A note of caution here, even though mulberry matcha is sold commercially, it is known to be mildly toxic and cause stomach upset to a small group of people.
This is more of a fun home experiment rather than some of the more extravagant dishes on this site. I would even go as far to say that it’s not worth it to make this recipe unless you’re really interested in a matcha substitute (see below for results).
I’ve always seen mulberry matcha sold in health shops everywhere due to various claims that it has the same antioxidant properties as matcha along with a variety of health benefits. We don’t talk about supposed health benefits of ingredients on this blog due it being hard to identify accurately and most of the scientific papers out there are highly specific (which is good) and therefore don’t translate over into vastly over-generalised health claims.
This aside, I’ve always been interested in a matcha substitute as it has quite a high amount of caffeine compared to just green tea. This is because green tea is just steeped in water to extract the flavour whereas matcha, being finely grounded tea leaf powder, is actually ingested as a suspension in water. It doesn’t pack the same punch as filtered coffee of course, but has a comparable amount of caffeine as espresso.
Matcha and the decaffeination process
Surprisingly enough, the technology for decaffeinated matcha is actually on the market, but isn’t as popular or widespread maybe because it isn’t as effective or easy to do. Similar to decaf coffee that is made by swiss water method where the solvent used to extract the caffeine from coffee beans is water, decaffeinated matcha is most typically made with some kind of patented water extraction method. The decaffeination method for coffee and matcha is not 100% perfect and the resulting product does have some residual caffeine. Even worse for matcha, which is typically marketed as a health product, the caffeine extraction process removes some of their antioxidants, which may be why decaffeinated matcha is not as popular.
Why matcha is so hard to make at home
In its place, mulberry leaf powder has typically been marketed as a caffeine free substitute for quite a while, so this recipe isn’t my own original idea. But rather than simply buying the product and reviewing it, I thought I’d try to make it myself. Anyone that’s well versed in the matcha making process will know that this is almost impossible and true that this final product is far from perfect. To begin, matcha is typically ground down to an extremely fine powder using a large stone grinder that is very heavy and very expensive. Supposedly the high heat capacity of the stone stops the grinder from heating up and affecting the quality of the matcha, but what this means for us is that it’s impossible to replicate at home. If you search hard enough you can find a home sized stone grinder but they’re expensive and as you’d expect, don’t give as fine a powdered grind as the industrial machines.
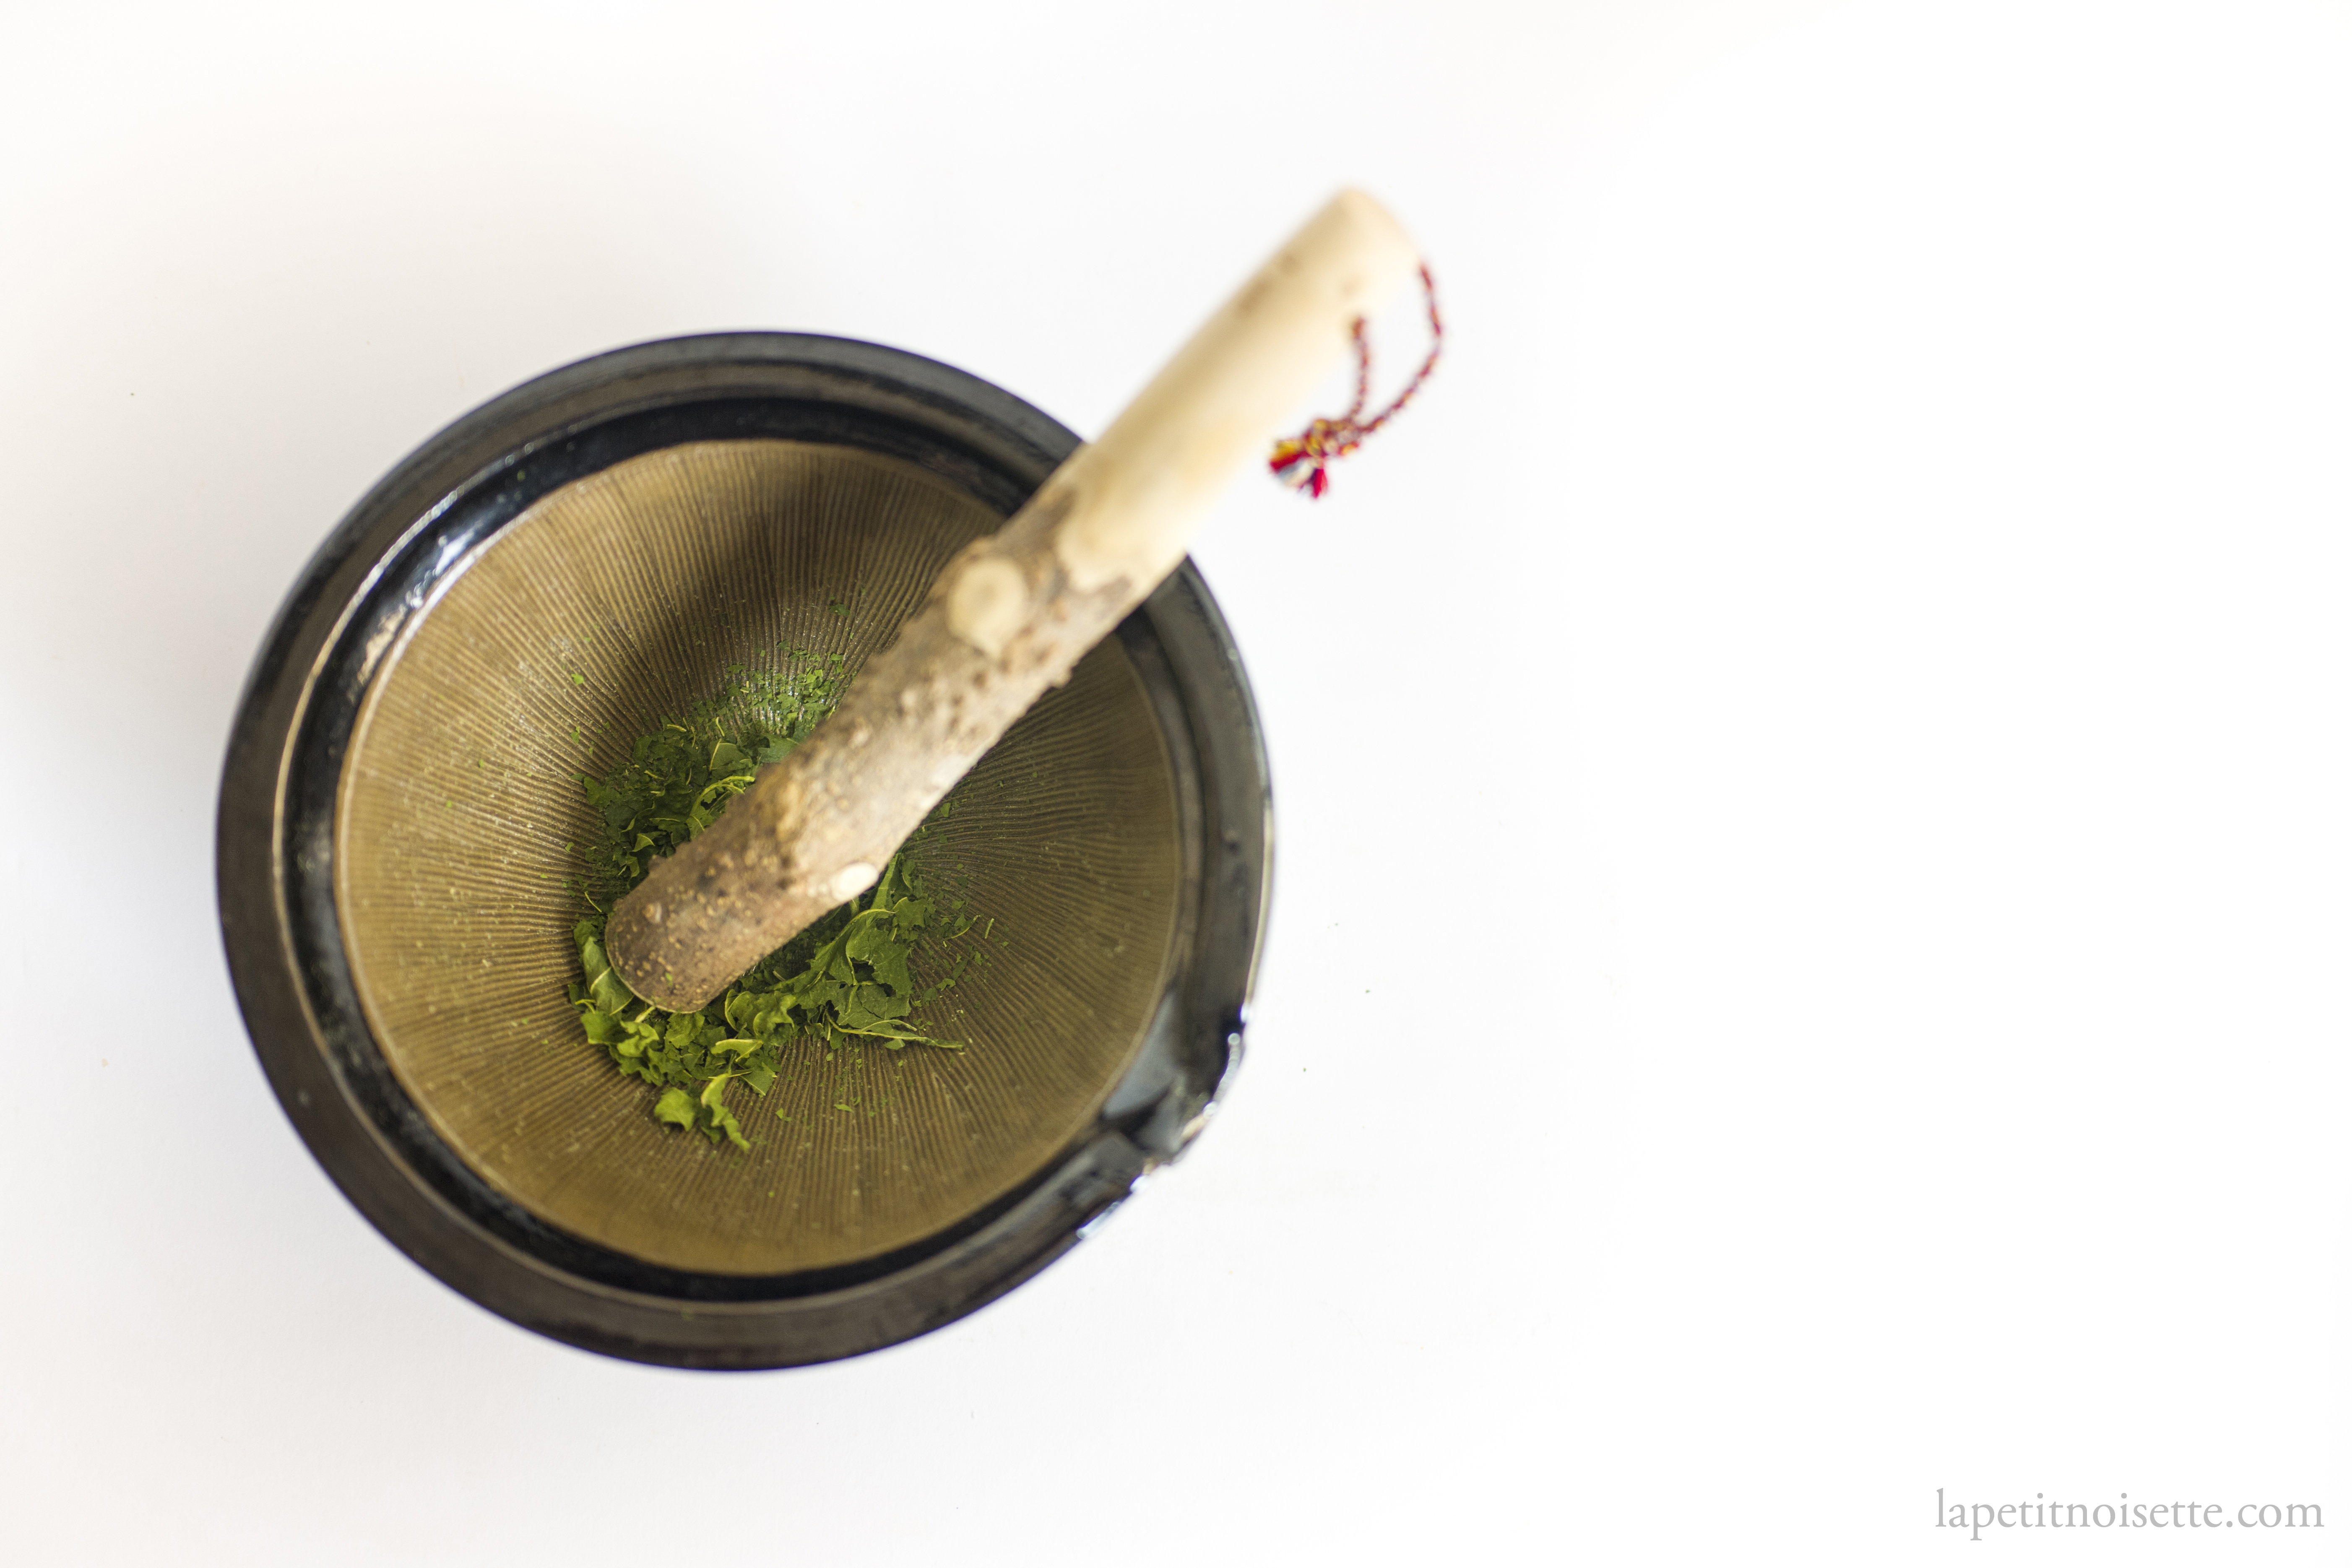
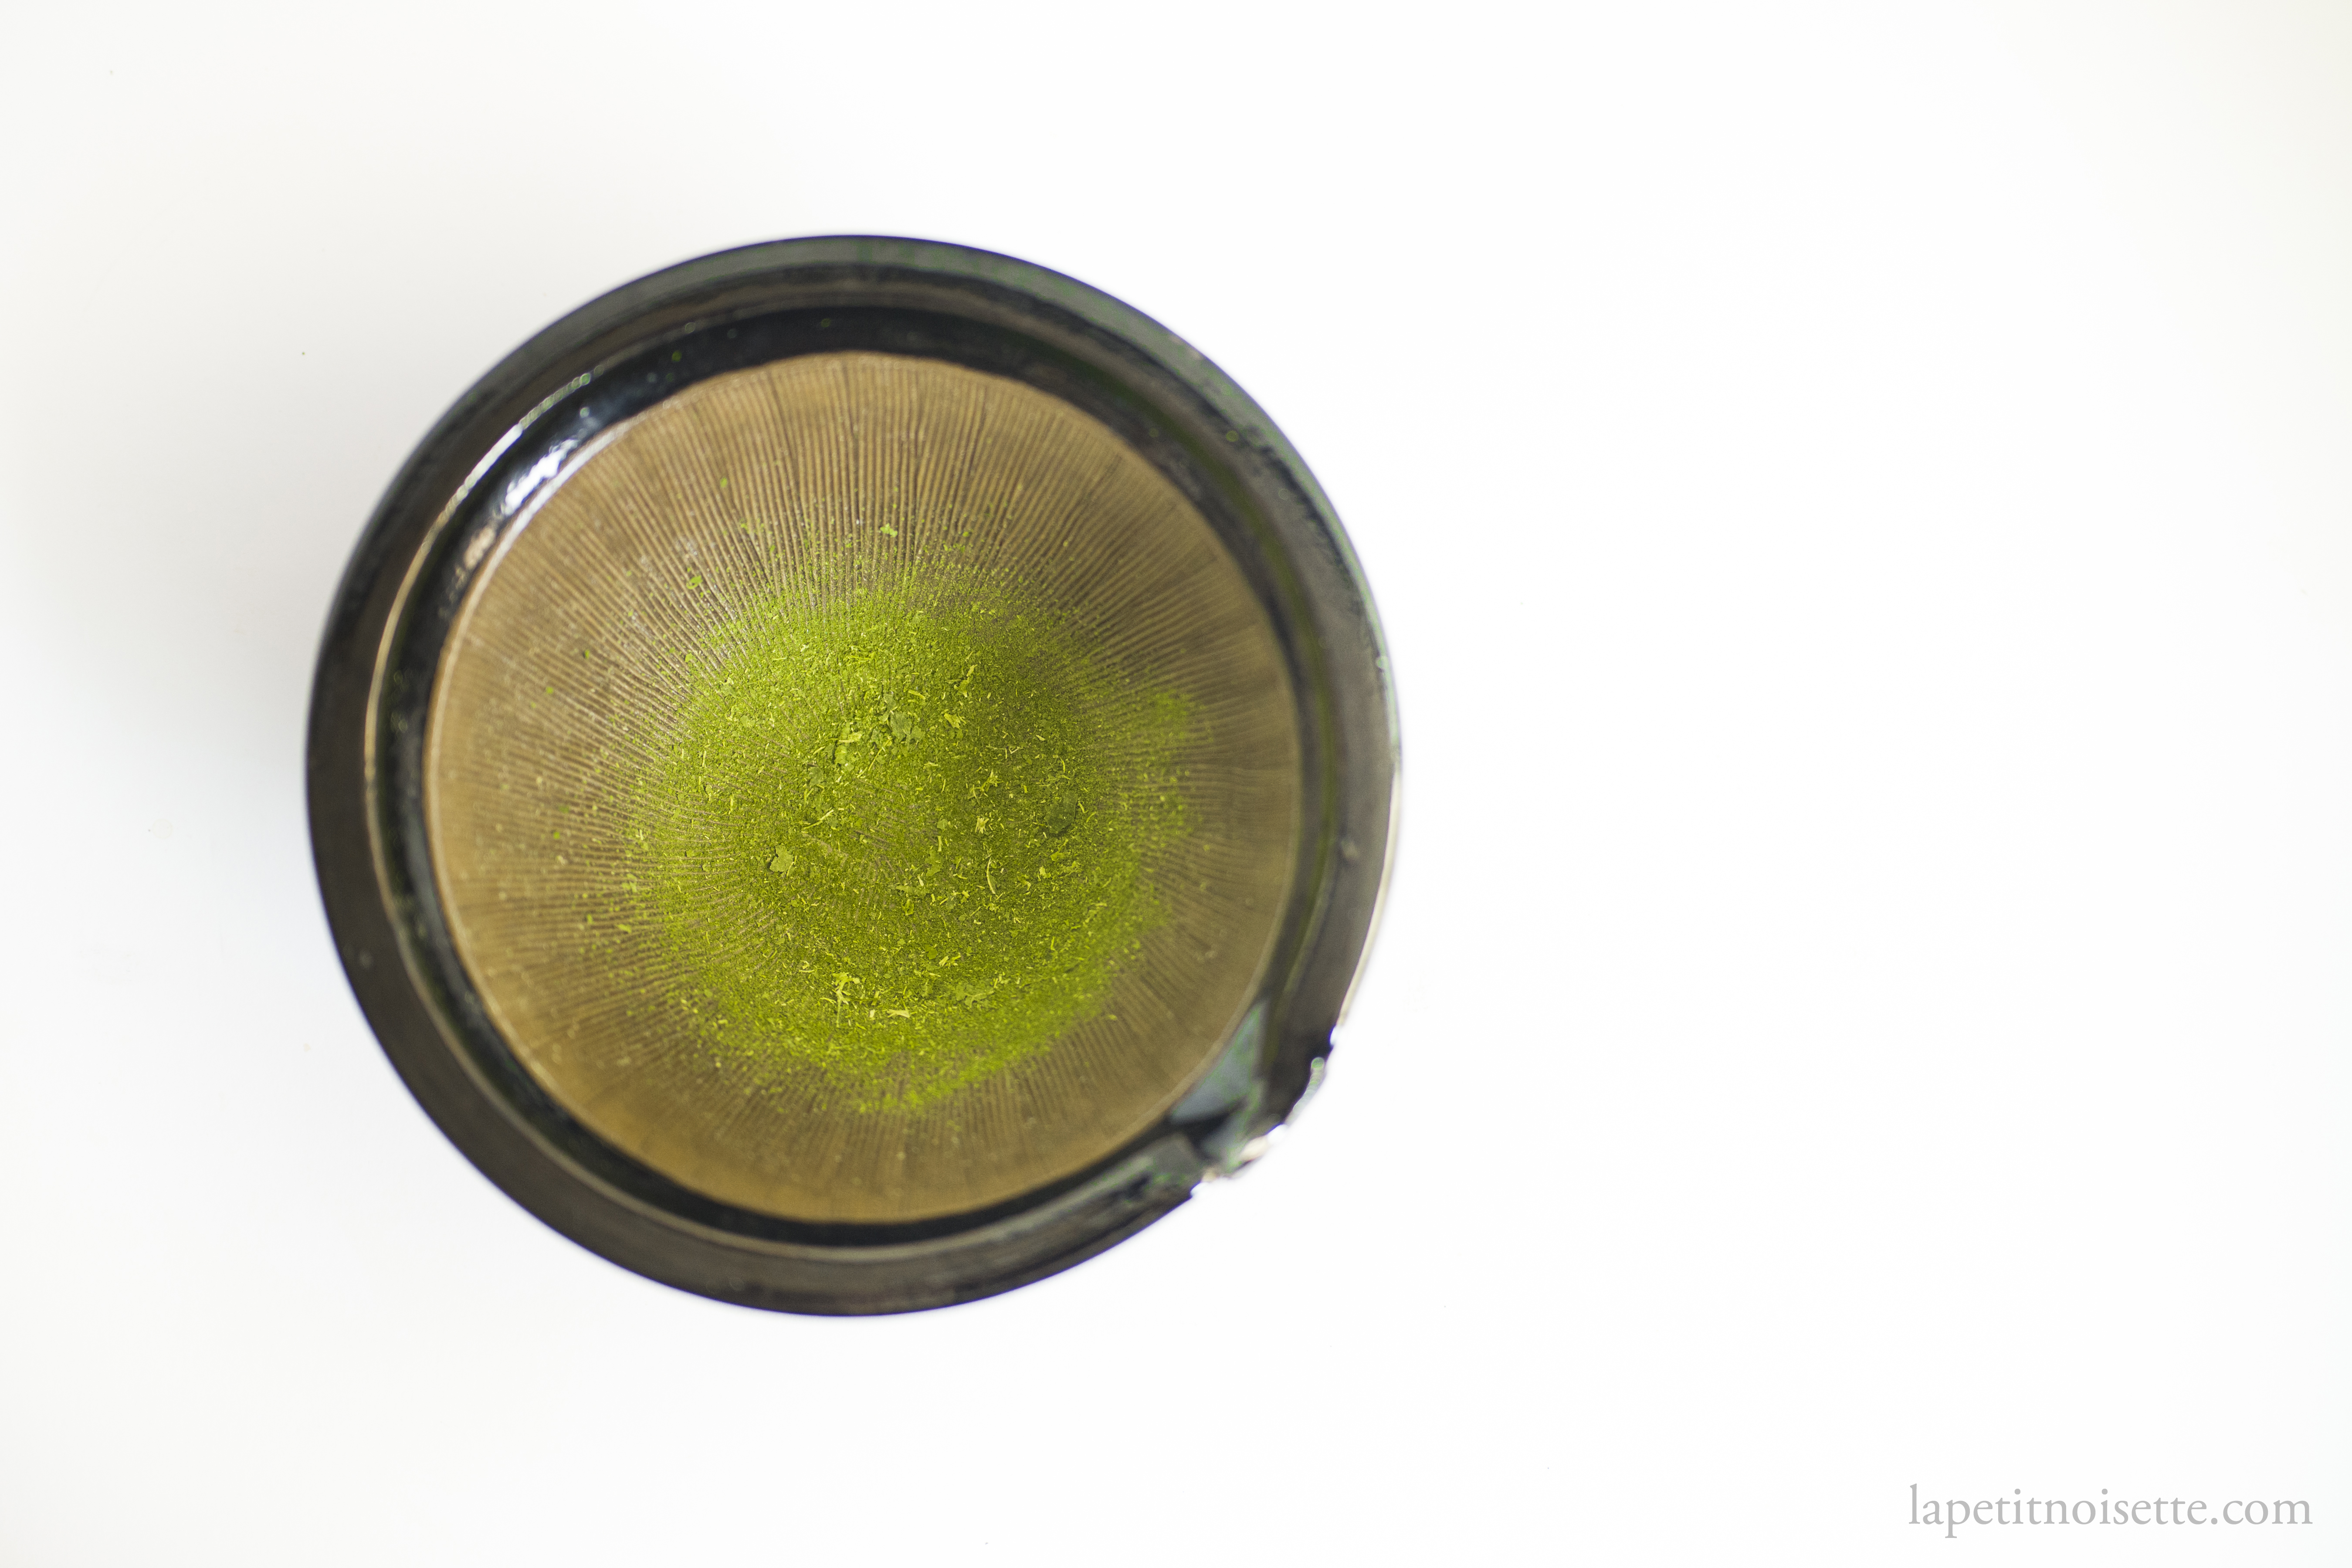
This is actually the main barrier to making high quality matcha at home, whether from mulberry leaves or tea leaves, which is that it’s impossible to achieve a fine enough powder to match store bought matcha. And here, grind size is a very important factor because matcha is drunk as a suspension of powder in water so grind size will definitely affect the texture and taste of the final drink. There isn’t a perfect solution here, but the best alternative I could come up with was using a Japanese mortar and pestle, or suribachi (擂鉢) and surikogi (擂粉木), to grind down the leaves into as fine a powder as possible. I’ve tried using a blender, food processor and other pestles and mortars but the electric equipment just doesn’t get you a fine enough powder but yields more granular results, whilst the other types of pestles and mortars seem better designed for pounding motions rather than fine grinding motions, at least the ones I’ve used. I’ve found the many many small equally spaced ridges on the suribachi to have been the most effective in yielding an even fine ground powder, especially with a lot of elbow grease work.
How to process the mulberry leaves before grinding
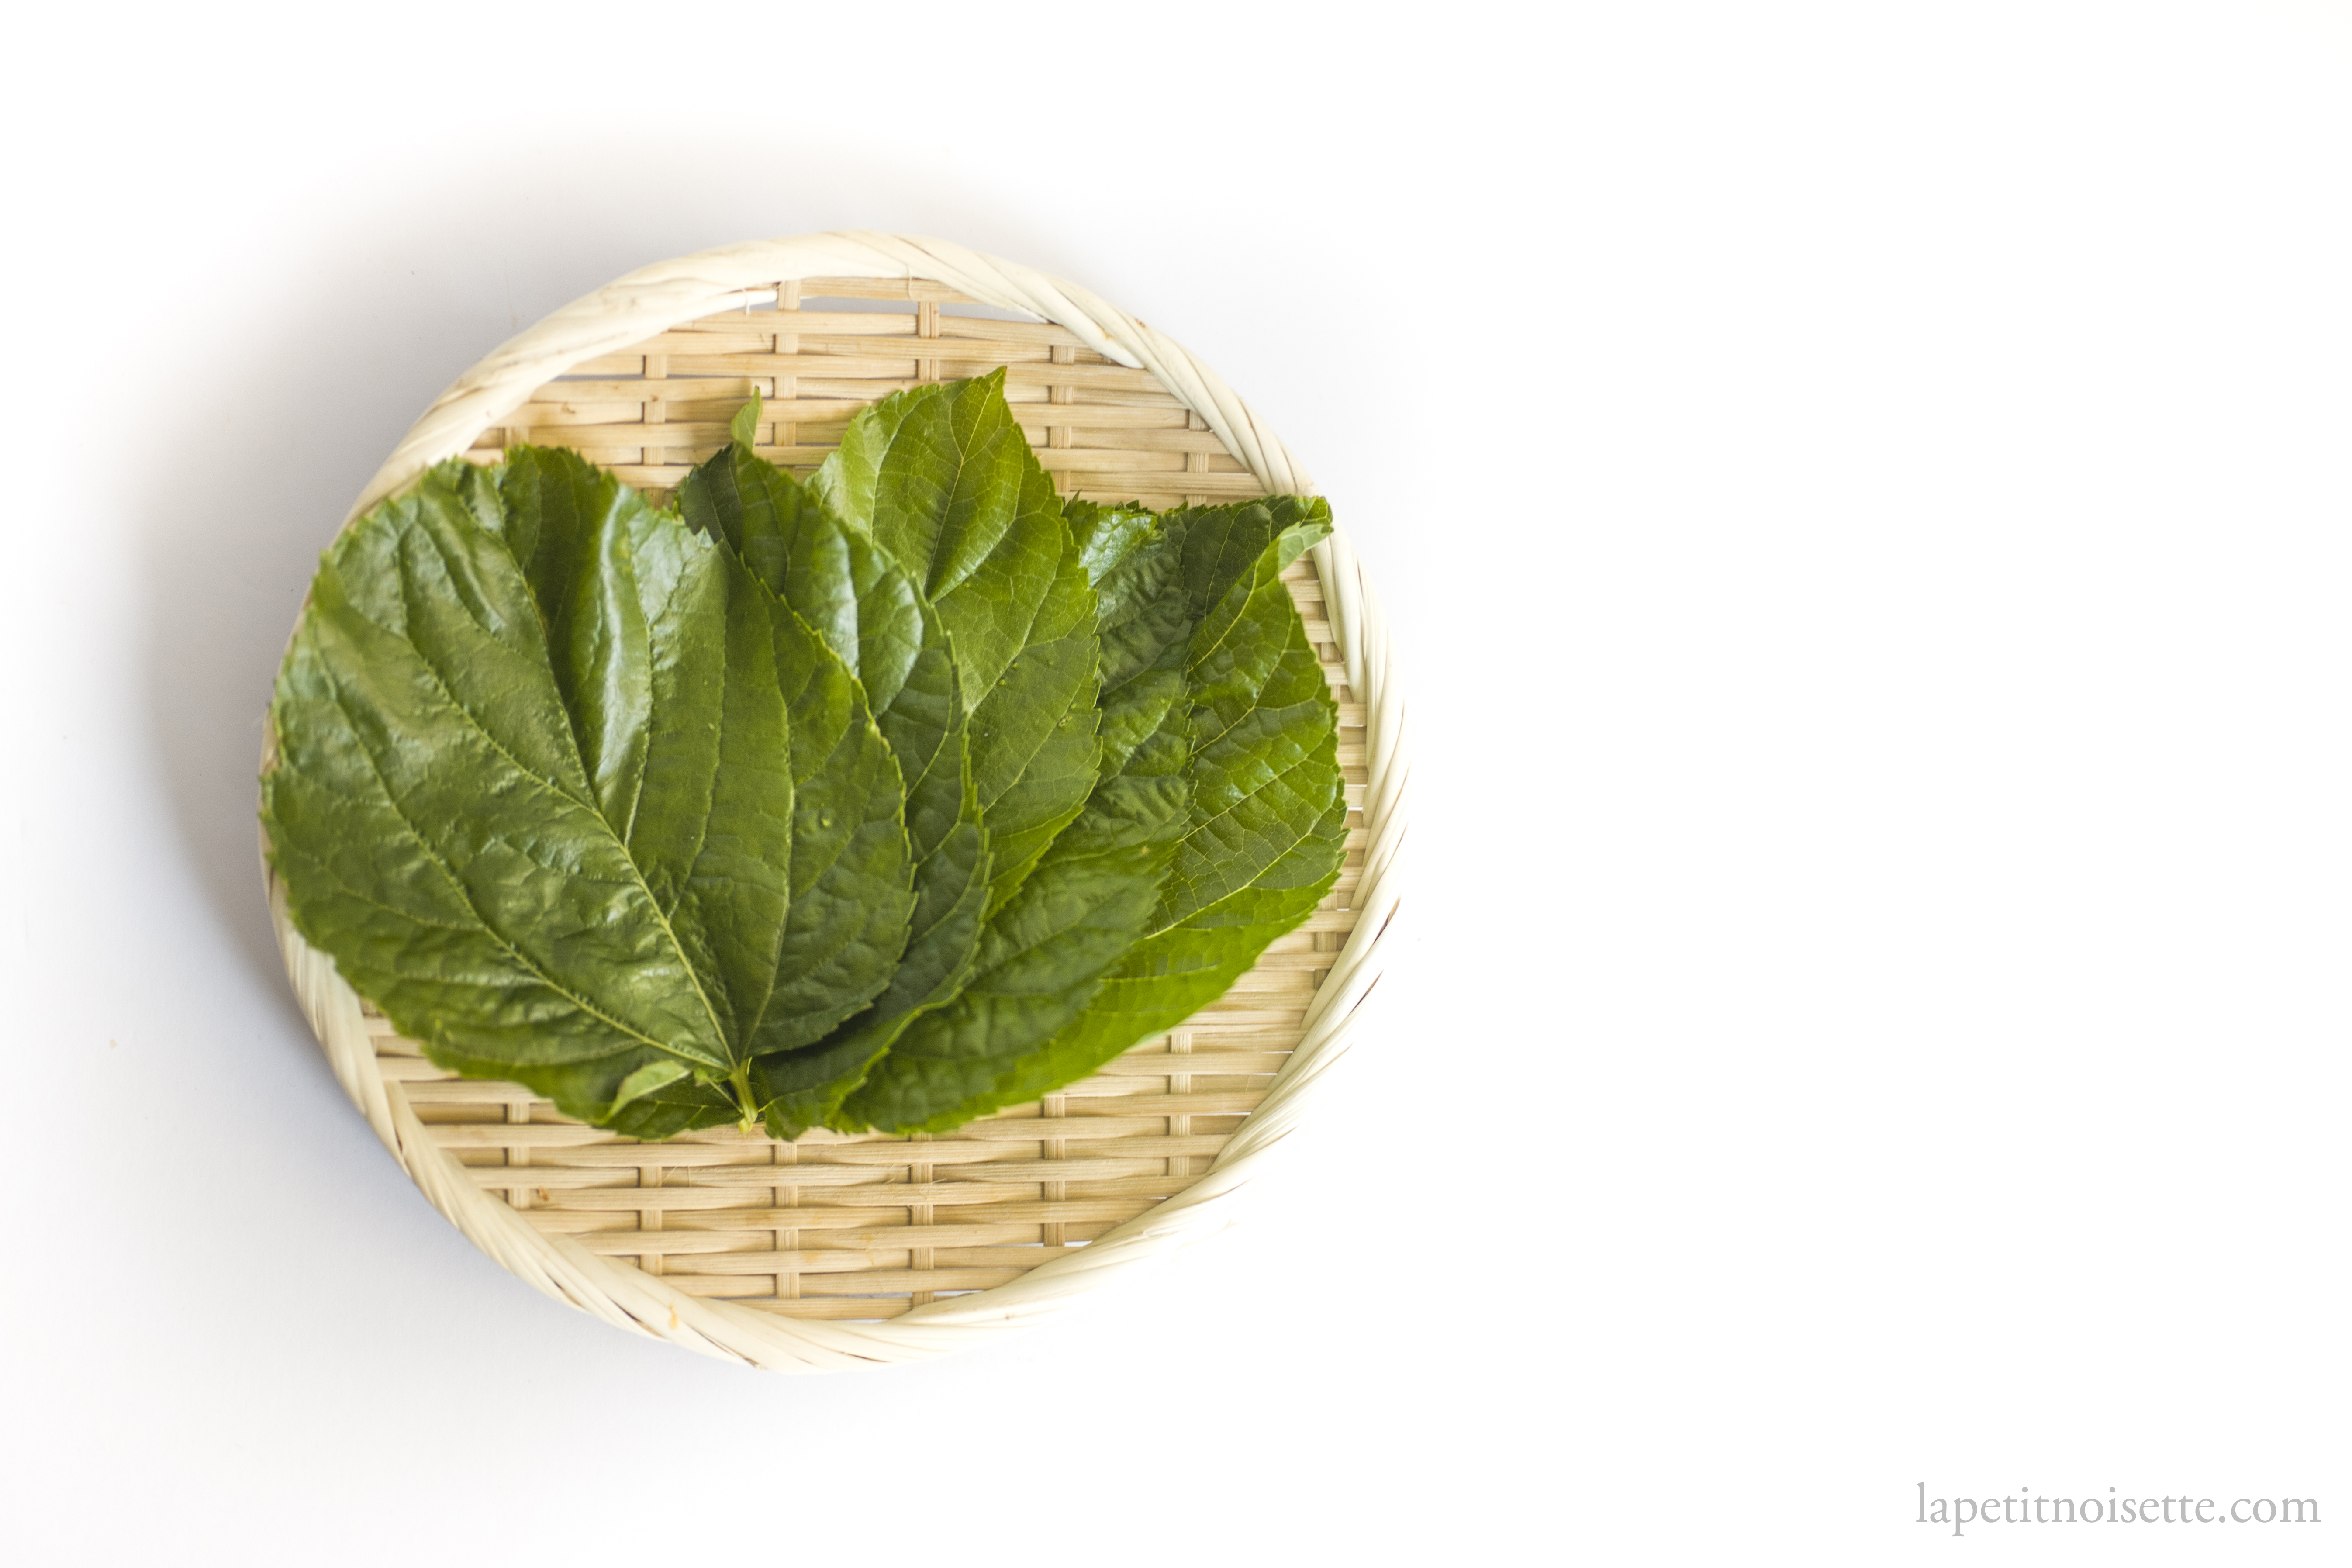
You’d be surprised to find a mulberry tree near you if you join gardening groups on social media or give it a google search, but otherwise mulberry leaves might be hard to find where you live. The variety of mulberry tree used in this recipe is Morus Alba, or the white mulberry tree. It’s not as famous for its fruit production but is better known as the tree used to supply food for silkworms in sericulture (silk production). In an attempt to try and replicate the matcha making process, I tried to source the young leaves that grow in the shade of other larger older leaves which were much paler and lighter green in colour. I also harvested some older leaves to test. It’s crucial to dry out the leaves before grinding to get a powder instead of a paste and I found drying them out in the sun doesn’t preserve their colour as much as I’d like. Instead, drying the leaves in the microwave was the most effective, followed by drying the leaves out in a low temperature oven. Just google the instructions to dry herbs in an oven. The only issue with the microwave is the risk of the leaves catching fire if you microwave them for too long, and the fact that you can’t process the leaves in large batches due to the size of the microwave. I highly recommend cutting the main thick stem in the leaves out before drying them as they don’t dry well in the microwave and even if you do dry them, they don’t grind into a fine powder. When you dry them, you want to touch the leaves to check for any remaining moisture before you grind them and make sure they’re completely dry. Your aim is for leaves that are crisp and brittle when you handle them.
Mulberry leaf matcha recipe
- A handful of mulberry leaves
- A pestle and mortar
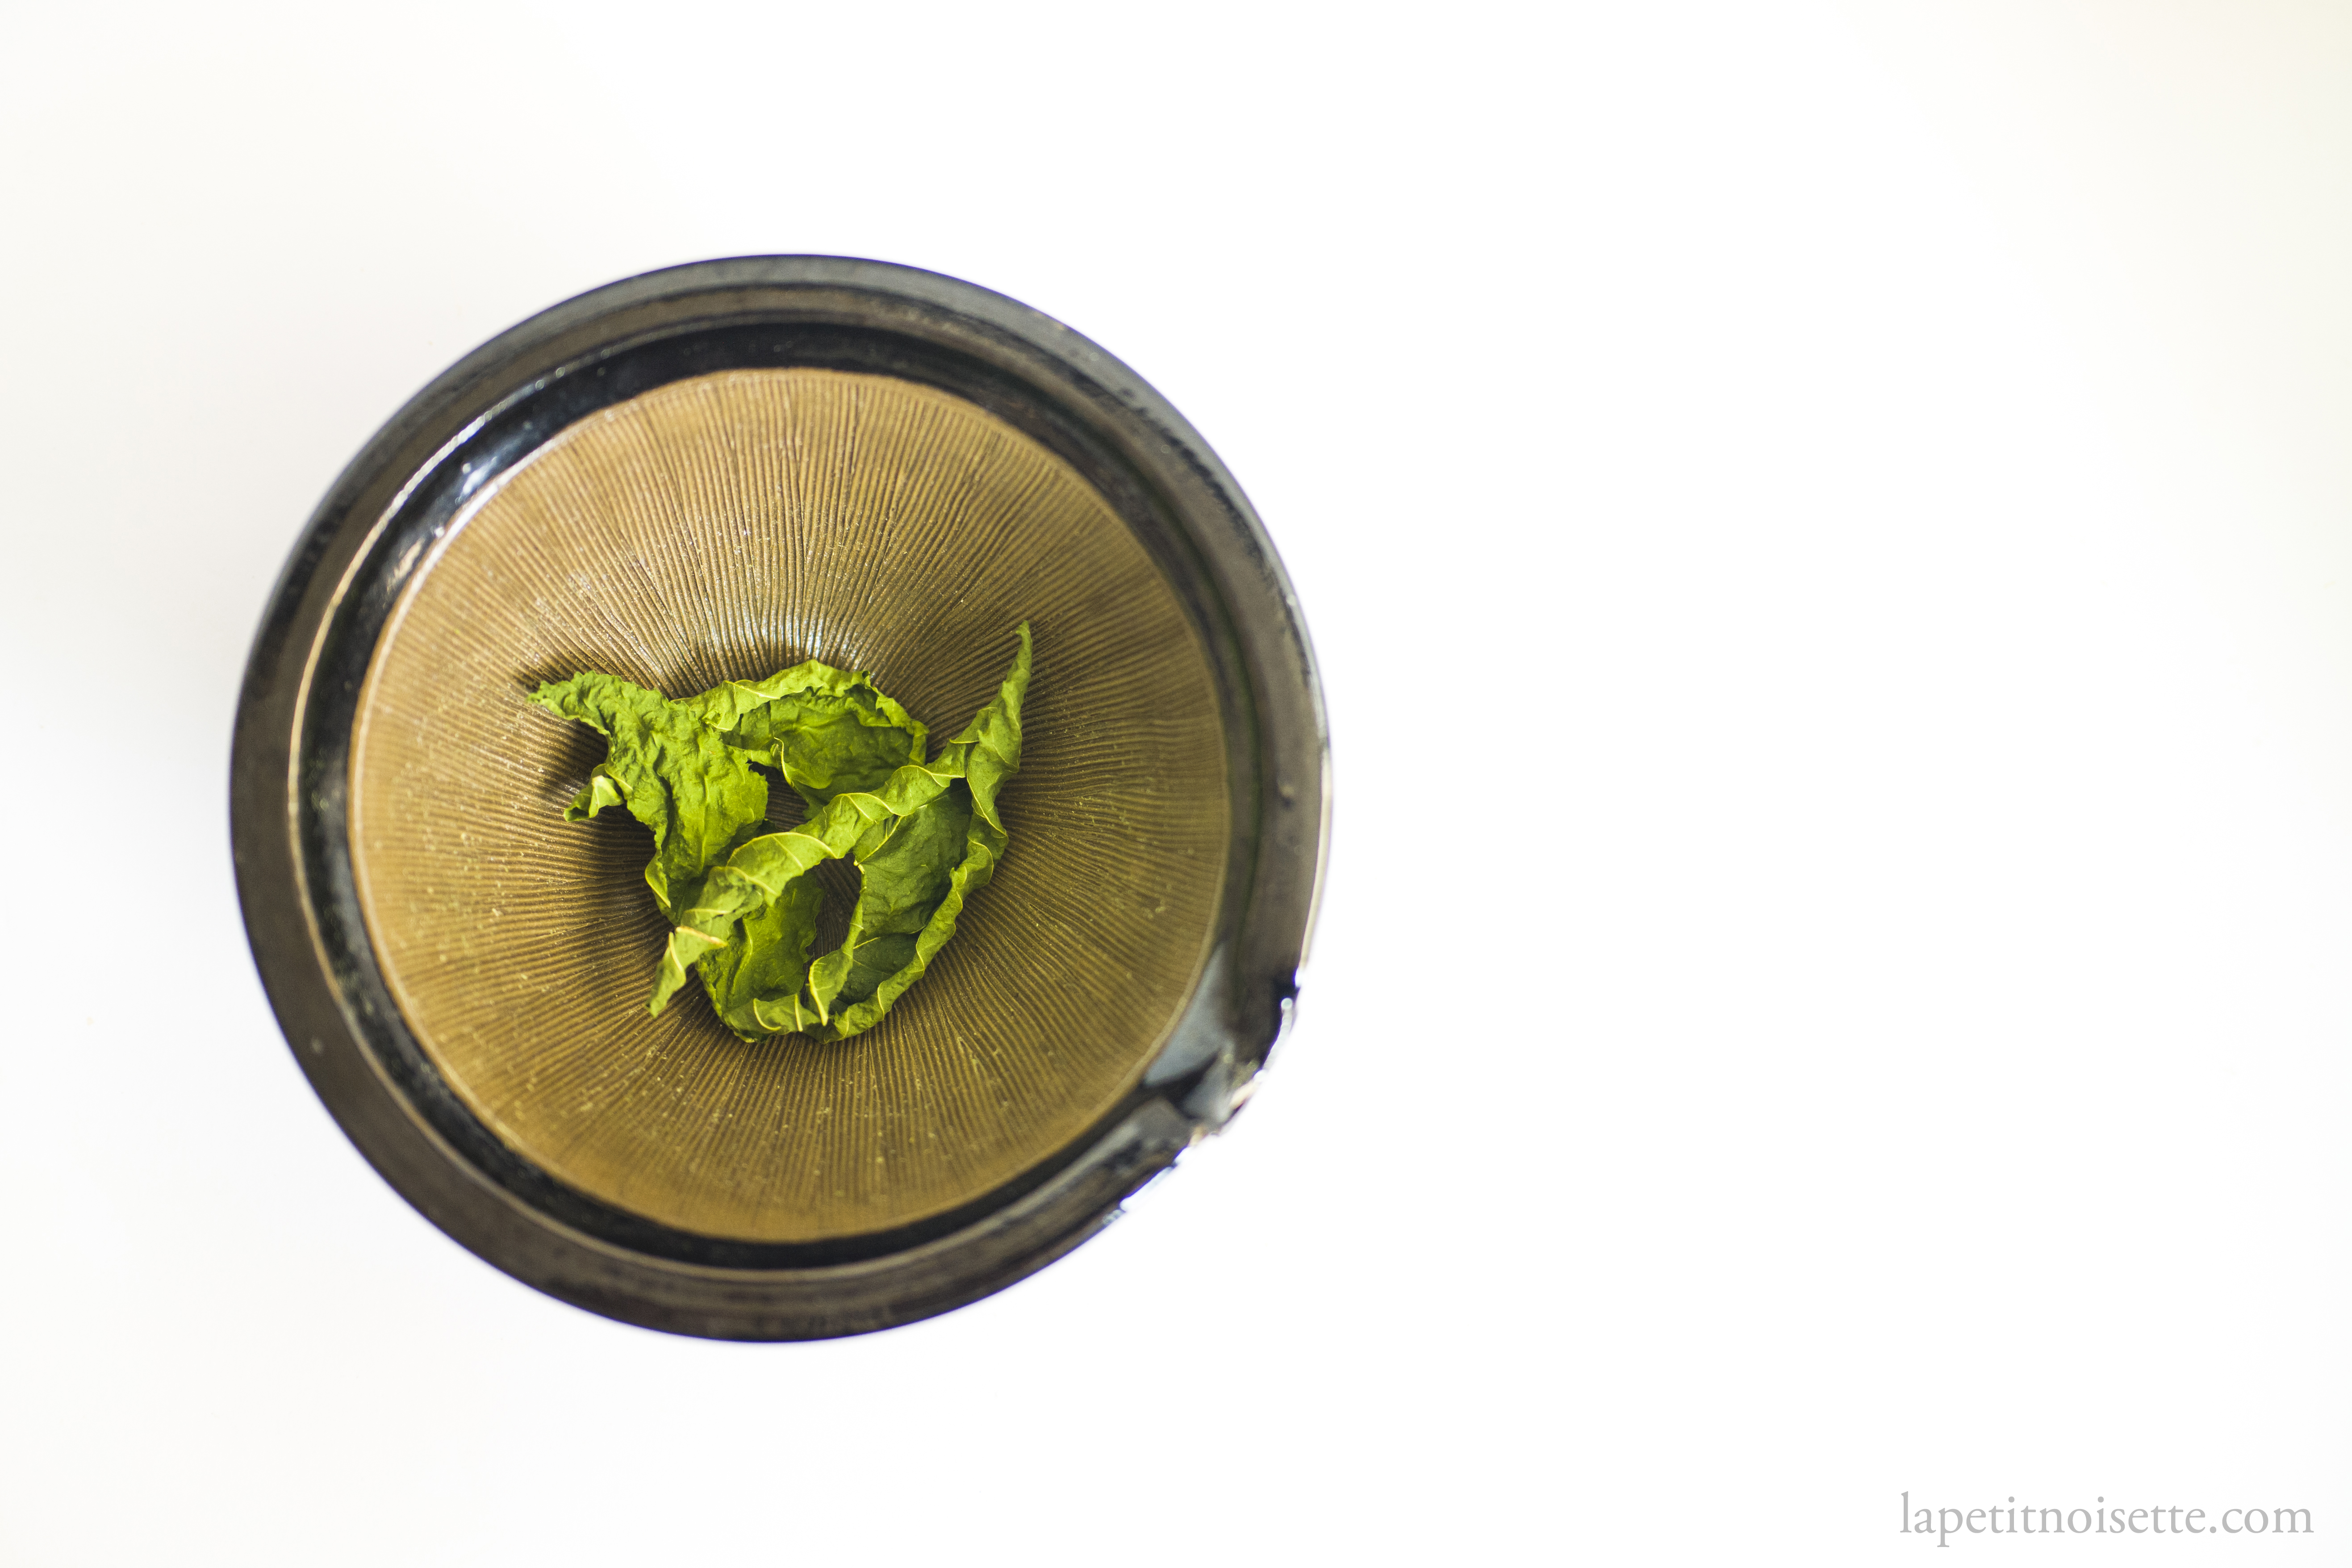
Cut off the stems of the mulberry leaves and also cut out the central vein of the leaves (midrib) as they do not dry well. Place a single layer of leaves between two kitchen towels and microwave on high for 1 minute 30 seconds and check if all the leaves are brittle to the touch. If not, microwave in 30 second increments until dry, checking between each microwave. Be careful as over-microwaving the leaves will cause them to catch fire. Alternatively, dry in the oven at 80°C until dry and brittle, around 40 minutes to an hour. Even better if your oven has a lower temperature or you own a dehydrator.
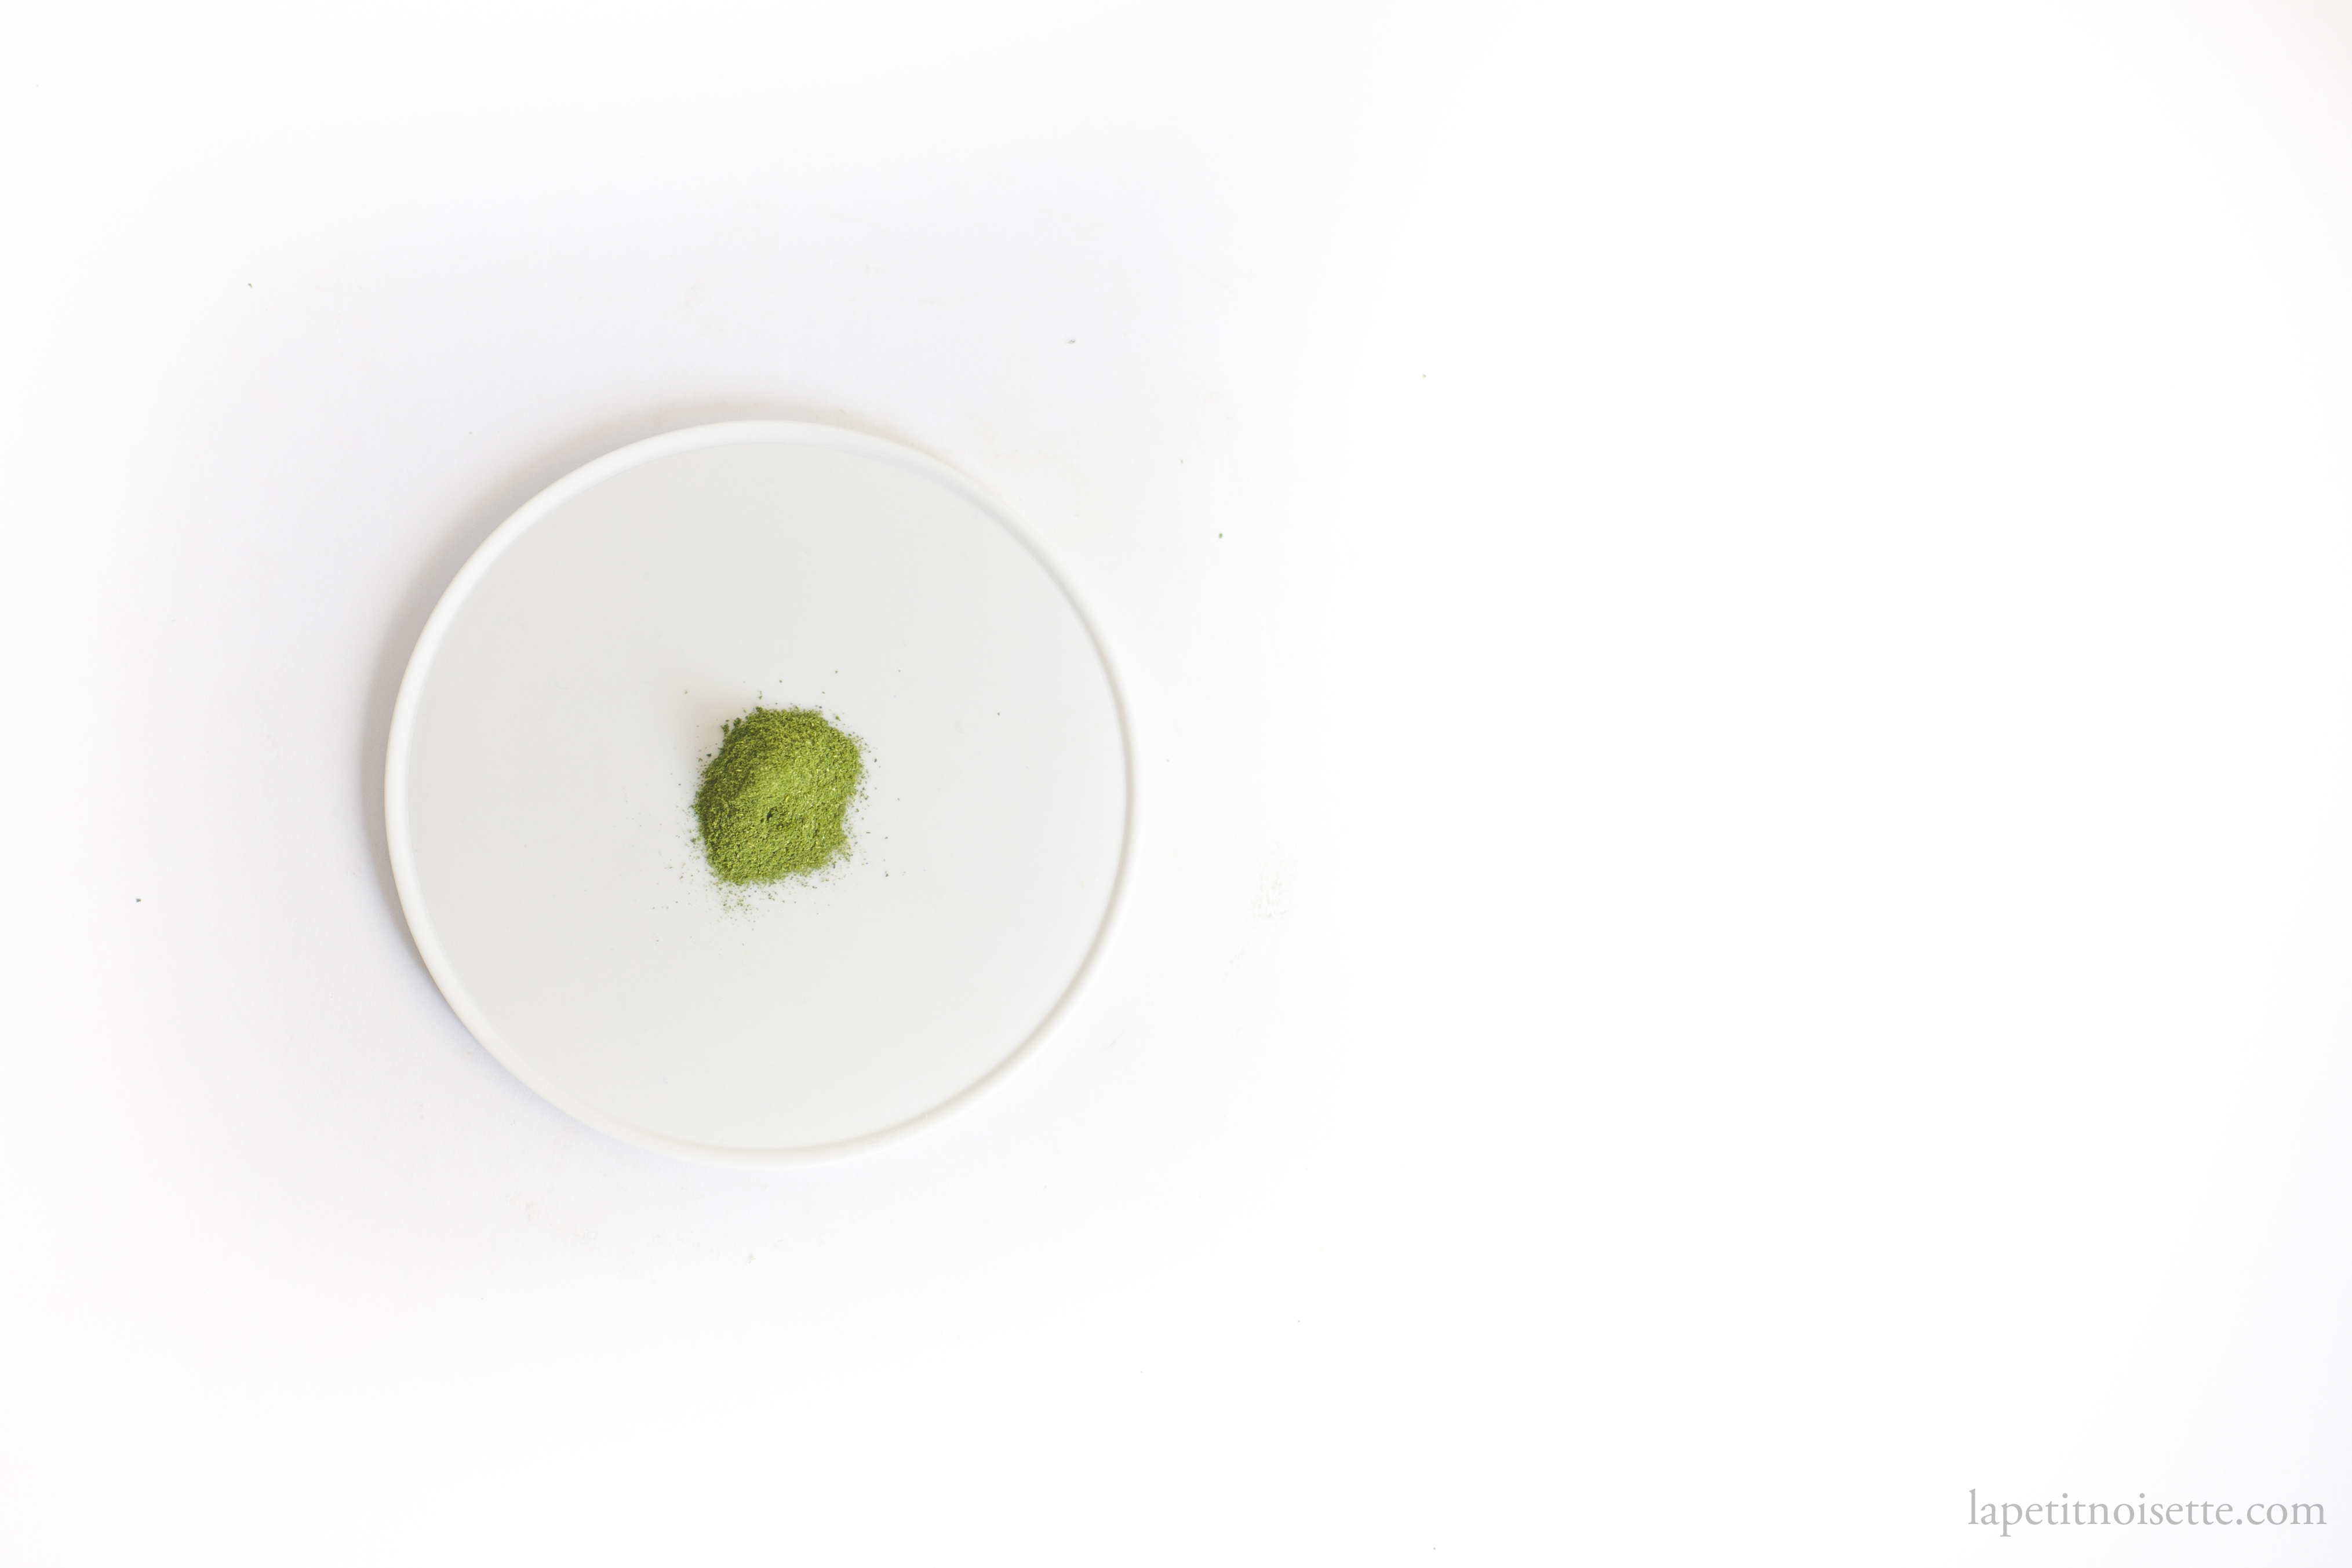
Place the leaves into your mortar and gently crush with your pestle to break up the pieces before grinding in a circular motion to break up smaller pieces into a fine powder. Keep on grinding for at least 5 minutes. If you ground mulberry leaves start clumping together and becoming mushy, you didn’t dry your leaves enough. The veins of the leaves will most likely not break up into a fine powder so you want to pass your mulberry powder through a sieve to remove larger pieces. The smaller the holes in your sieve the finer the powder you’ll obtain.
Store in an airtight container ideally with a food desiccant and use as you would matcha powder.
Are mulberry leaves a good substitute for matcha?
From my experimentation, mulberry matcha is very similar to low quality matcha but is much stronger in aroma. Most of you would have heard people describe matcha as grassy or herbaceous, and mulberry matcha is even more grassy if that’s even possible. If you’ve ever brought high grade Japanese matcha before, you’d know that it’s light green in colour and has a good balance of bitterness to it. Low quality matcha from other countries tend to be darker in colour and much more bitter, which is what this mulberry matcha is like. I’d say to only try out this recipe if you have either easy access to mulberry leaves or live in a place where it’s very hard or very expensive to buy matcha powder.

I’ve just finished “successfully” making mulberry matcha before I found this article. I used a small magic bullet and a mortar and pestle. They key for me was pharmacetical grade sieve I bought on amazon. The set I got had an 80 mesh and a 200 mesh. The 200 was fine enough to get the powder to suspend. Only about 50 percent of my leaves make it through the 80 mesh and I intend to use it like culinary matcha. Only about 10 percent of the ground leaves will go through the 200 mesh. I washer and steamed the leaves before using my dehydrator. I wanted the mulberry matcha for the polyphenols, the blood sugar control and the lack of caffeine. Mine smell wonderful and is not the least bit bitter. It is definitely a time consuming and not for the faint of heart.
sorry, not about matcha, but the font ofyour website, it is terribly straining the eyes – not a good choice.