Learn more about the different types of miso and how to make it in our miso series.
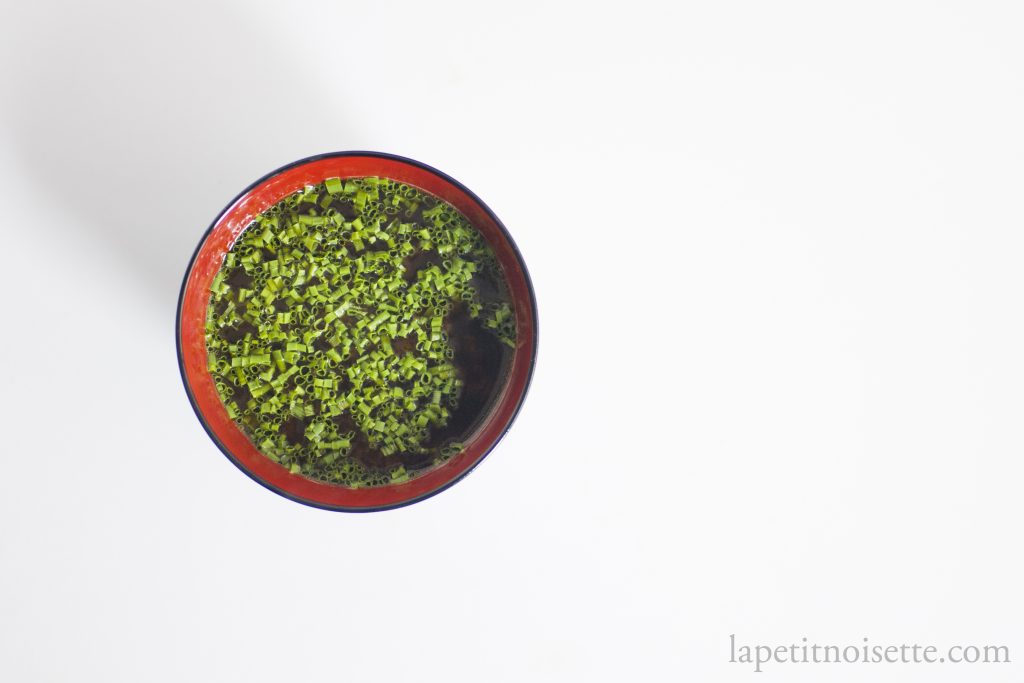
One of the final courses that we served as part of the omakase menu at our restaurant was this small serving of miso soup presented in either a cup or lacquered bowl. When I myself first dined at the restaurant, I was surprised at how small the serving of miso soup was, and also by its very minimalist appearance. There was nothing else in this small cup of deep brown soup other than extremely evenly and finely chopped baby spring onions floating on top. The soup also simmered in the light, as though there were little bits of silver dust inside. Upon tasting, I was taken aback at first. It was nothing like other miso soups I had tasted- strong, bitter and punchy. It felt more like a palate cleanser than miso soup. But those flavours quickly melted away into the background into this deeply savoury and almost roasted like quality that reminded me almost of hot chocolate made from 90% dark chocolate with the richness to match. It reminded me very similar to the method used to taste chocolate, whereby one allows the chocolate to melt in one’s mouth before being able to fully appreciate it’s taste, as the melting of the cocoa butter melds away the bitters notes from the tannins, allowing the complexity of well made dark chocolate to shine true.
This miso soup we served at the restaurant was served at the end of all the nigiri courses, but before the fruits. It was served in very small quantities, with each person probably getting around a 100ml serving. Because the serving size was so small, it was a very concentrated and potent soup. It’s flavour profile was very bitter and savory compared to the usual sweet miso soup you get at your blog standard Japanese takeaway store. When I started work at the restaurant however, making this miso soup became a part of everyday routine. 10 servings, made from the day’s fish and ready before service. I started to make the soup around 11 in the morning after that day’s fish delivery was gutted and clean, and the fish for the day’s service was filleted and portioned.
The reason why the soup had to be made at that time made sense. The base stock of this soup was not made from shaved katsuobushi like a typical dashi stock, but made from the roasted bones and frames from the fish filleted that day, enough to make stock for that day’s and the next day’s service. Even oily fish like mackerel (saba) and salmon fish bones were used in the stock, something that is never done in western stocks.
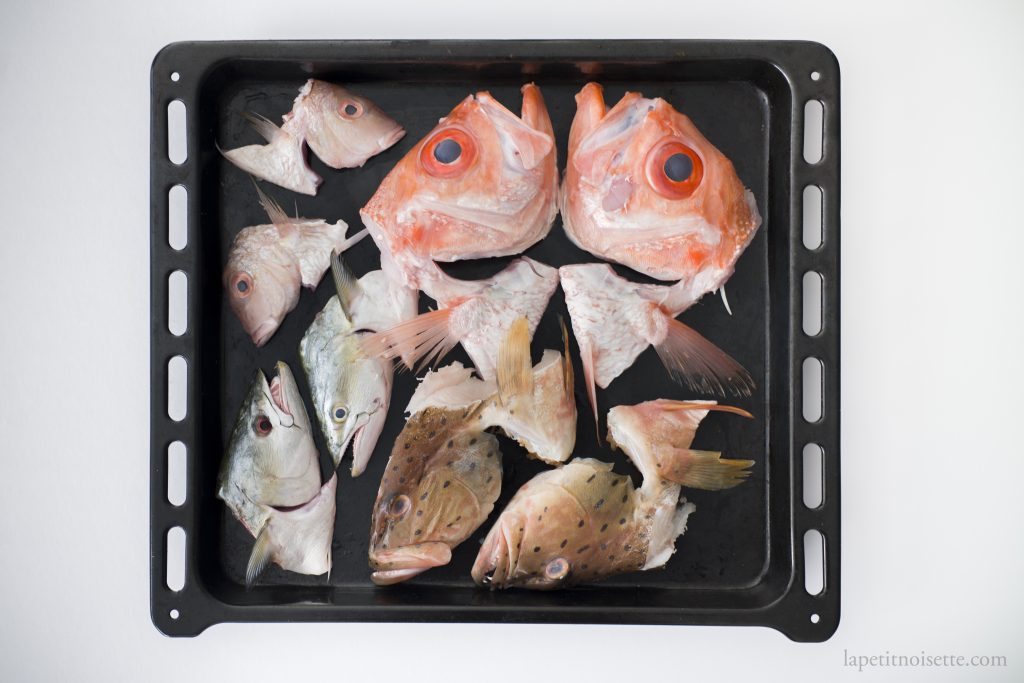
The heads of all the fish were cut directly into two clean halves through the forehead, splitting the skull into two, a task that takes significant skill and a very sharp knife, a technique called kabuto-wari (兜割り) or nashi-wari (梨割り). Whilst I personally preferred the weight of a deba to do this, Sayaki-san did this using a western chef knife. Another recipe that uses this technique is simmered kinmedai head. The gills from the heads were also discarded and a tooth brush was used to clean off any solidified blood remaining in. For the skeleton frame of the fish, the same toothbrush treatment would be carried out to remove all the solidified blood from the fish cavity. This was quite a laborious job as the bitterness in the soup was to only come from the miso and not the fish blood.
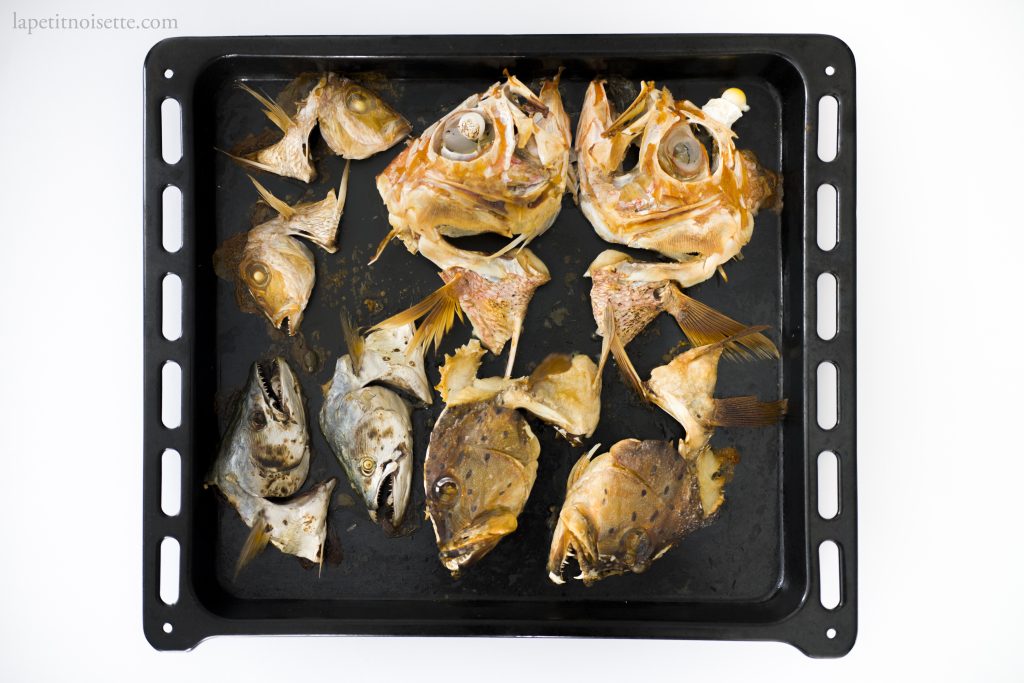
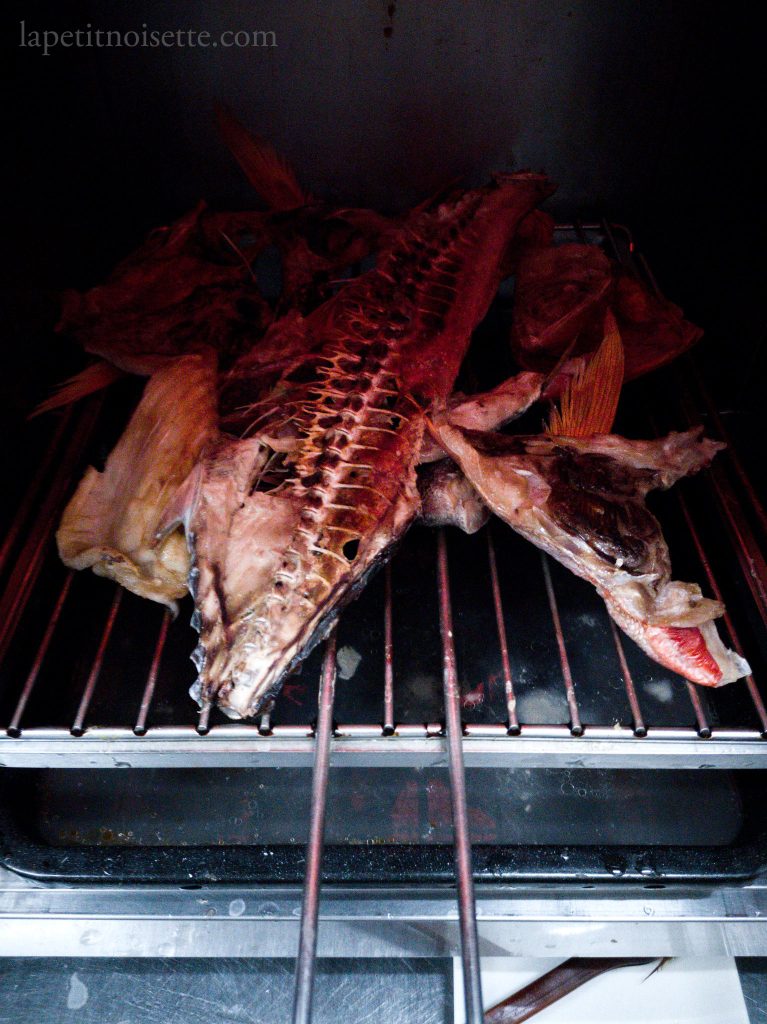
Only the fish bones of sardines (Iwashi), gizzard shad (Kohada) and baby sea bream (Kasugo) were not used in the stock and were discarded due to their small bones. The toothbrush used wasn’t any special toothbrush, just the cheapest one you could find at any convenience store. To cook the fish bones, we would lay out a single layer of fish bones on a tray and place them under a gas salamander grill to brown them. Once caramelised, we would use a pair of tongs to flip over the bones to make sure they were browned on both sides, before adding them straight to a large stock pot. We usually did this in 3 rounds, the first round being small fish with thin bones, the second round for bigger fish bones and the last round for all the heads. During the first round, the tray would be lifted up fairly close to the fire from the salamander and they cooked quite quickly, but for the last round of fish heads, we would place the tray much lower down away from the head source as it would take longer to brown evenly due to its thickness.
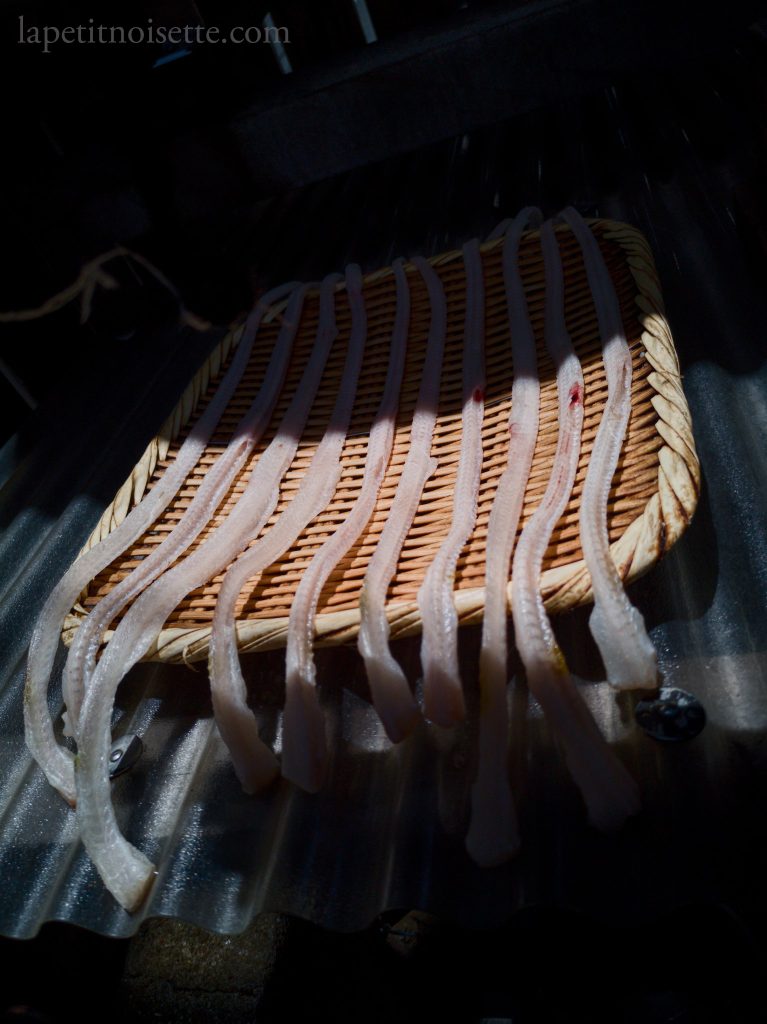
For sea eel (anago) and freshwater eel (unagi) however, we did something that I’d never heard of or seen before. After filleting the eels, the heads would be discarded, but the spines of the eels would be cleaned with a toothbrush and then left on a bamboo strainer in the sun out the back of the restaurant to dry into a crisp, before roasted in the salamander in the same way until crisp, just like the deep fried eel bones you get at an unagi restaurant. But instead of a snack, these bones would be added to the soup once sufficiently dried. Even today I cannot find reference to this anywhere on the internet, whether in English or Japanese. To emphasise how much the spines needed to be cleaned before drying, they were almost completely stripped of flesh and blood and did not attract flies when left out in the sun at the back. I myself was surprised that we didn’t use anything to cover the bones as we dried them on the metal roofing of a shed out at the back.
The bones, heads and dried spines were then placed into a giant stock pot with a piece of kombu and brought up to just barely a simmer. Once up to temperature, the kombu was discarded. We would need to skim off the scum from the soup every 10 minutes or so, but a great emphasis was put on only skimming off the scum but not any of the fat that floated to the surface. The fat was important for the flavour. No katsuobushi, mirin or soy sauce is used in this recipe. We would let this simmer for around 3 hours or so, before straining it out using a fine mesh strainer into a traditional Yattoko pot (やっとこ鍋) and discarding the bones.
The staff sometimes picked at the discarded head meat to get at the cheek flesh but usually the heads went straight into the bin as well. It was here that I realized what the silver glimmer I noticed in the soup was, it was bits of fish skin! During the long simmer, bits of fish skin left on the frames broke down into tiny tiny pieces that were able to pass through the holes of the sieve, giving the soup a silvery glint. If many fish were filleted that morning, there would be enough stock for two days, and the stock would be split in two pots, one for today and one for tomorrow. The stock for tomorrow would then be placed in a fridge that was located in an apartment storage across the road behind the restaurant that we rented.
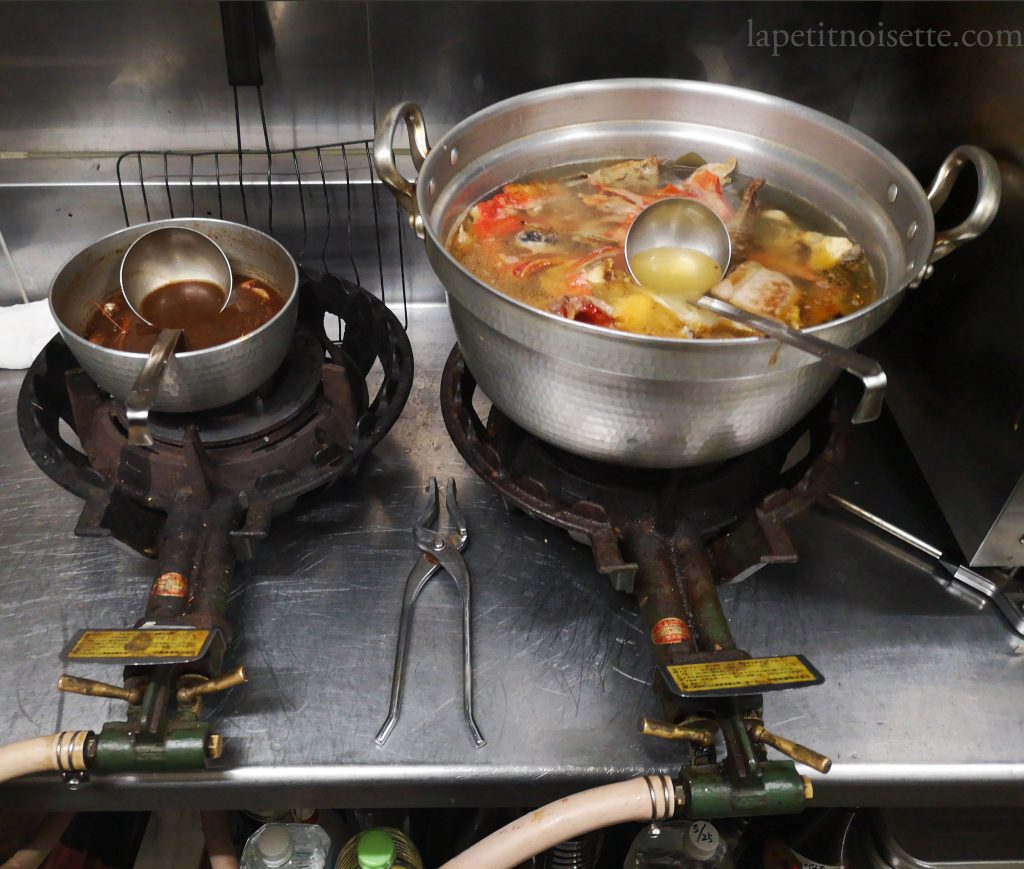
Having finished making the stock, we would then stir in miso through a fine meshed strainer as you would typically do, adjusting it to taste. We would always let Oyakata have a taste of the soup. Only when he was satisfied with it were we allowed to store it away. The Yattoko pot with the soup would then cling wrapped ready for that night’s service. A Yattoko pot is basically a handleless Yukihira saucepan that we used because you could stack multiple sizes of the pot together to save space because they had no handle, but it also made it one of the scariest pots I ever had to handle as we used to carrying it by using a pair of pliers to clamp down unto the pot and lifting it up, requiring a huge amount of forearm strength. I was always worried when moving the pot of soup around for I fear spilling it all over the floor. This was especially so as Oyakata sometimes allowed the soup to be portioned in the back kitchen and brought out to be served, but sometimes requested that the pot be brought out front and served in front of the guest.
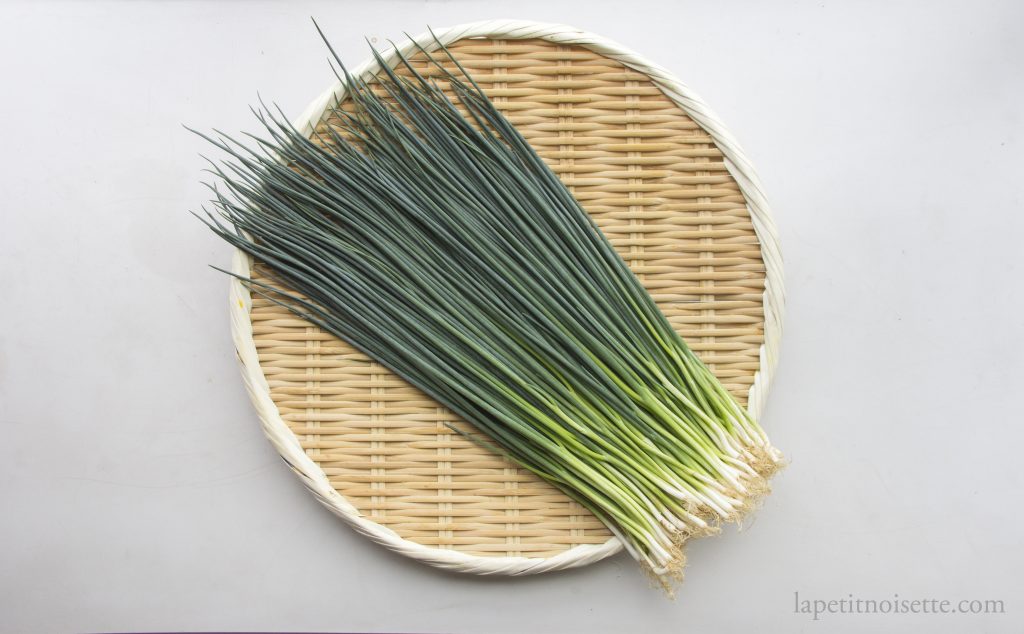
The only garnish for the soup was a heirloom variety of spring onions from Kyoto known as Kujo Negi (九条ねぎ), very finely sliced on a piece of kitchen towel laid on top of the chopping board as to preserve their circular cross section. The idea here was that if your knife was not sharp enough, you were cutting the spring onions using the weight of the knife instead of its sharpness, resulting in the spring onion being pressed against the chopping board, hencing making them “D” shaped, instead of “O” shaped.
We used very young spring onions that were very small however, so the equivalent you could find elsewhere would most likely be chives which are similar in appearance and size even if they taste a little different. After slicing, the spring onions would be soaked in water to remove some of their astringency, before being sprinkled onto the soup (after the soup had been reheated and portioned out) just before being served to the customer in a lacquered owan bowl (お椀) or cup.
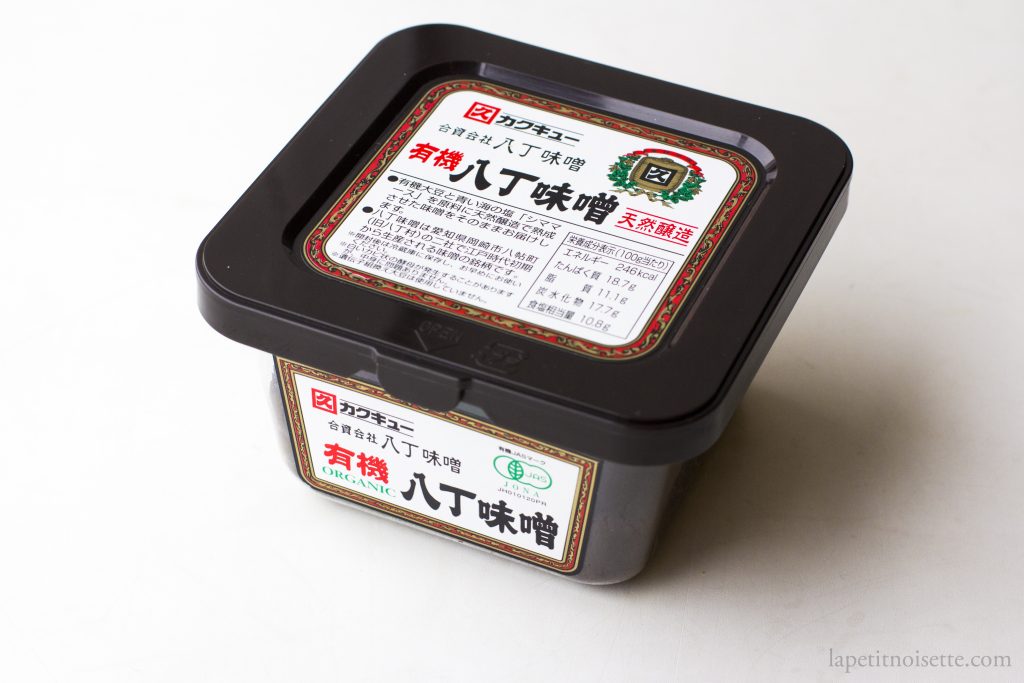
What miso did we use?
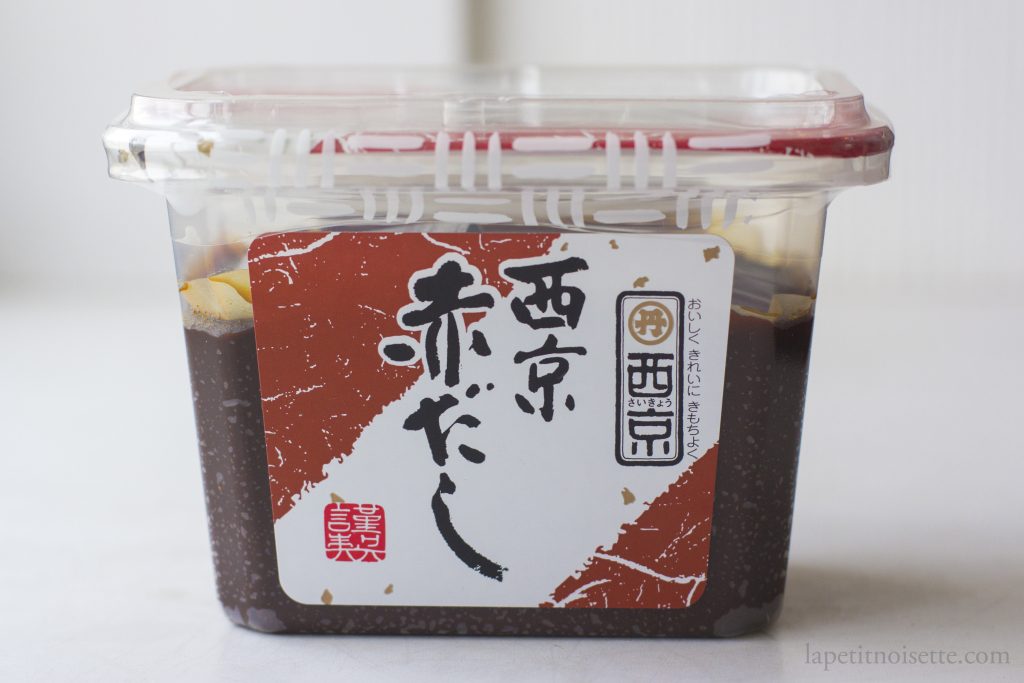
For a basic primer on miso, you have rice miso (Gome Miso/米味噌), that is made from a mixture of rice koji and soybeans, barley miso (Mugi Miso/麦味噌), made from barley koji and soybeans, and soybean miso (Mame Miso/豆味噌) made from soybean koji and soybean. So all of them actually contain soy beans. You then have mixed miso (Awase Miso/調合味噌) which is a mixture of 2 or more of the types of miso, usually rice and soybean miso added together. At the restaurant, we used a kind of miso known as red dashi miso,(Akadashi Miso/赤だし味噌), which even though has the word dashi in it, it has nothing to do with dashi and does not contain any kombu or katsuobushi in it. In fact, Akadashi Miso falls under the category of mixed miso, or some people would even call it another name for Awase Miso. The main thing to note is that the Akadashi Miso we used at our restaurant contained Hatcho Miso (八丁味噌), a kind of soybean miso that has been fermented for over 2 years which gave our soup its characteristic taste. So if you can’t find akadashi miso but you can find Hatcho Miso you should be pretty good to go. Be warned, this miso has been aged for at least 2 summers and therefore is quite bitter, even compared to normal red miso. But it is this very bitter and yet savory characteristic that underpins this soup.
It was this combination of roasted fish bones combined with Hatcho miso that paired extremely well. The deep almost chocolate-like savory and salty taste from the miso accentuated the roasted aroma of the fish bones, whilst the fish oils released from the roasting process mellowed out the bitterness from the miso.
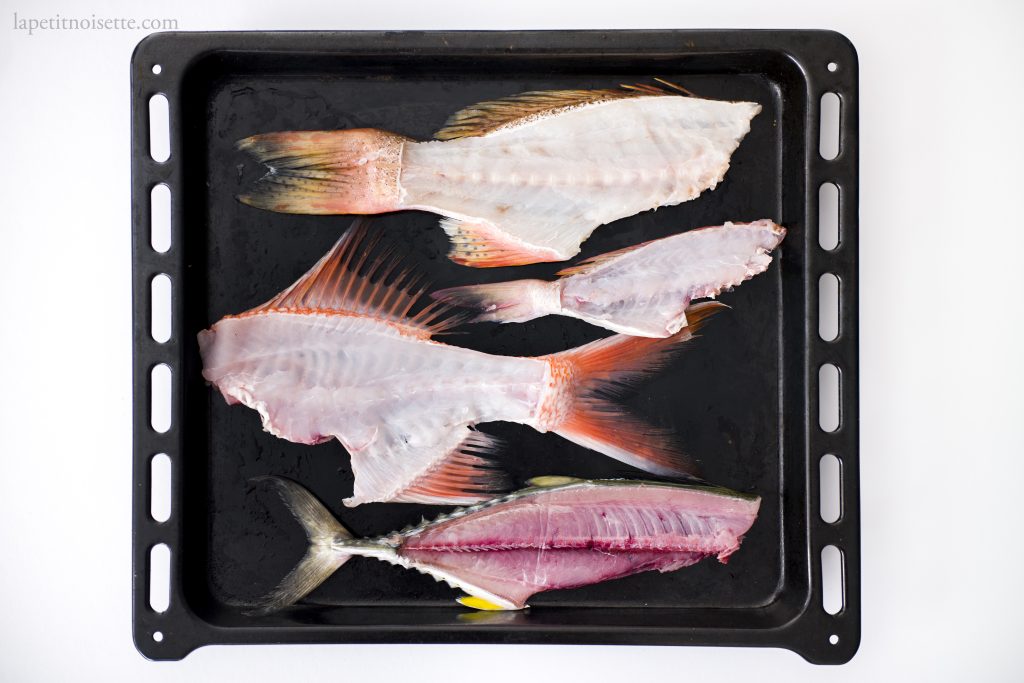
Since it’s highly unlike you’d have a gas salamander at home to roast the bones, you’d be able to similarly roast the bones in a home oven for this recipe. At the restaurants, the bones were roasted on a wire rack with a tray filled with water placed underneath it. This allowed the excess water from the bones to drip into the water as they roasted, making clean up easier. The water in the tray below was not added to the soup. At home, feel free to use the same set-up where you roast the bones on a wire rack with a tray below to catch the drippings, but be aware that flesh from the fish will stick to the wire rack, making clean-up quite a hassle.
The water from the tray also increases the humidity of the oven making the roasting slower, which would not happen in an open salamander as the steam can escape. I personally prefer to simply roast the bones on a clean oven tray without any baking paper or aluminium foil, which I find either rips or sticks to the fish. You can then deglaze the oven tray with cooking sake and add to contents to the soup, even though this isn’t part of the original recipe.
Michelin Starred Akadashi Miso Soup Recipe (赤だし味噌汁の作り方)
Roasted fish stock
700g of fish bones and heads (not more than 150g from oily fish like mackerel)
80g of eel spines, heads discarded (can be substituted with 80g of additional fish bones)
3500ml of water
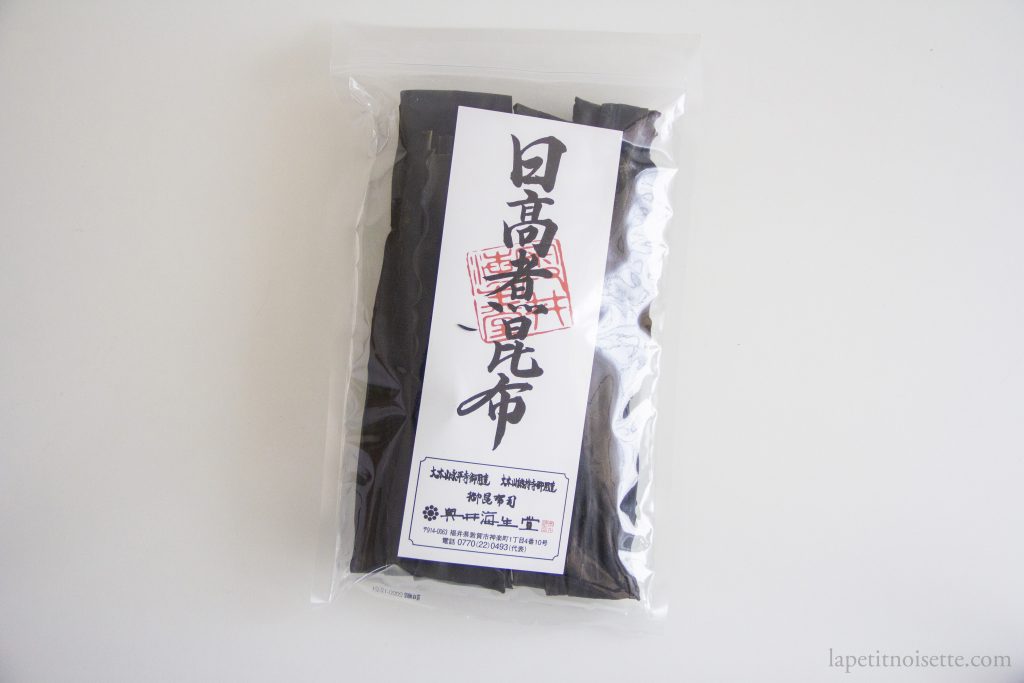
20g of Hidaka Kombu (Rishiri kombu does not work as well as it is more suitable for lighter soups but if you cannot find Hidaka kombu, any kombu works)
- Reserve the fish heads and bones after filleting fish and eels.
- Use a scissors to cut out any remaining gills in the fish head.
- Scrub away any visible blood or dirt on the fish bones using a cheap toothbrush, paying particular attention to the bloodline on the underside of the spine (the side of the spine that faces the organ cavity). It is alright to do this under running water.
- Place the fish head on a chopping board standing up so that the fish mouth is facing towards the sky. With the knife blade facing towards the mouth and the dull edge facing towards the forehead, insert the knife into the forehead, through as deep as possible and split the head into half by bringing the knife down and cutting through the mouth lips and jaws. The front half of the fish head should now be split in two.
- Once the previous cut is complete, turn the knife to the opposite direction with the blade of the knife facing the forehead, press the knife down to completely split the head in two.
- For the eel spines, under running water, use the toothbrush to remove any remaining blood. Dry with paper towels and dry under the sun until completely dry to the touch. Alternatively, roast the eel bones with the fish bones.
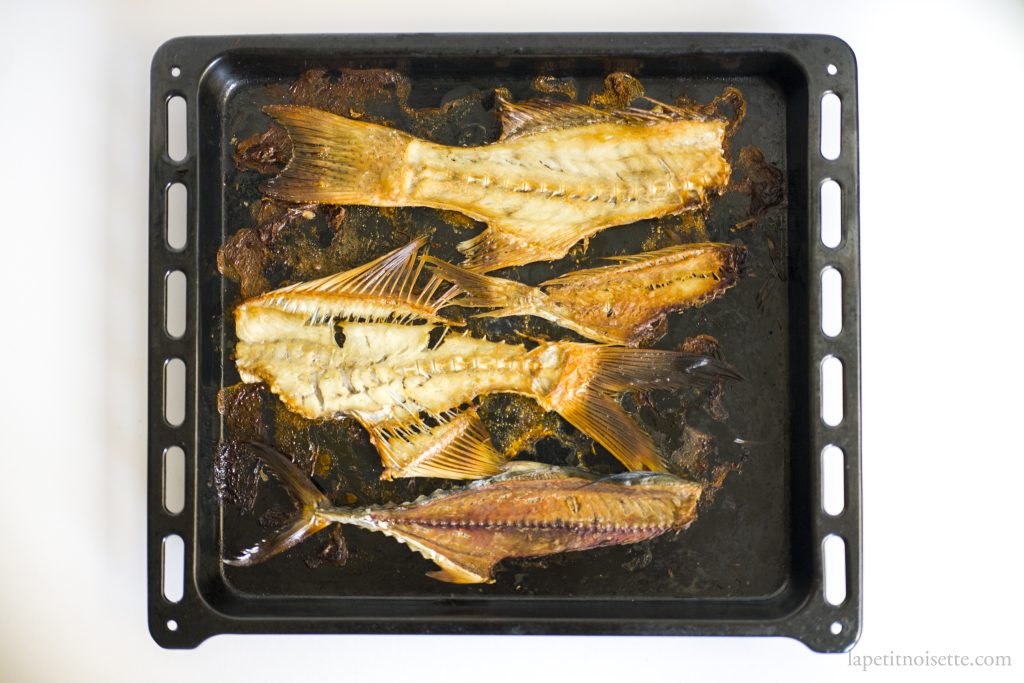
- Place the fish heads in a simple layer on a roasting tray and roast in an oven set on grilling mode at 200°C until well brown, around 40 to 50 minutes each side (totalling 1.5 hours). I’ve tested this recipe many times using different ovens and different fish in many different countries and honestly my first idea is to not provide a timing for this as it varied from 30 minutes all the way to 1 hour 30 minutes per side depending on the type of fish used and the strength of your oven grill So when roasting bones, please rely on the look of your fish to judge if they are roasted. You’re looking for the non-fleshy bits like the fins and gill flaps to be a deep golden brown whilst the rest of the head is browned like a good roast chicken skin. The texture of the outer skin should be crisp and the eyeballs in the head should pop-up if you’re using fresh heads.
- Once roasted on one side, turn the heads over using a pair of tongs and continue roasting on the other side. The other side should be quicker to roast as most of the water from the heads would have been evaporated.
- When the heads have been roasted on two sides, add them to the stockpot and scrap off any big pieces of meat stuck to your tray. It’s alright to leave some but they might burn when you add the fish bones.
- Add the fish bones to the now empty tray in a single layer and put it on the top shelf of the oven (compared to the middle shelf for the heads). Roast until browned and has an almost crispy texture, around 30 minutes for one side. Repeat for the other side At this stage, the fins have a tendency to burn before the flesh browns, especially if a lot of flesh remains on the bones or the fin curls during heating and thus becomes closer to the grill than other parts of the fish. A little bit of heavy browning is alright, but any bits that burn heavily should be trimmed off.
- Once the eel bones, fish bones and fish heads have been added to the stock pot, add in the kombu and water and bring up to a simmer.
- Once simmering, discard the kombu.
- Continue to simmer for 2 to 3 hours without a lid, skimming off any scum that rises to the surface as you would a typical stock. However be sure not to skim off any of the fish oils.
- Once simmered, strain using a strainer and discard all the bones. The stock at this point can be frozen up to a month before declining in flavour.
Akadashi miso soup (scale it up to your required amount)
250ml Roasted fish stock
20g or less of Akadashi Miso per 250ml of fish stock or 50:50 Hatcho Miso and White Miso
Baby spring onions (or chives if unable to find)
- Finely chop the spring onions and rinse under cold water. Drain and reserve for the soup.
- Bring the roasted fish stock up to a boil before turning off the heat. Place the miso in a fine meshed strainer and dip the strainer into soup and dissolve the miso through the strainer. If using akadashi miso, there should be little to no residual left in the strainer but if you add other varieties there might be solids left. Taste the miso soup and add more miso or stock to your taste. If intended to be served in a small portion as per the restaurant, add slightly more miso so that it is quite punchy.
- The soup can now be refrigerated until serving.
- When serving, reheat before portioning out into bowls and top with chopped spring onions.
Notes:
When splitting the fish head in half, feel press to press the fish head into the chopping board to try and flatten it out as it makes it easier to split the head. The aim is to press the head so that both the collar and cheeks are evenly split on both sides so that the forehead of the fish is closer to the chopping board, closing the distance the knife tips need to travel to penetrate the forehead. Splitting fish heads in half vary in difficulty from fish to fish. Fish like mackerel and kinmedai are easier to split, whilst Tai and Flatheads are notoriously almost impossible to split, especially with the Tai’s reinforced forehead bone. (Nonetheless we were still forced to do it at the restaurant).
We split the fish heads directly down the middle as it provides an overall more even thickness to roast them so that they don’t roast unevenly. If left whole, it’s hard to brown it evenly without burning someparts.
When roasting the bones, we would also remove bones and heads from the roasting rack as they became ready as smaller fishes tended to be done faster than bigger fish. You may also do so if you fish, the effort required to tend to the oven and check on the fish constantly might not be worth it in your opinion.
The convention when making miso soup typically calls for the miso to be added just before or when the dashi stock is boiling, or even after the heat has been turned off as vigorously boiling the miso is believed to diminish it’s taste. However akadashi miso and hatcho miso are the exception to this rule as they are able to withstand boiling due to the fact that they contain a high percentage or even 100% soybeans. This allows us to make this recipe during the afternoon and simply reheat it for dinner service.
The 20g of miso per 250g of stock is just a general rule of thumb for standard miso soup. At the restaurant, the amount of miso added was just eye-balled based on experience and Okayata’s taste, which of course varied on the strength of the stock and the amount of fish used that day. If you prefer to make this as a normal drinking soup adjust to your own taste. To serve as it was at the restaurant, you’d want to add slightly more miso that you think you need. It should just make your mouth pucker a little from the bitterness but should be delicious at the same time, reminiscent of a hot chocolate.
Yes we actually used tongs in the restaurant to flip the fish heads and bones, not chopsticks as you might have expected. I guess even in an old traditional restaurant sometimes practicality wins over tradition.
Very interesting, thank you. I actually came across the Akadashi miso just yesterday, which I had not seen before.
Now I know – thanks.
I thought that fish stocks as a rule had to be simmered for less than 30 minutes, to prevent calcium leaching from the bones and making the stock bitter. Is that not an issue with this recipe, or is any resulting bitterness desirable?