This article leads on from Different Parts and Types of Katsuobushi (鰹節の解剖学).
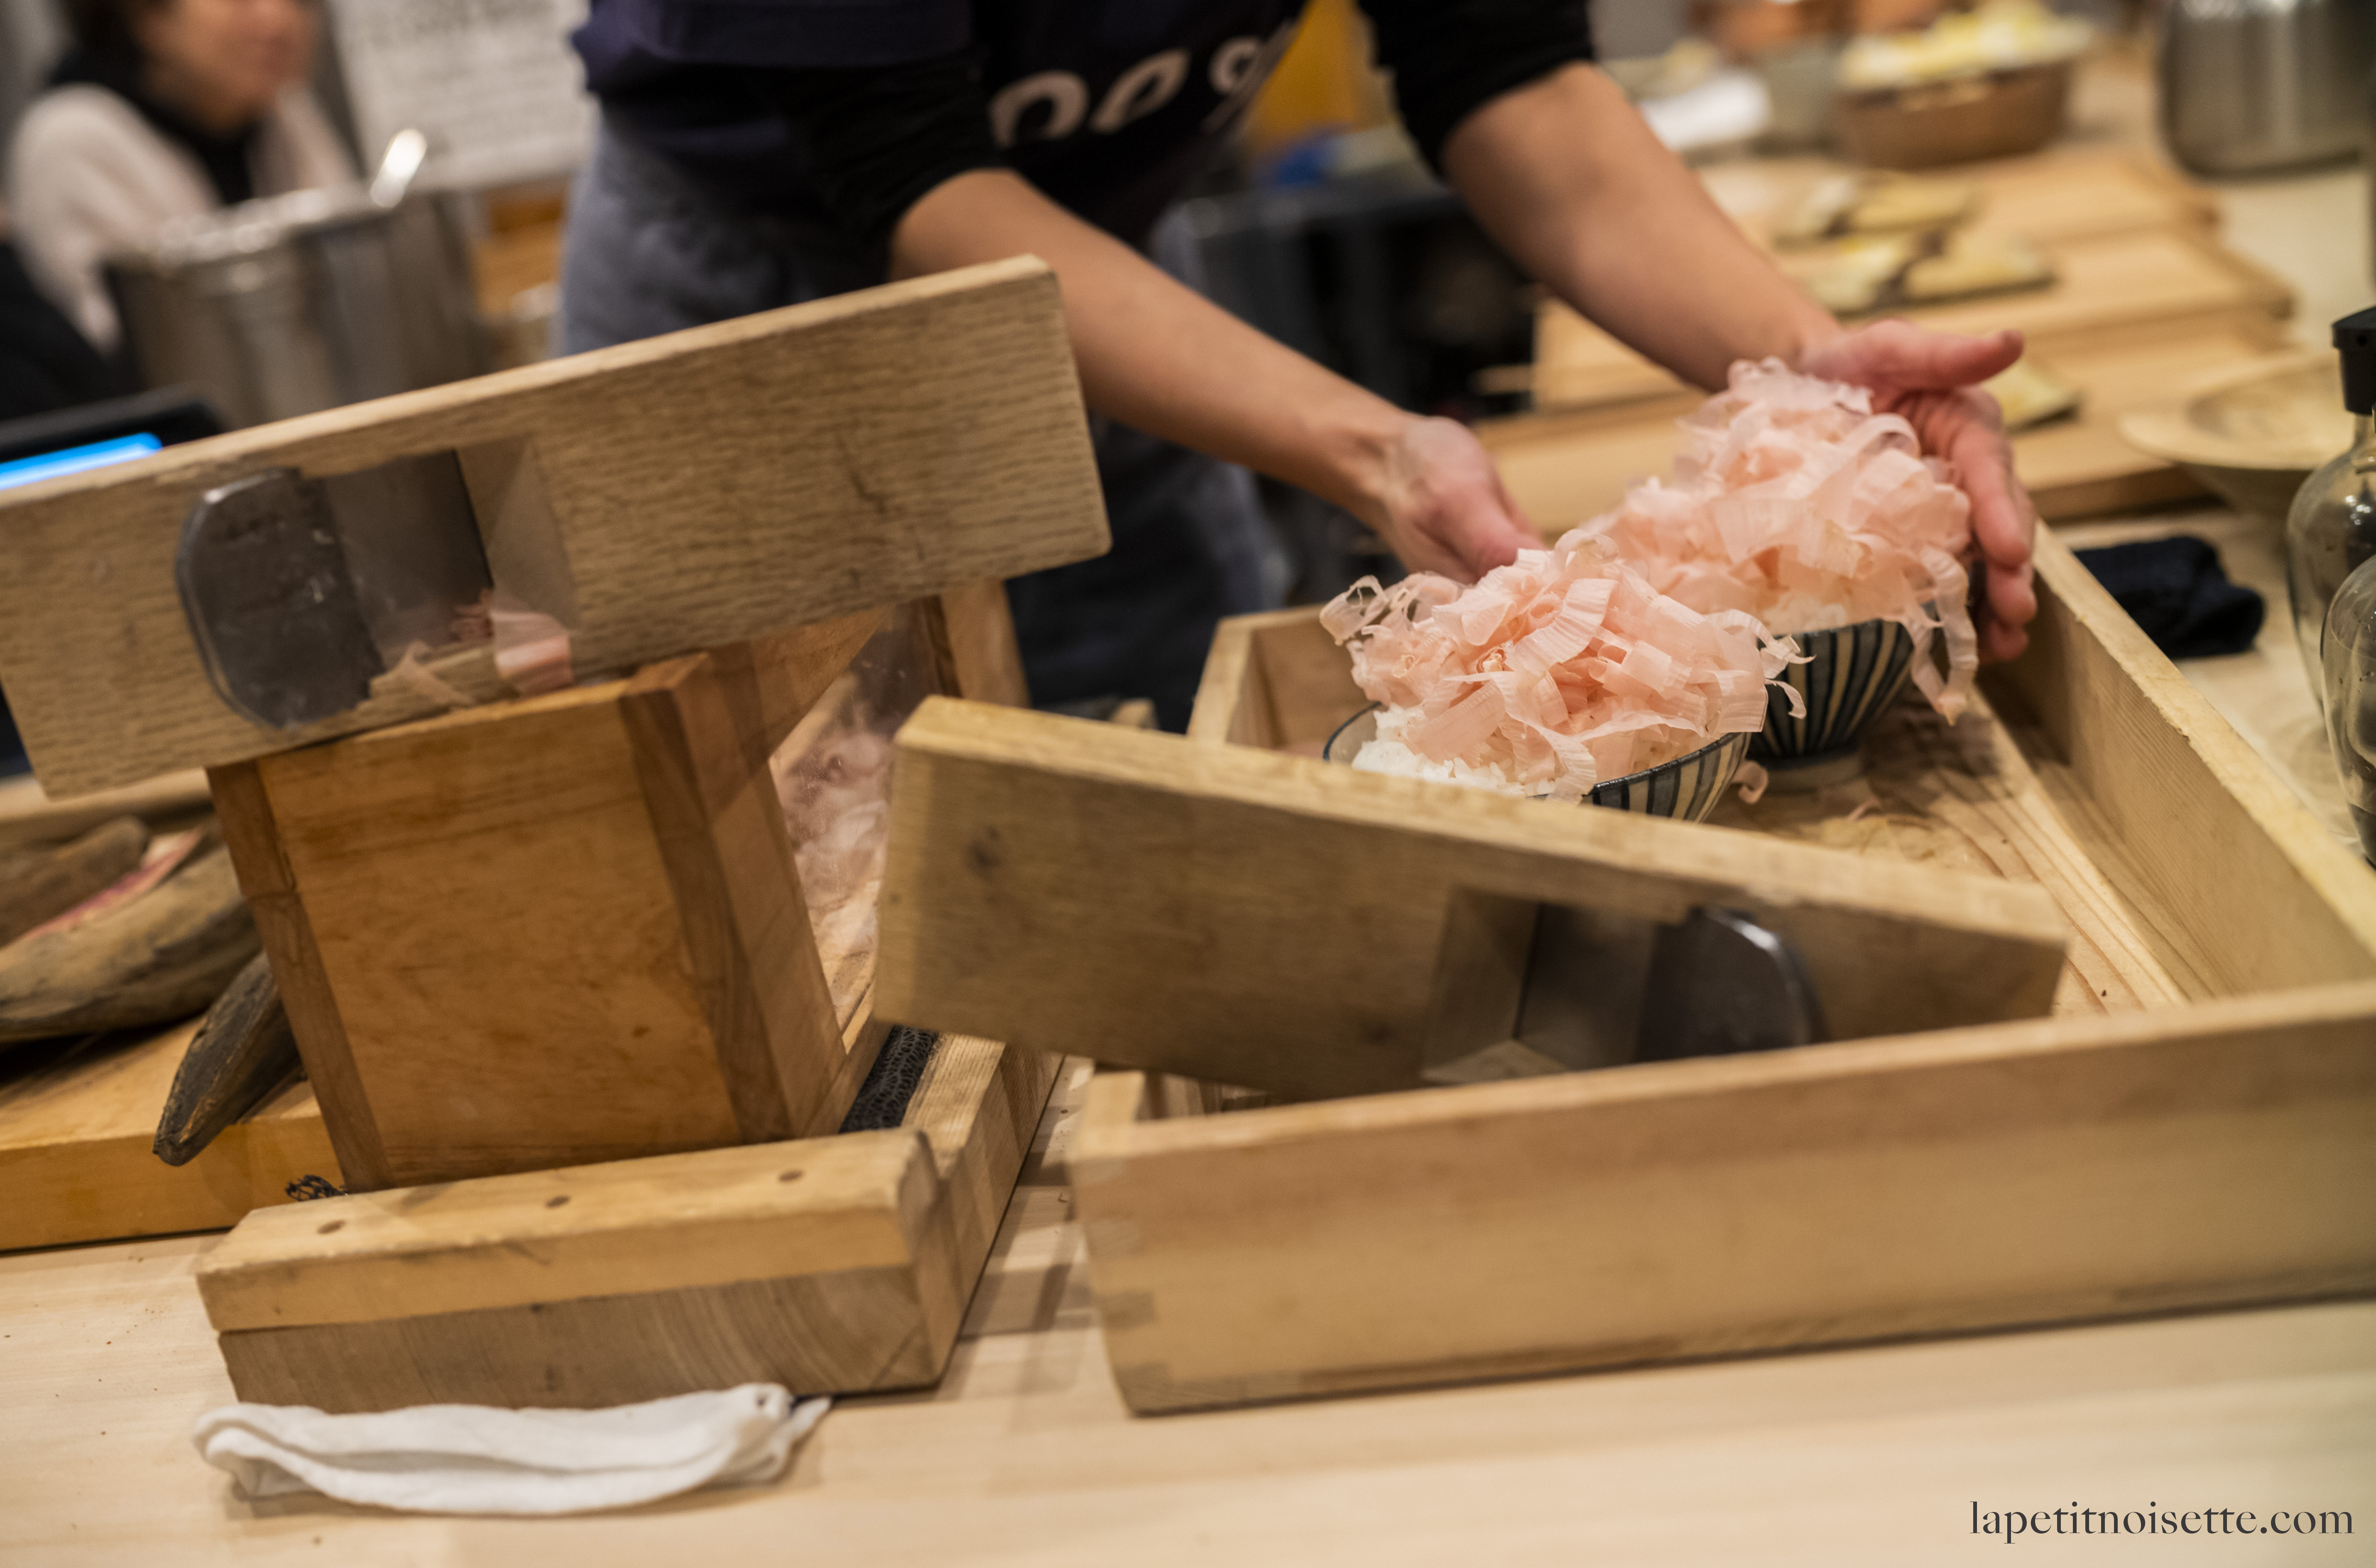
There is a famous saying amongst Japanese chefs, that “katsuobushi must only be shaved once the guest’s face is seen” (鰹節はお客様の顔を見てから削れ). This saying emphasises the importance of freshly shaved katsuobushi, which quickly loses flavour once oxidised. And trust me – that flavour is worth the effort.
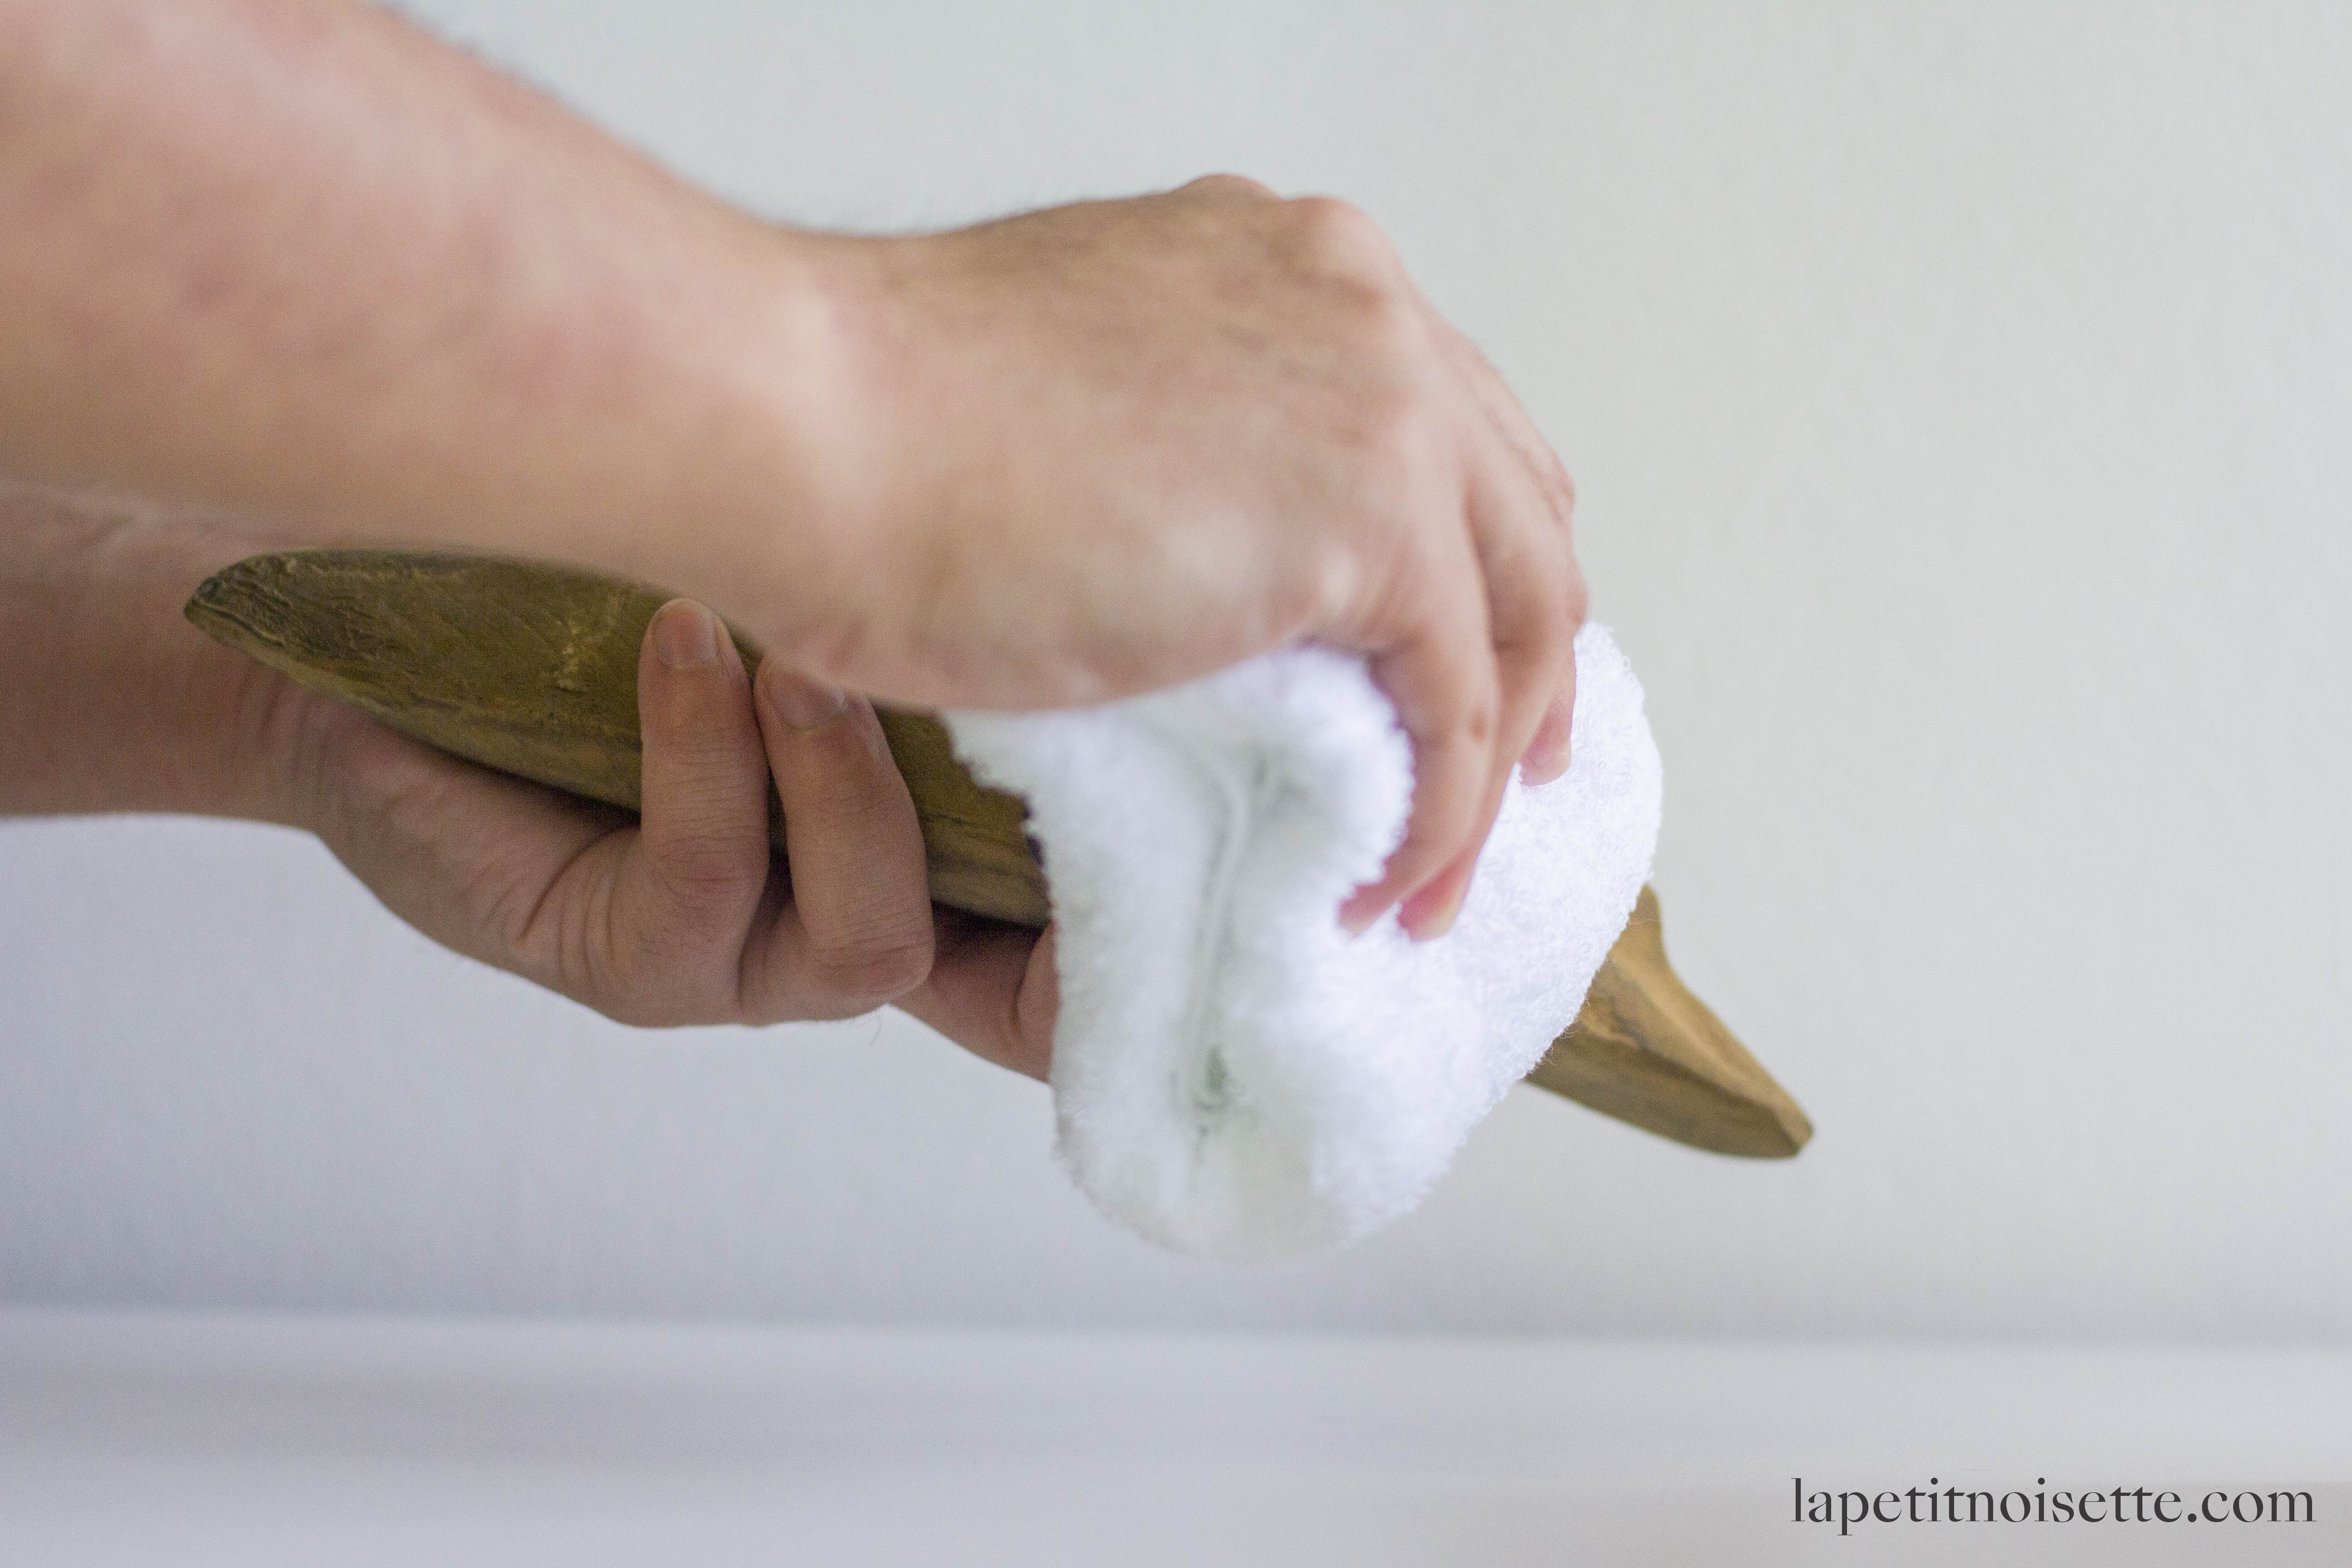
To start, take a clean dry cloth and gently wipe off the excess powder on the surface of the Katsuobushi, this is Aspergillus glaucus that has dried out in the sun and just needs to be dusted away. Be extra careful when wiping the Katsuobushi to make sure the cloth is completely dry, or the Katsuobushi will absorb the moisture, promoting unwanted mold growth, making it impossible to store.
Positioning the Blade
Next we need to position the blade of the kezuriki – if hammered too far in, the shavings will be too thick. The shaving plane (pictured below – holder and blade together without the box) is known as a kanna (鉋), whilst the mallet used to hit it is called a kizuchi (木槌).
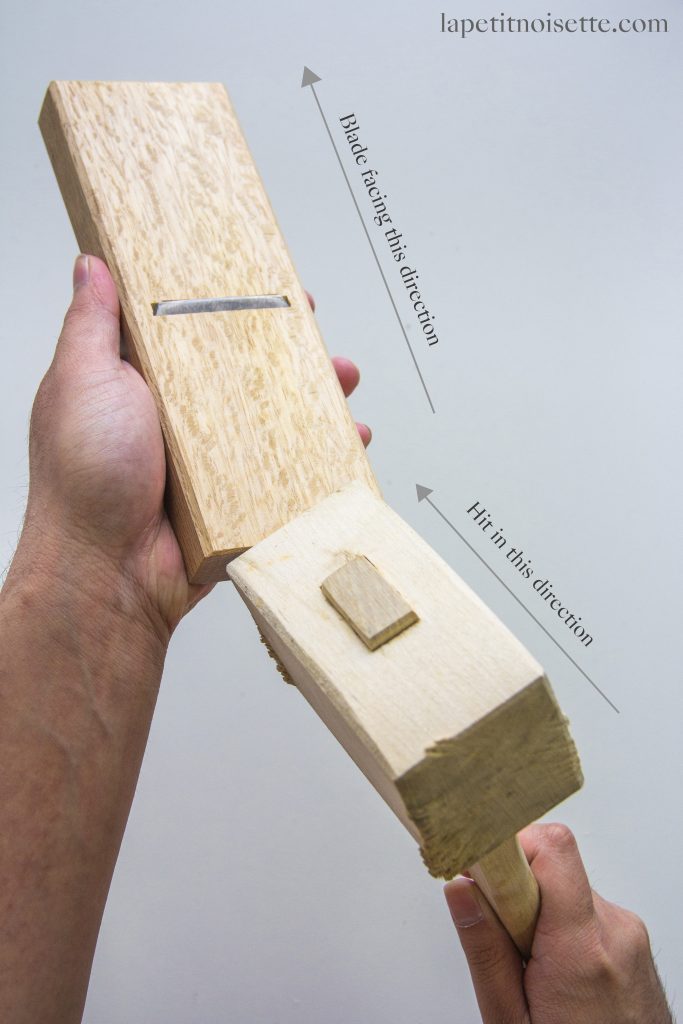
To remove the blade, tap the lower part of the plane in the direction of the blade. This will cause the blade to retract and release; you may need to hit the plane quite a few times. This movement will not damage the plane as both the mallet and plane are wooden.
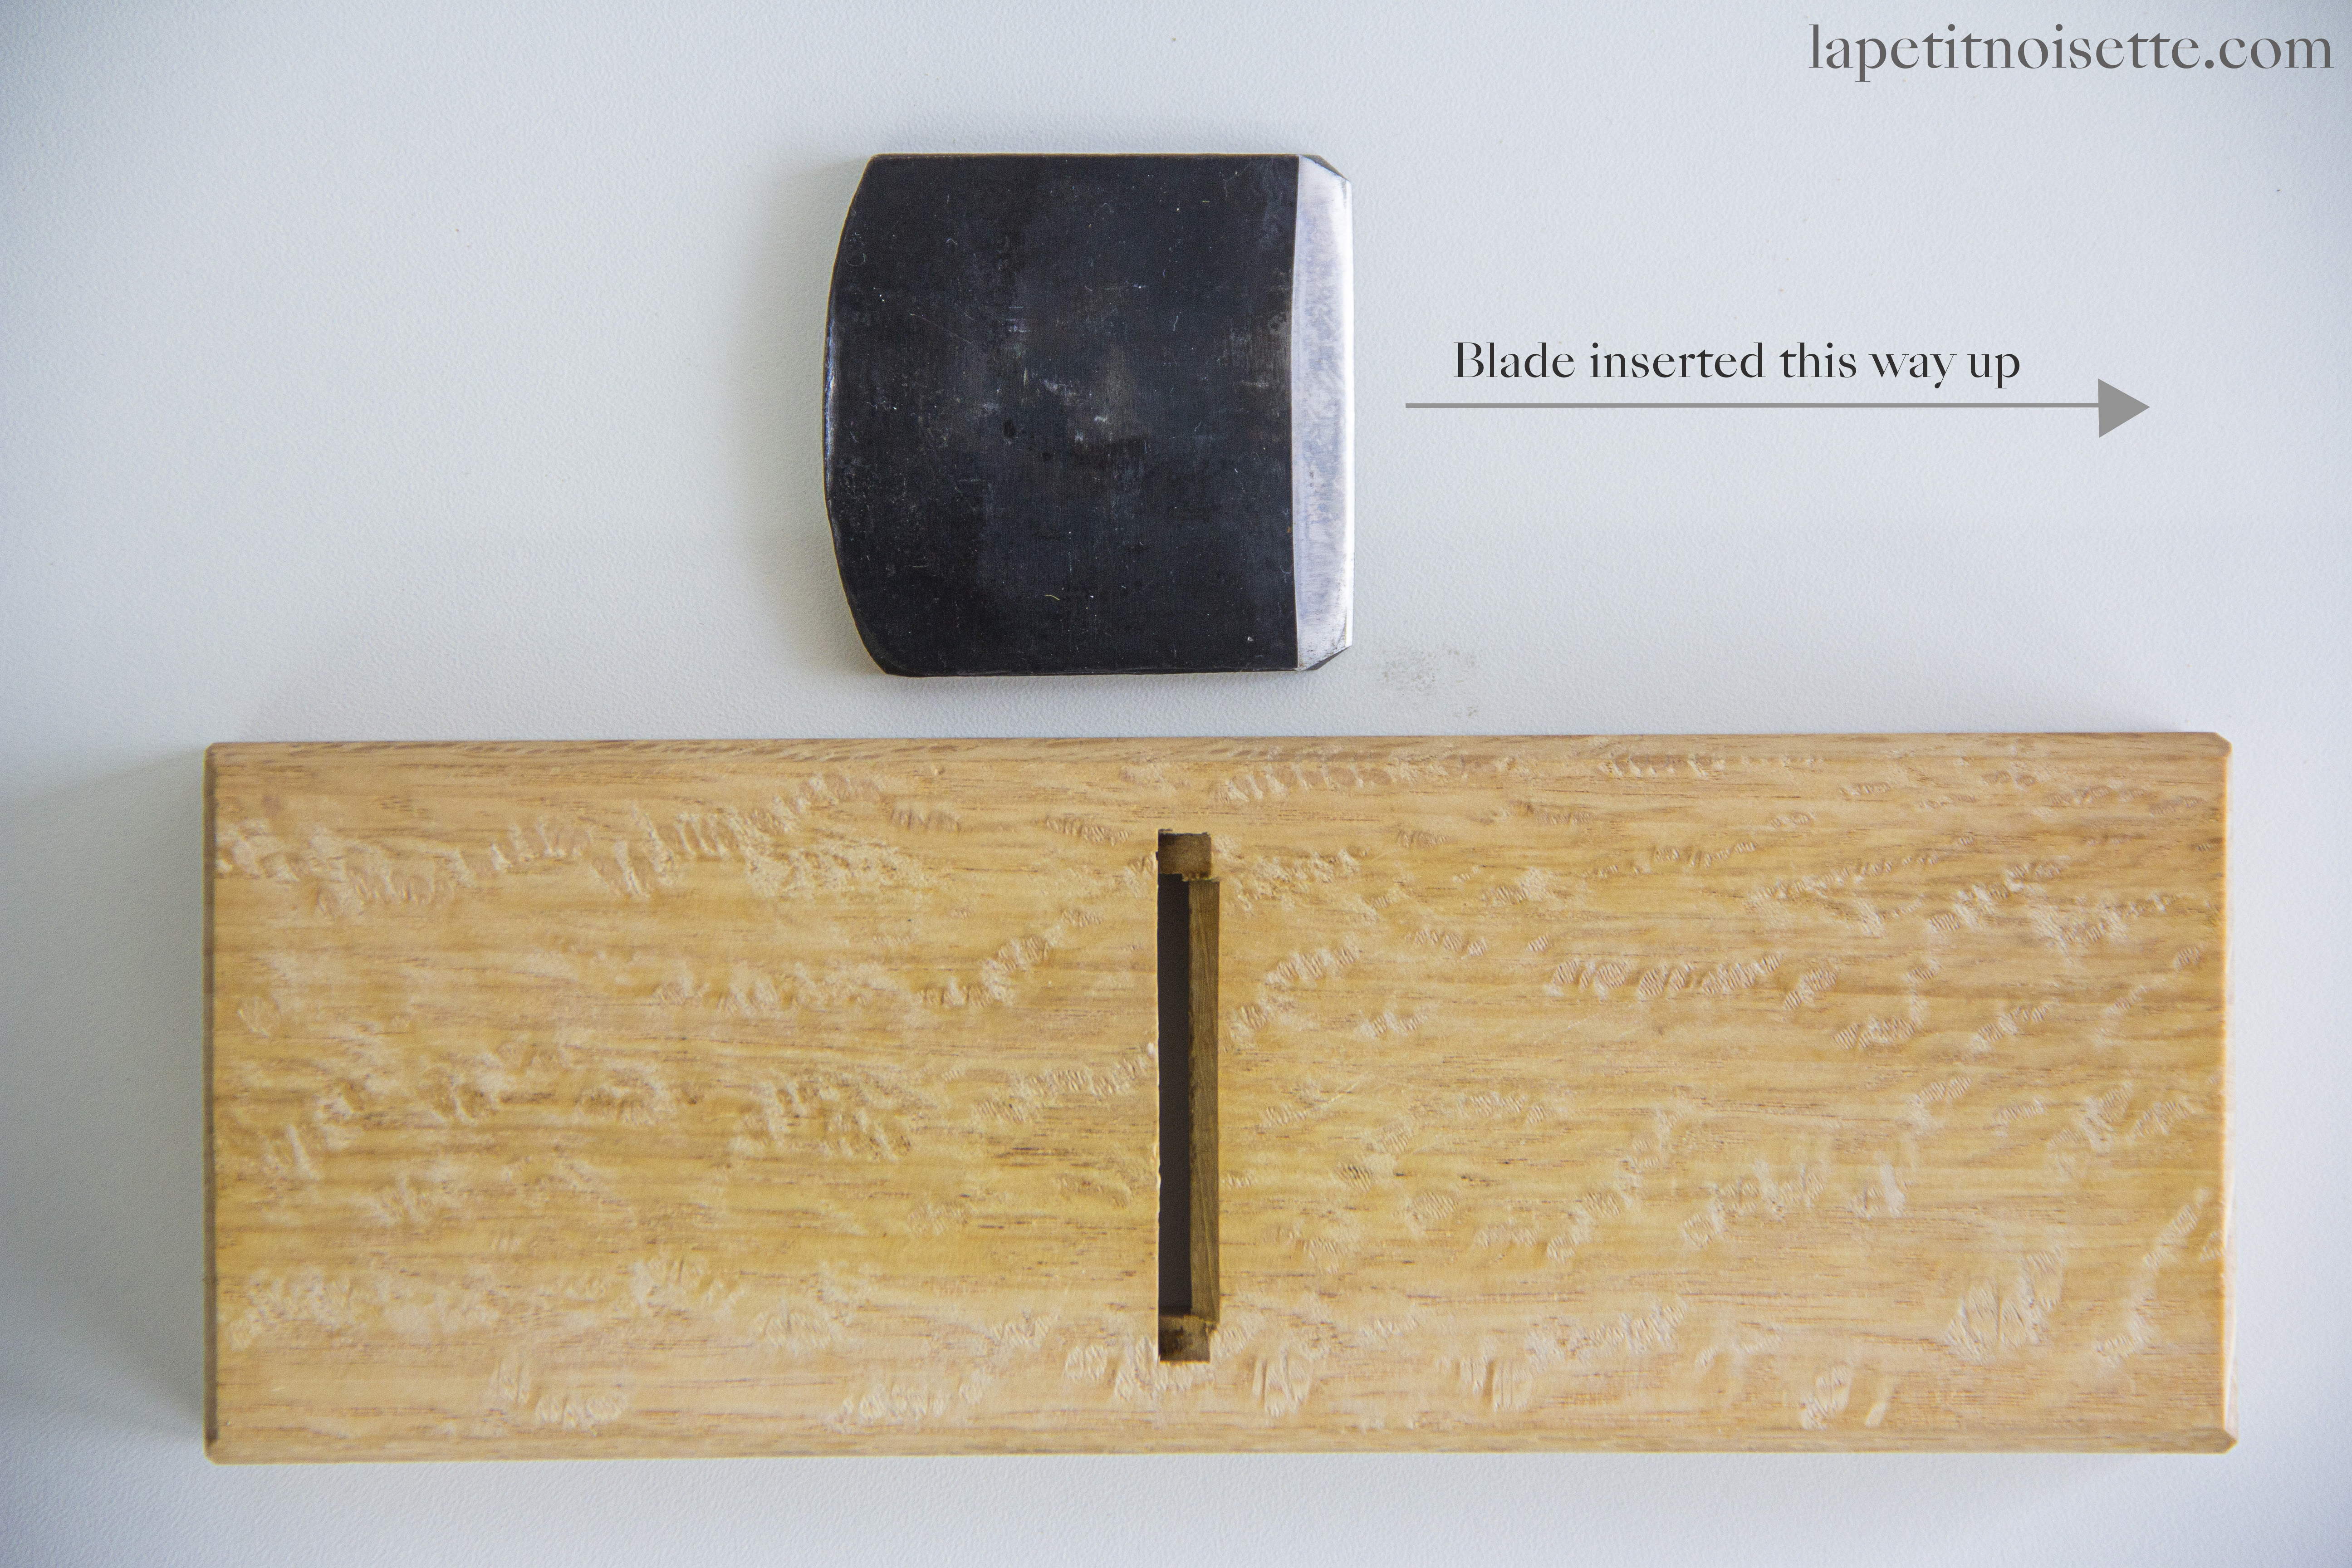
To replace the blade, insert the blade with the flat side facing down (as shown in the picture). Gently push the blade in as far as it goes. Then, turn the plane around and tap the plane facing against the direction of the blade.
It’s important that the blade goes in straight, so try your best to tap the centre of the plane. But, if it shifts, simply tap on either side to even it out. If the blade goes in too deeply, tap the plane on the opposite side to get it to come back out, as mentioned above.
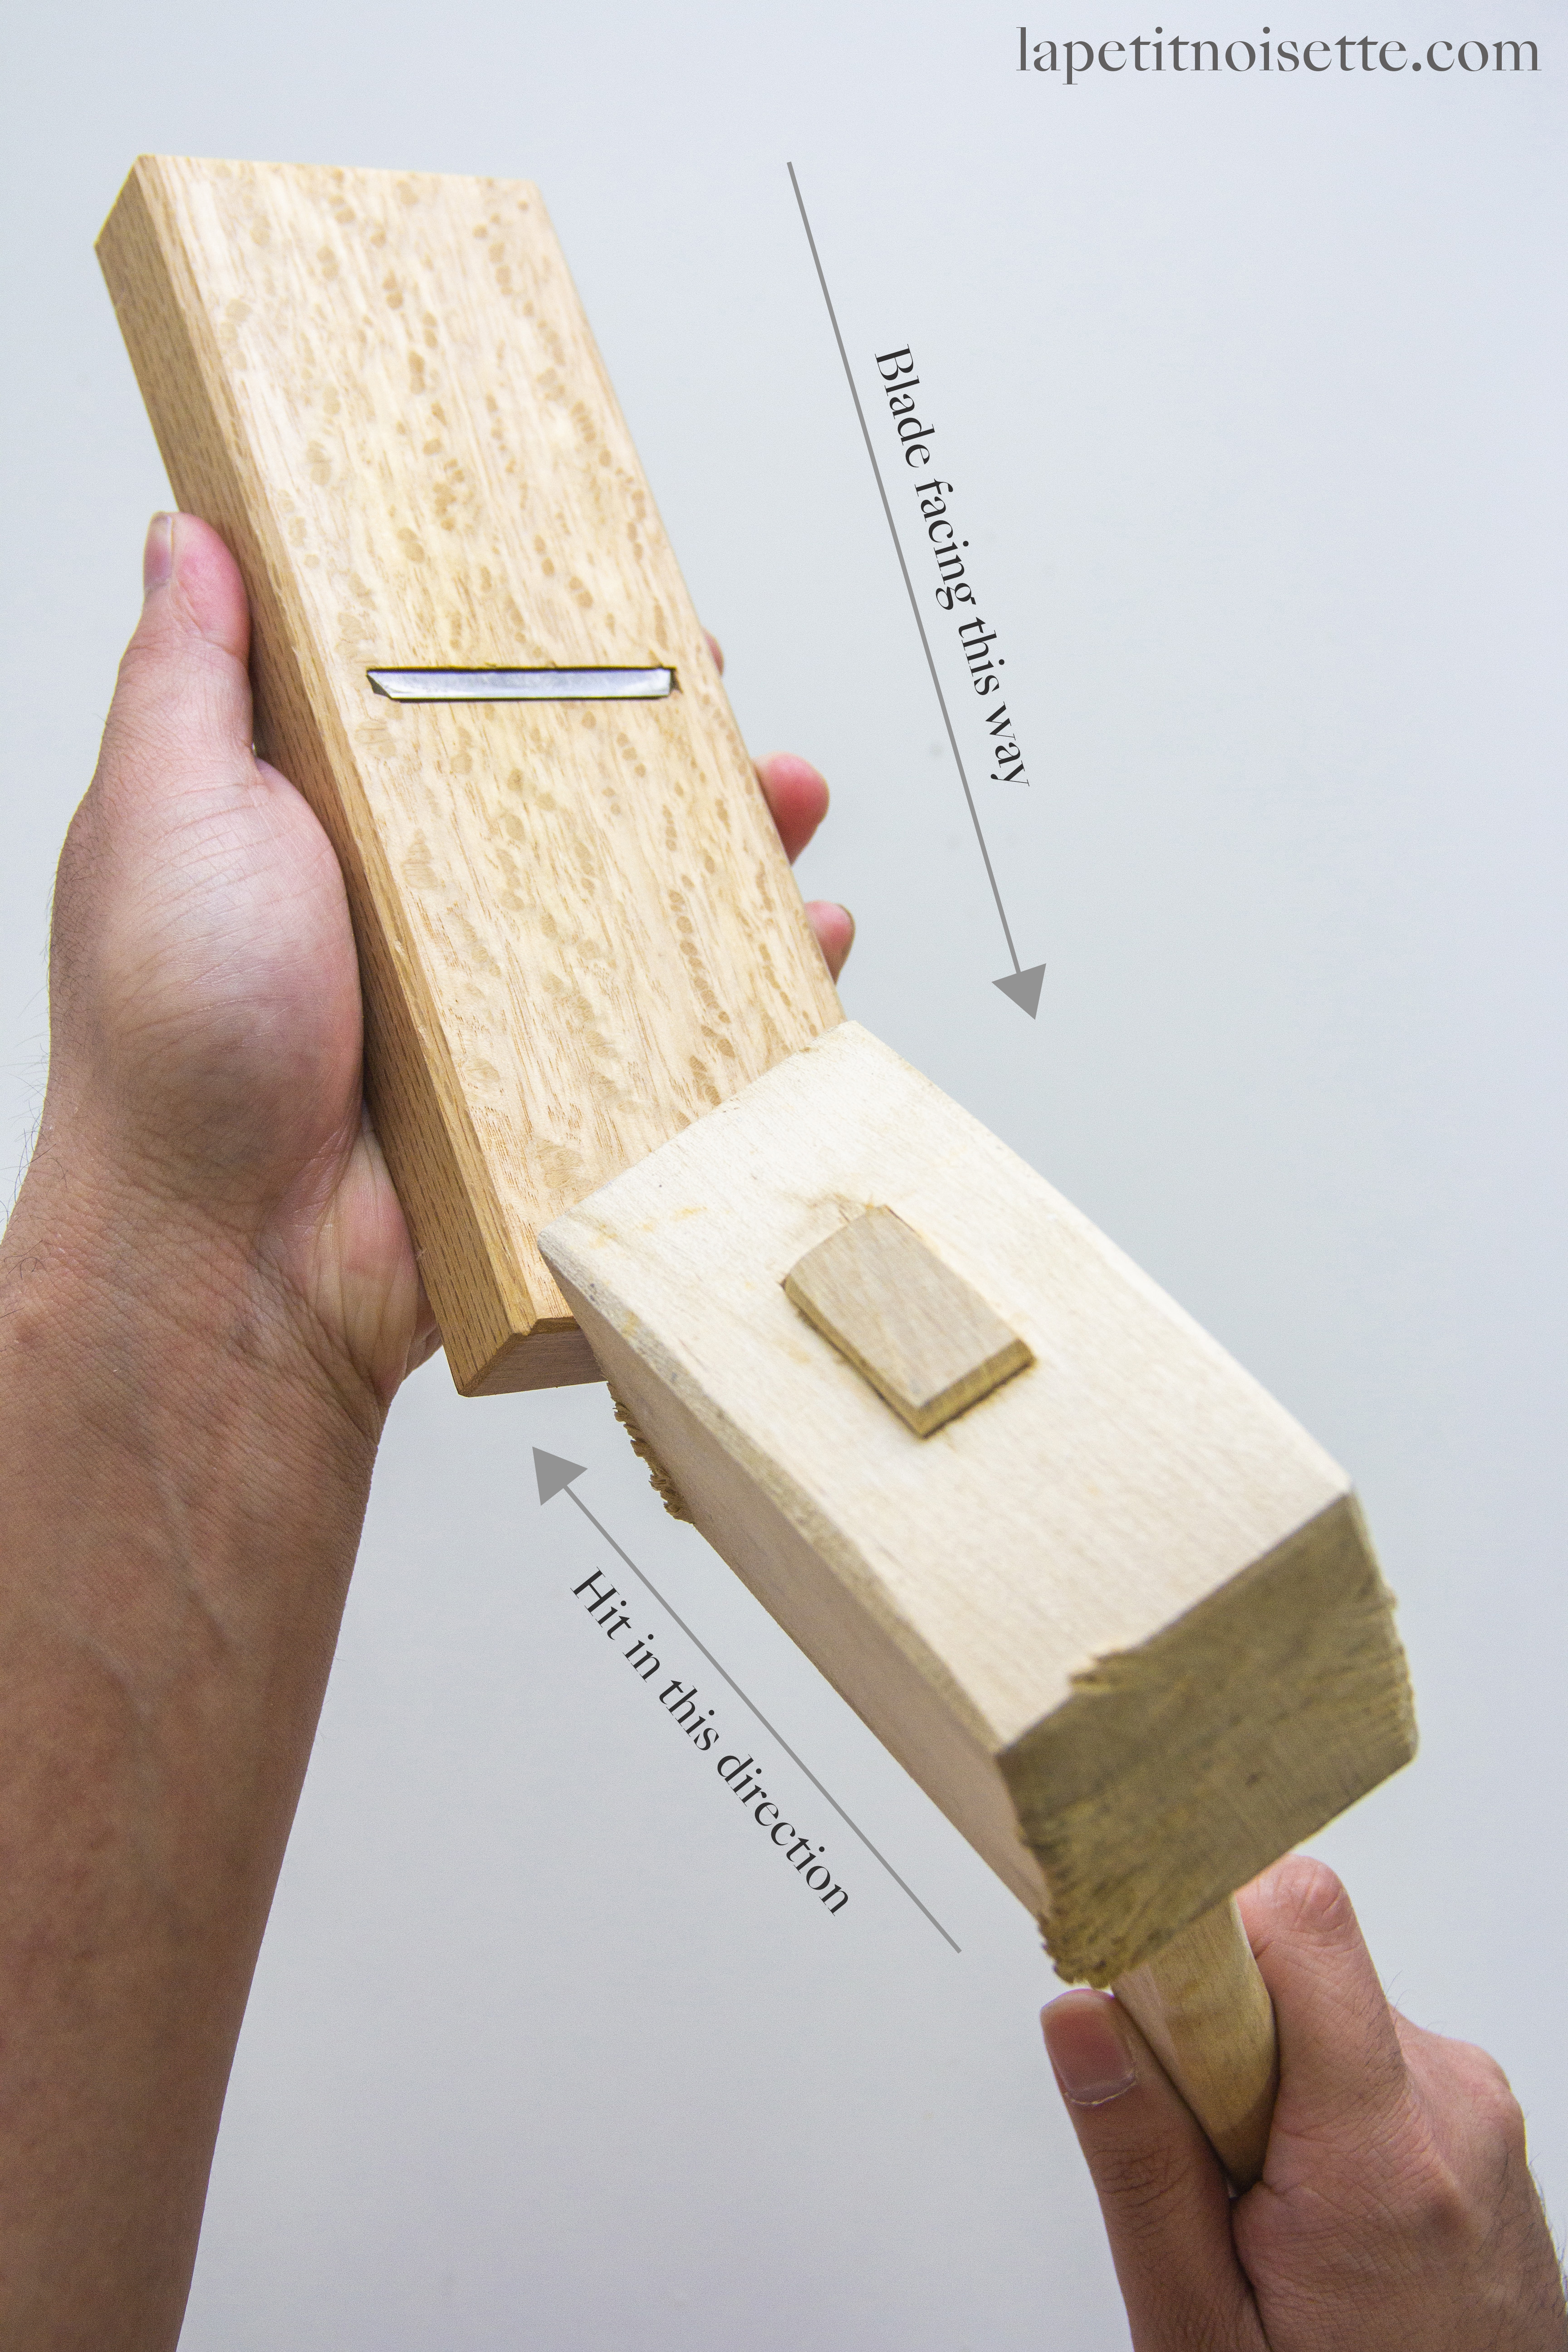
What you are aiming for is to have the blade sticking out roughly as far as a sheet of paper is thick, which will give you beautifully thin curls of katsuobushi. Of course, such a thin margin is almost impossible to measure. Instead, gently brush your finger perpendicular against the blade (NOT parallel to the blade). You should just be able to feel the tip.
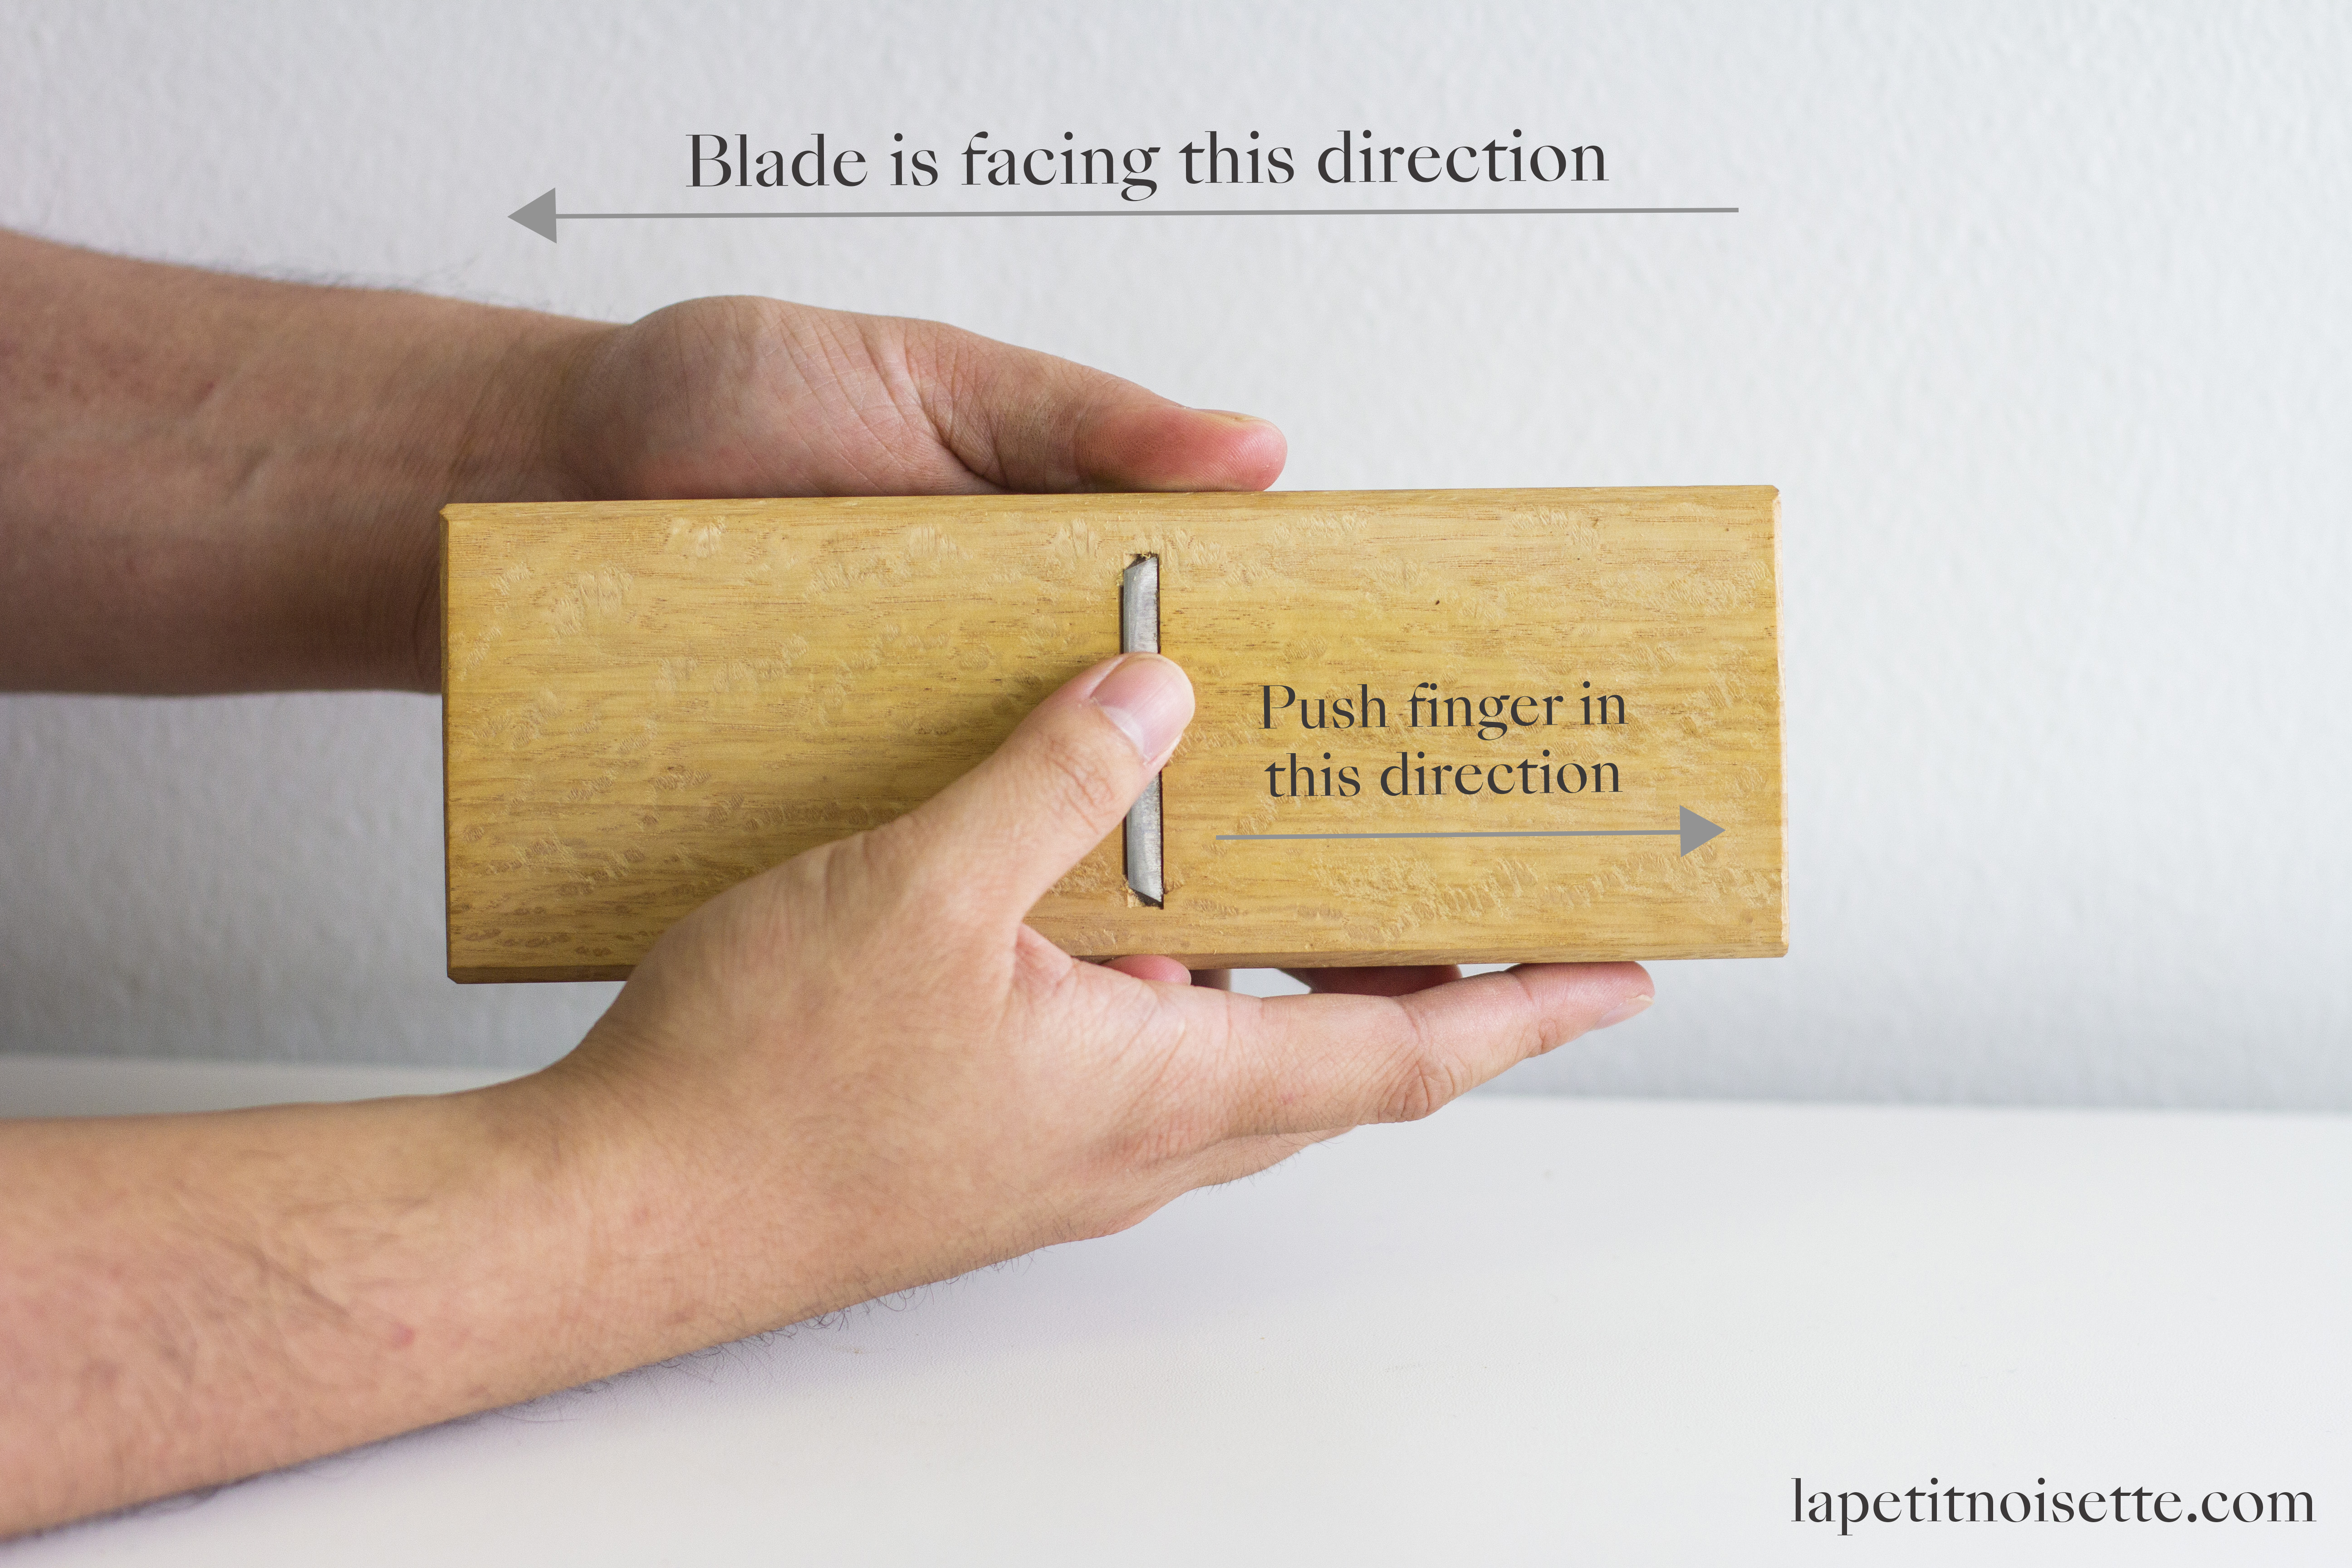
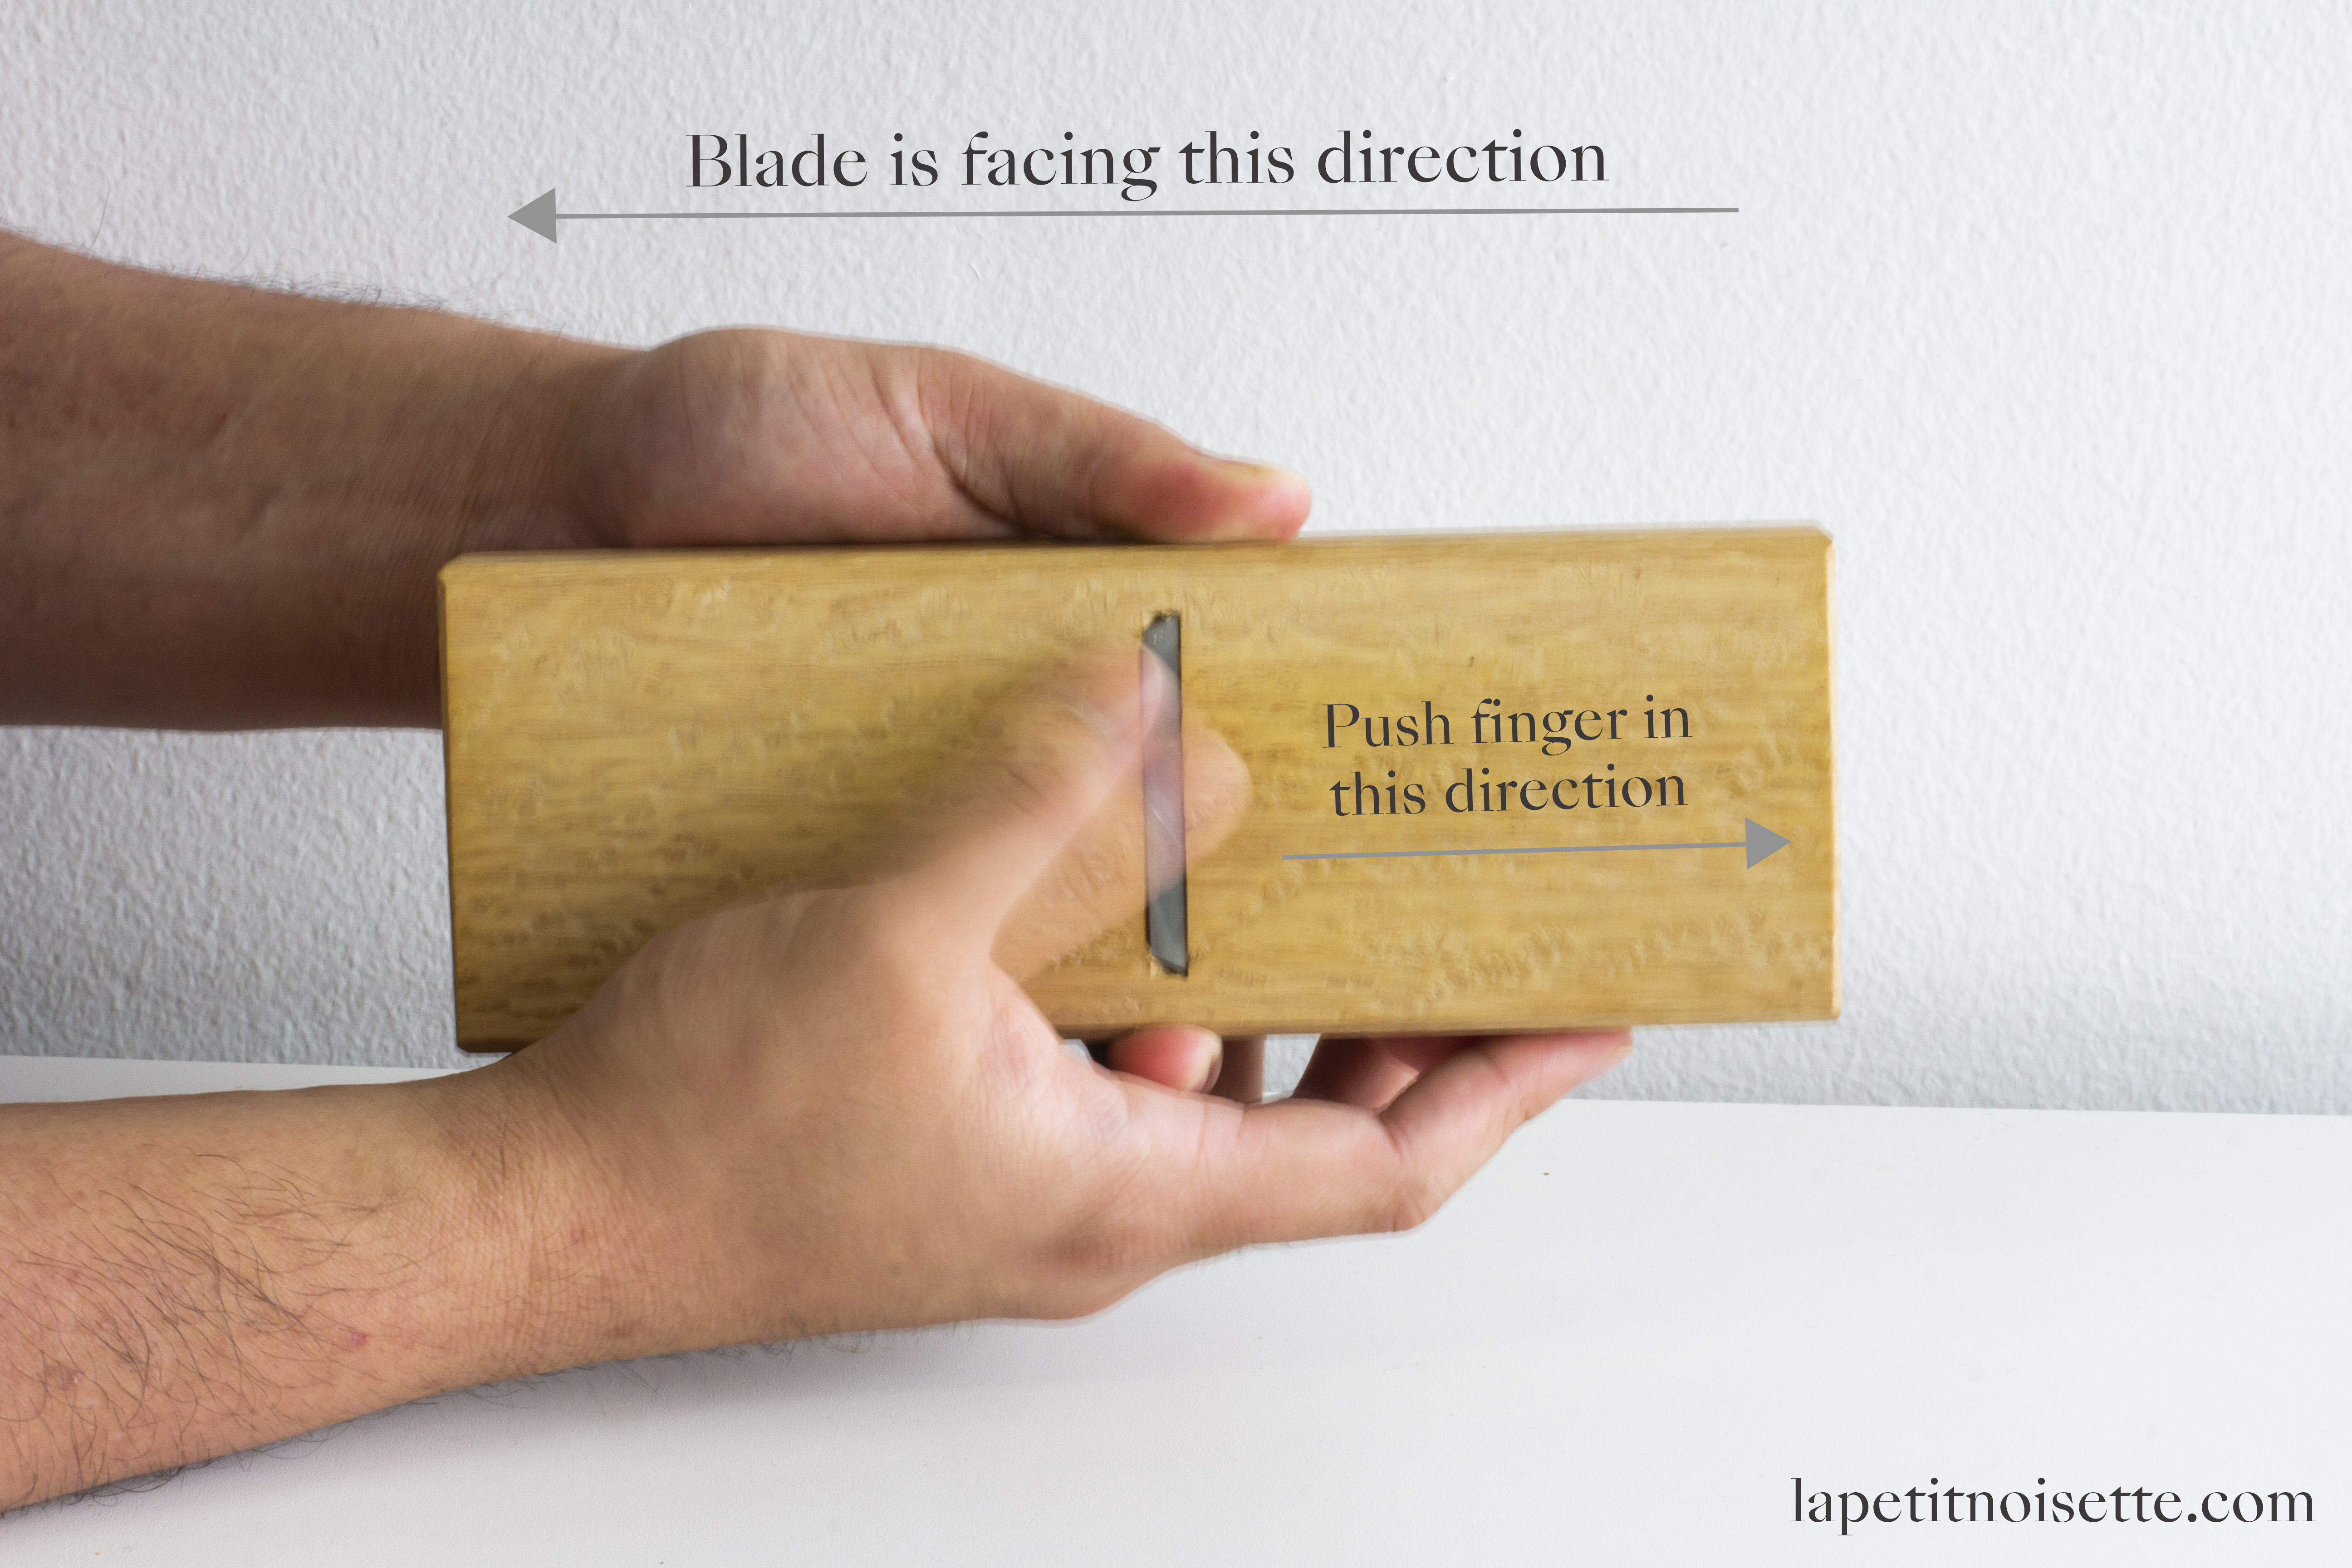
Positioning the Fillet
To start shaving the Katsuobushi, it is important to first determine the correct shaving direction. You want to start shaving by pushing in the direction from tail to head in one continuous motion to obtain nice long thin flakes.
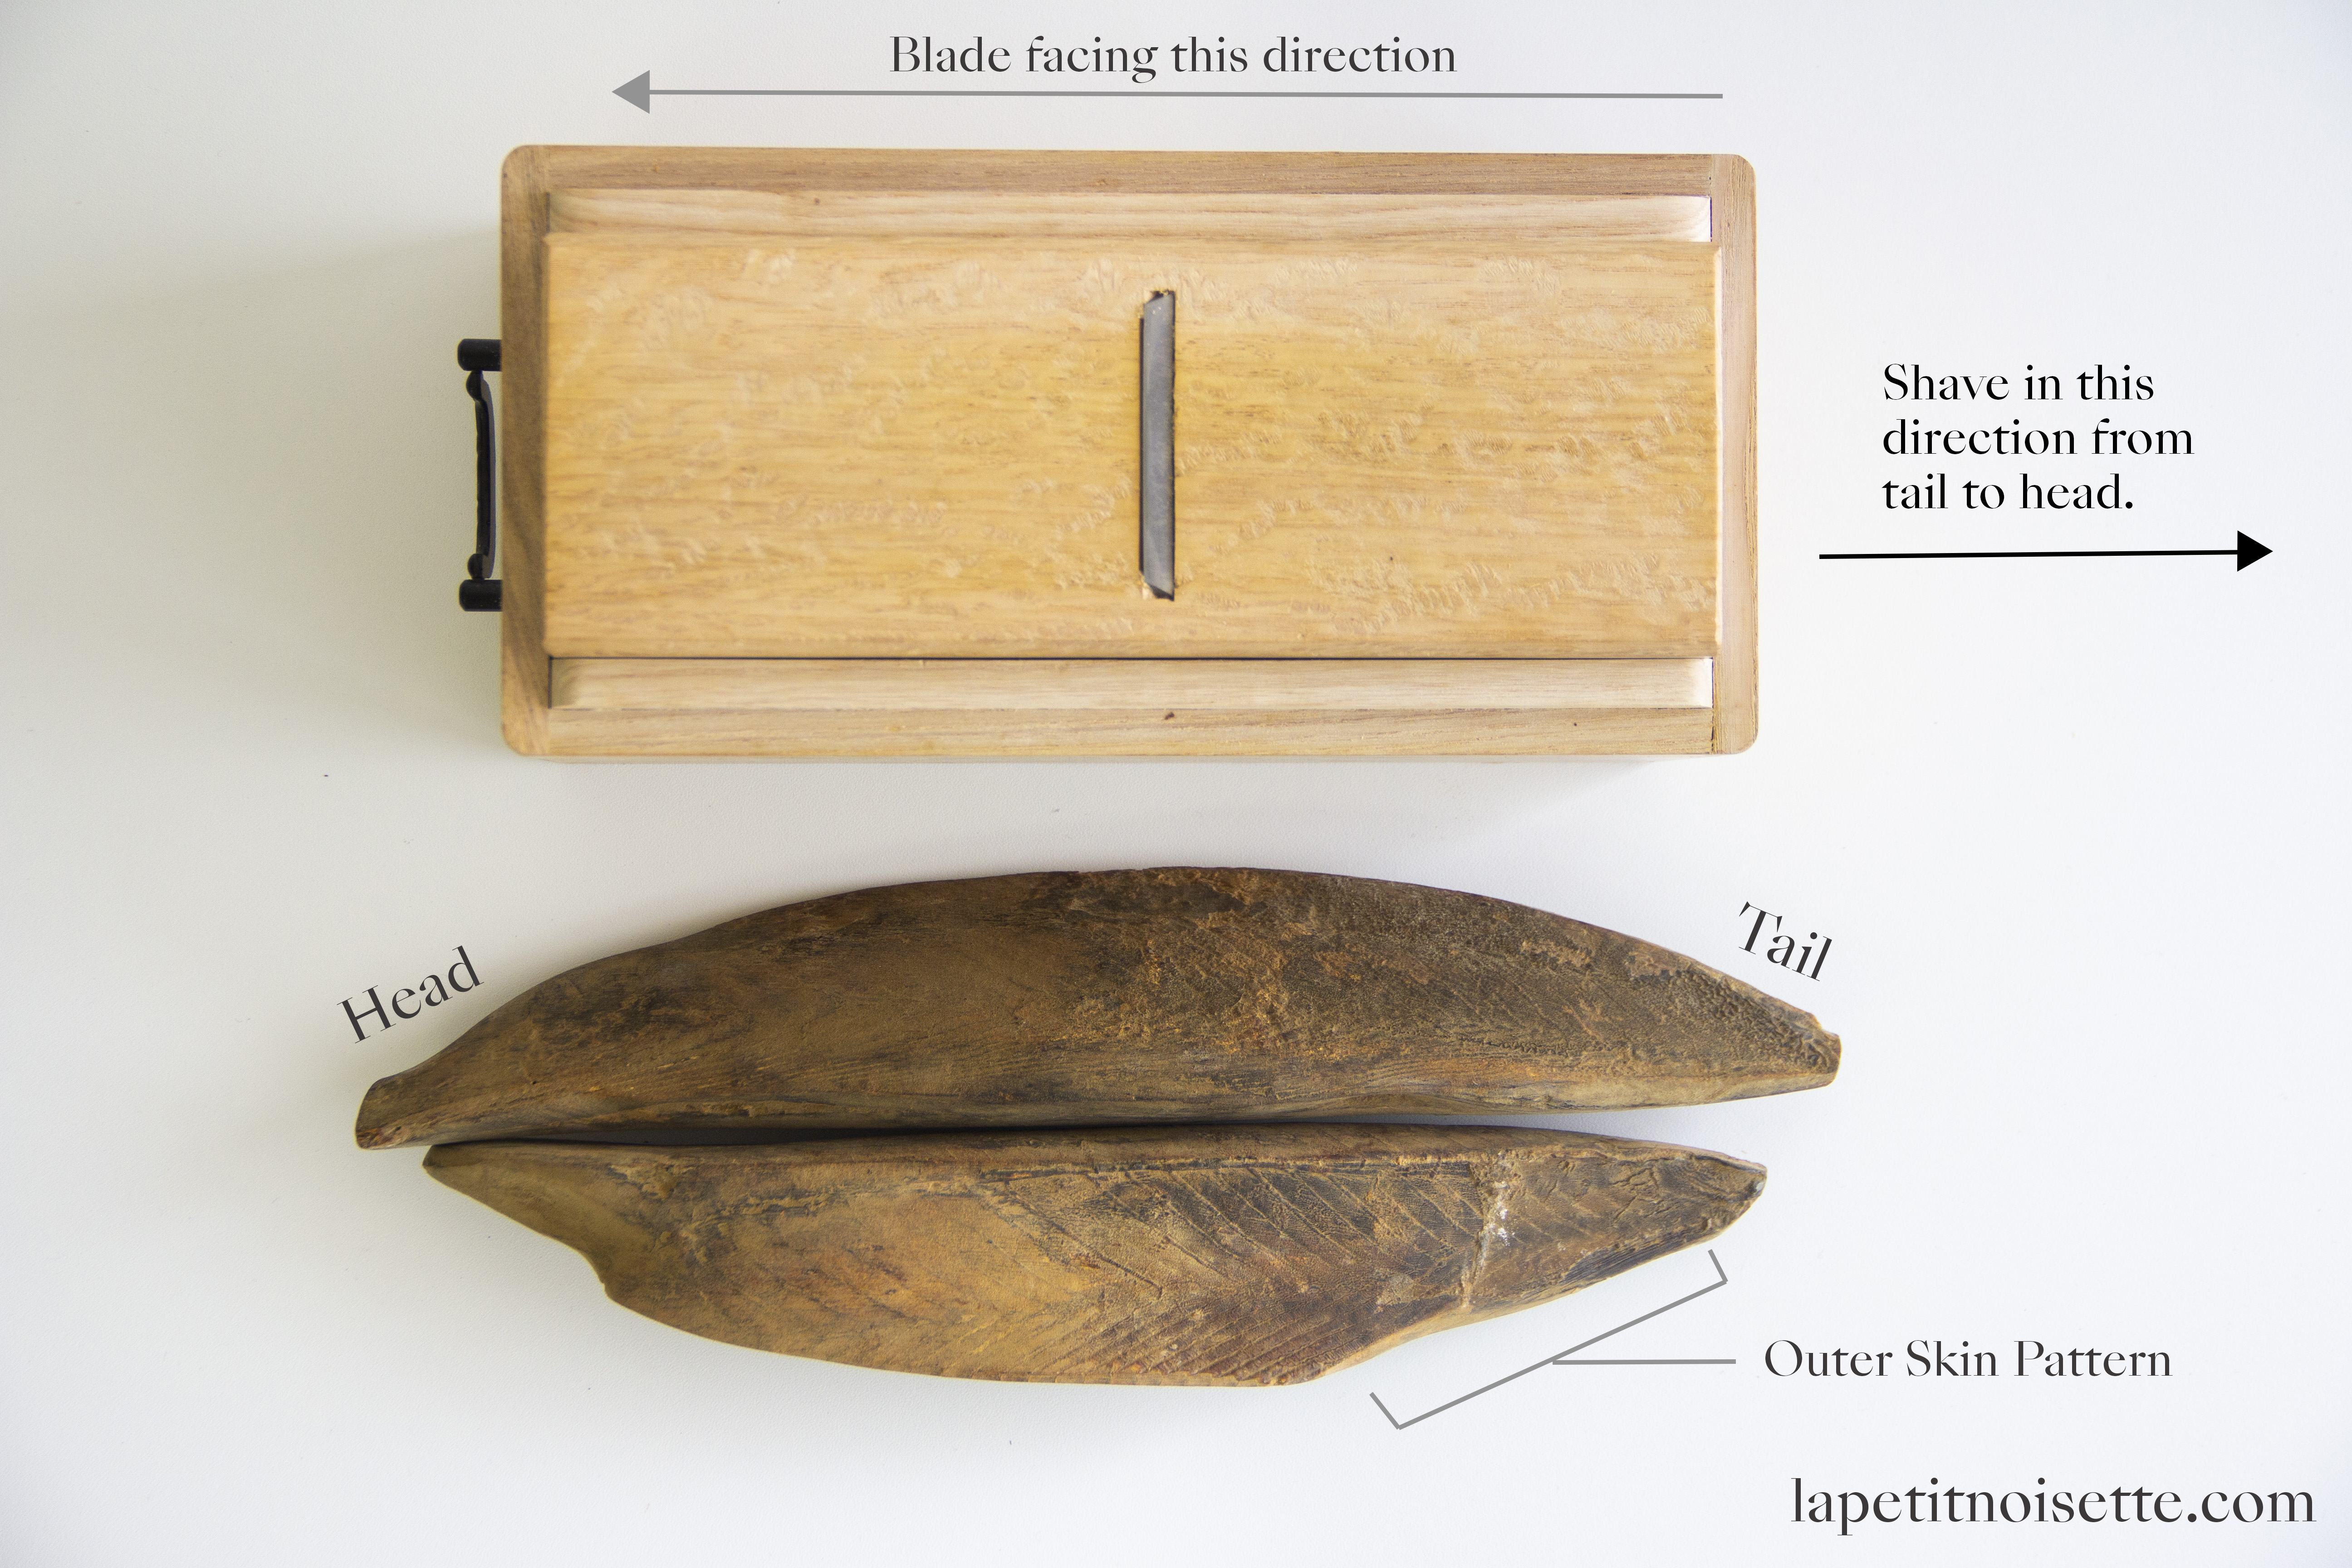
If you shave it from head to tail, you will obtain powder. Please refer carefully to the pictures for determining the direction of shaving!
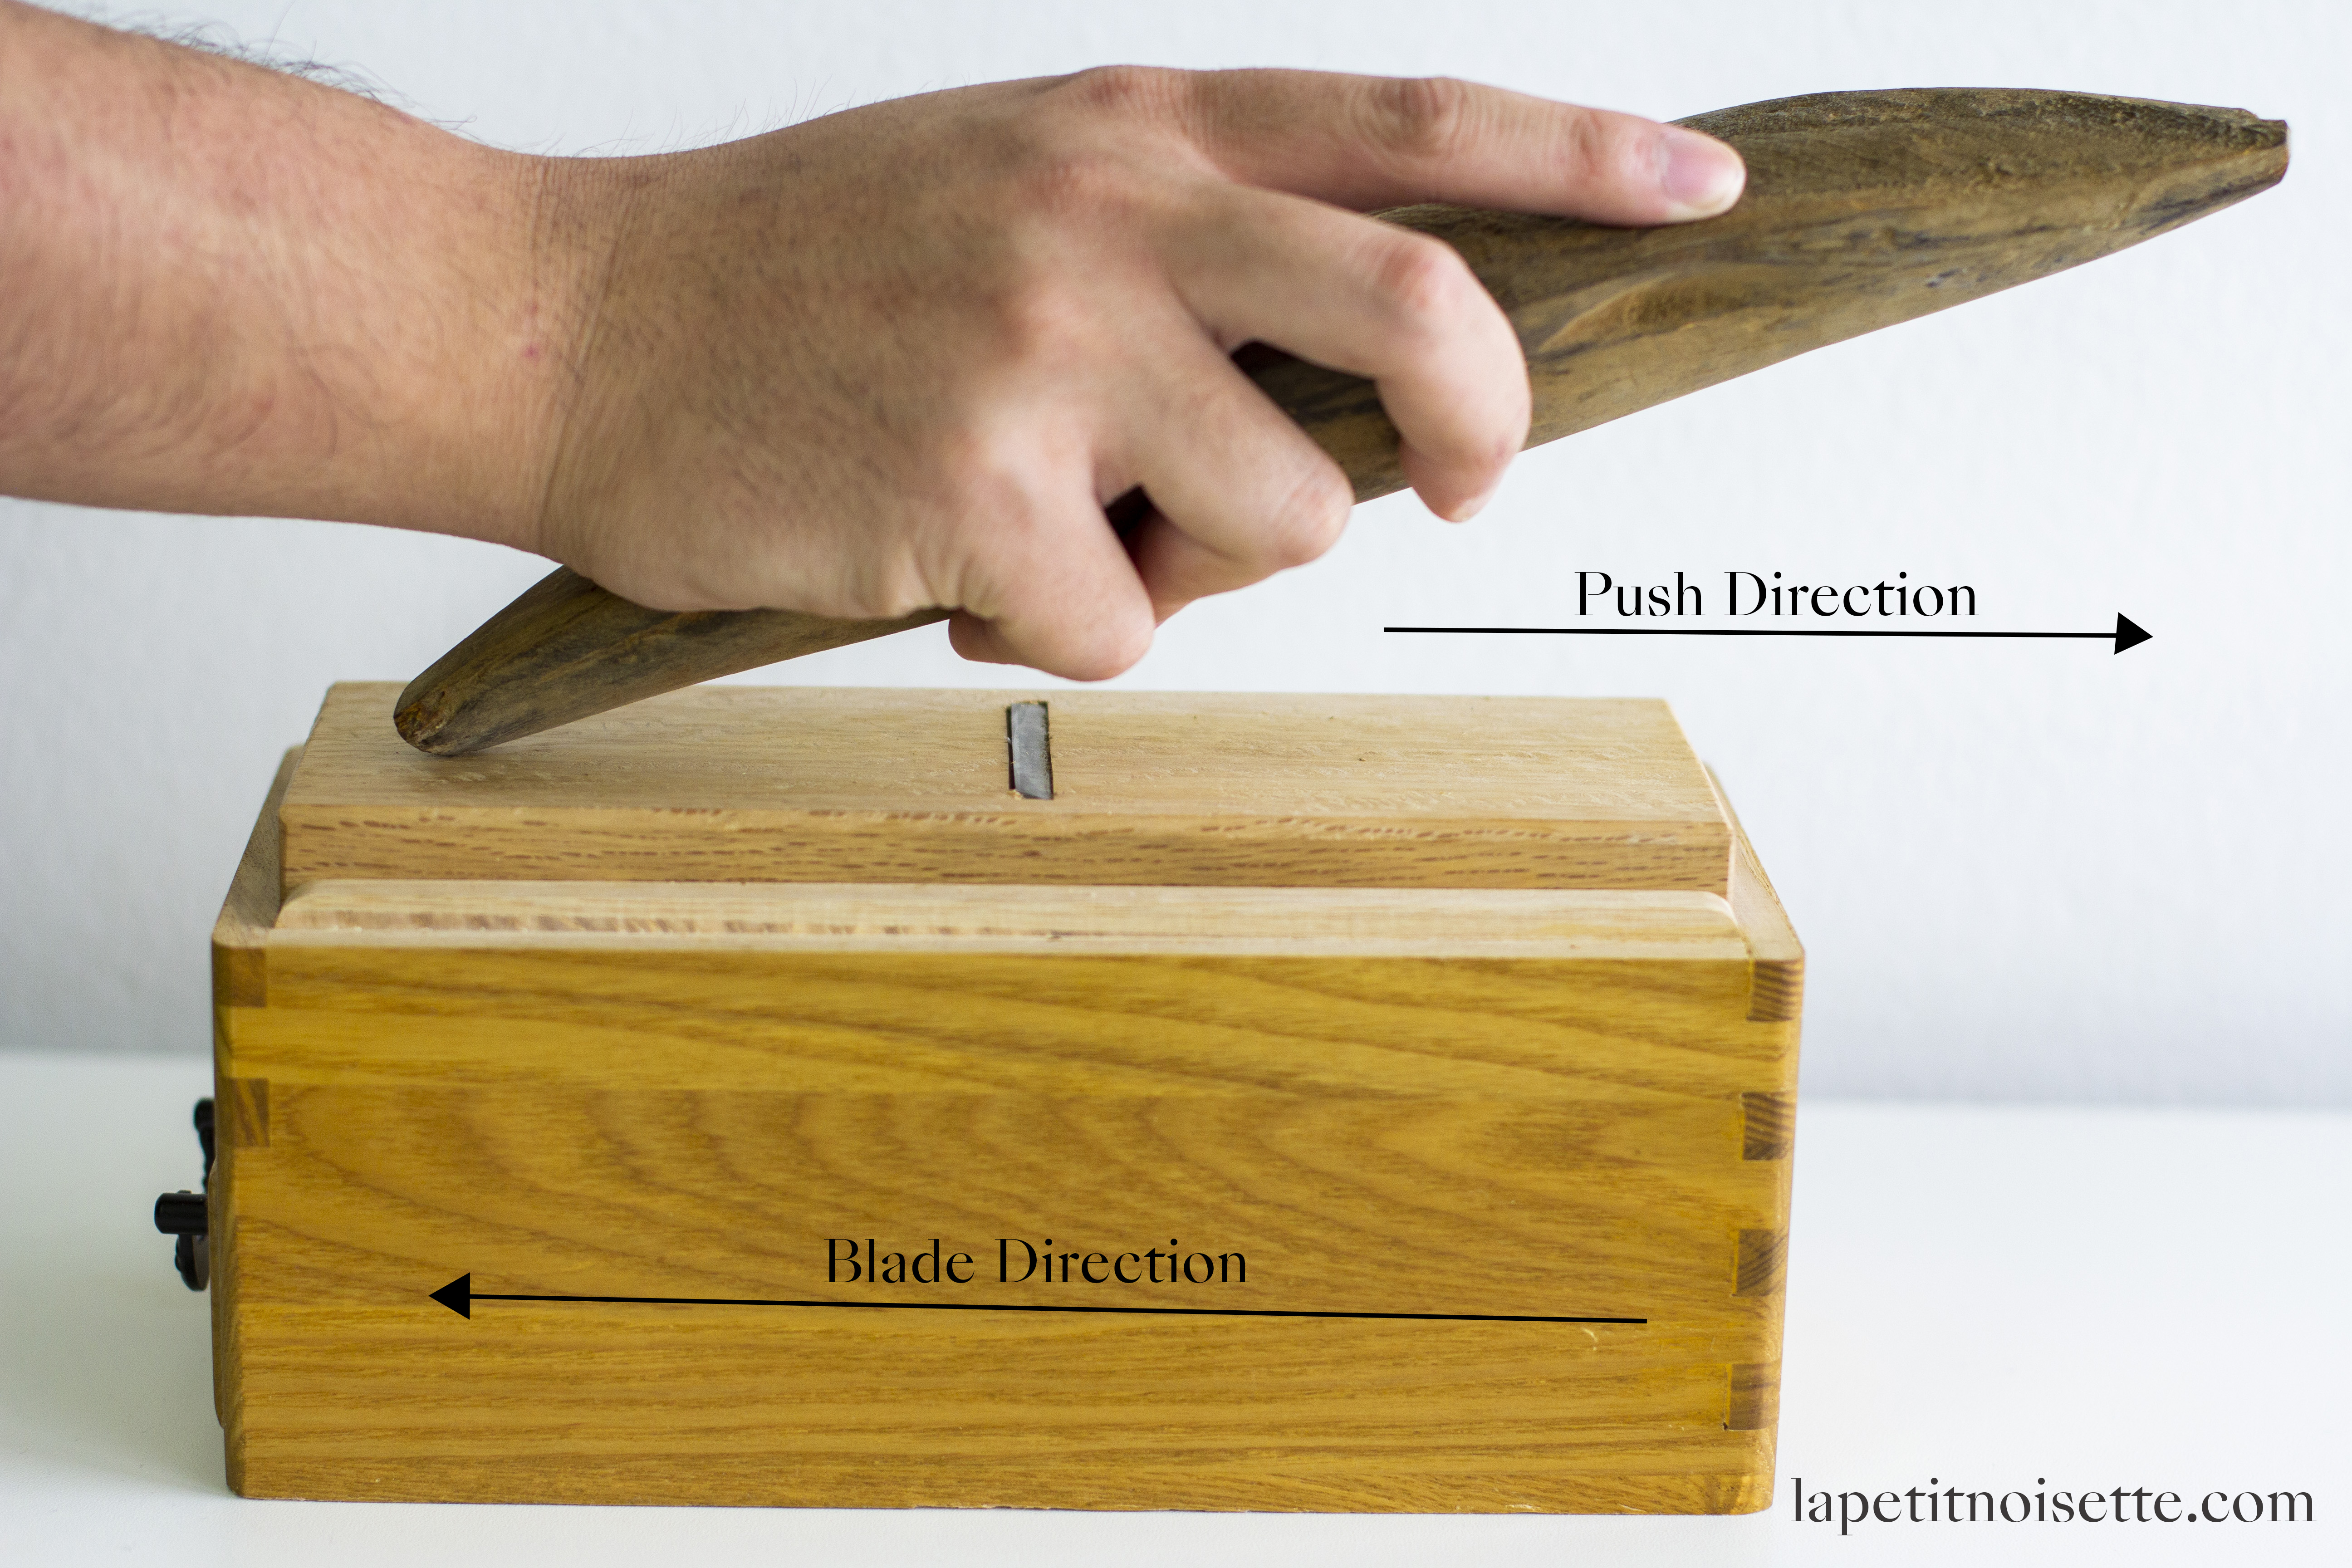
Place your hand three quarters of the way up the katsuobushi, and press the head down on the plane. Push the fillet – tail to head – onto the blade. The outer skin of the tail should be facing upwards (as pictured above). The katsuobushi should be held at a 45° angle to the blade. If you prefer to hold the fillet with two hands, follow the picture below, using the second hand to support the hand holding the fillet.
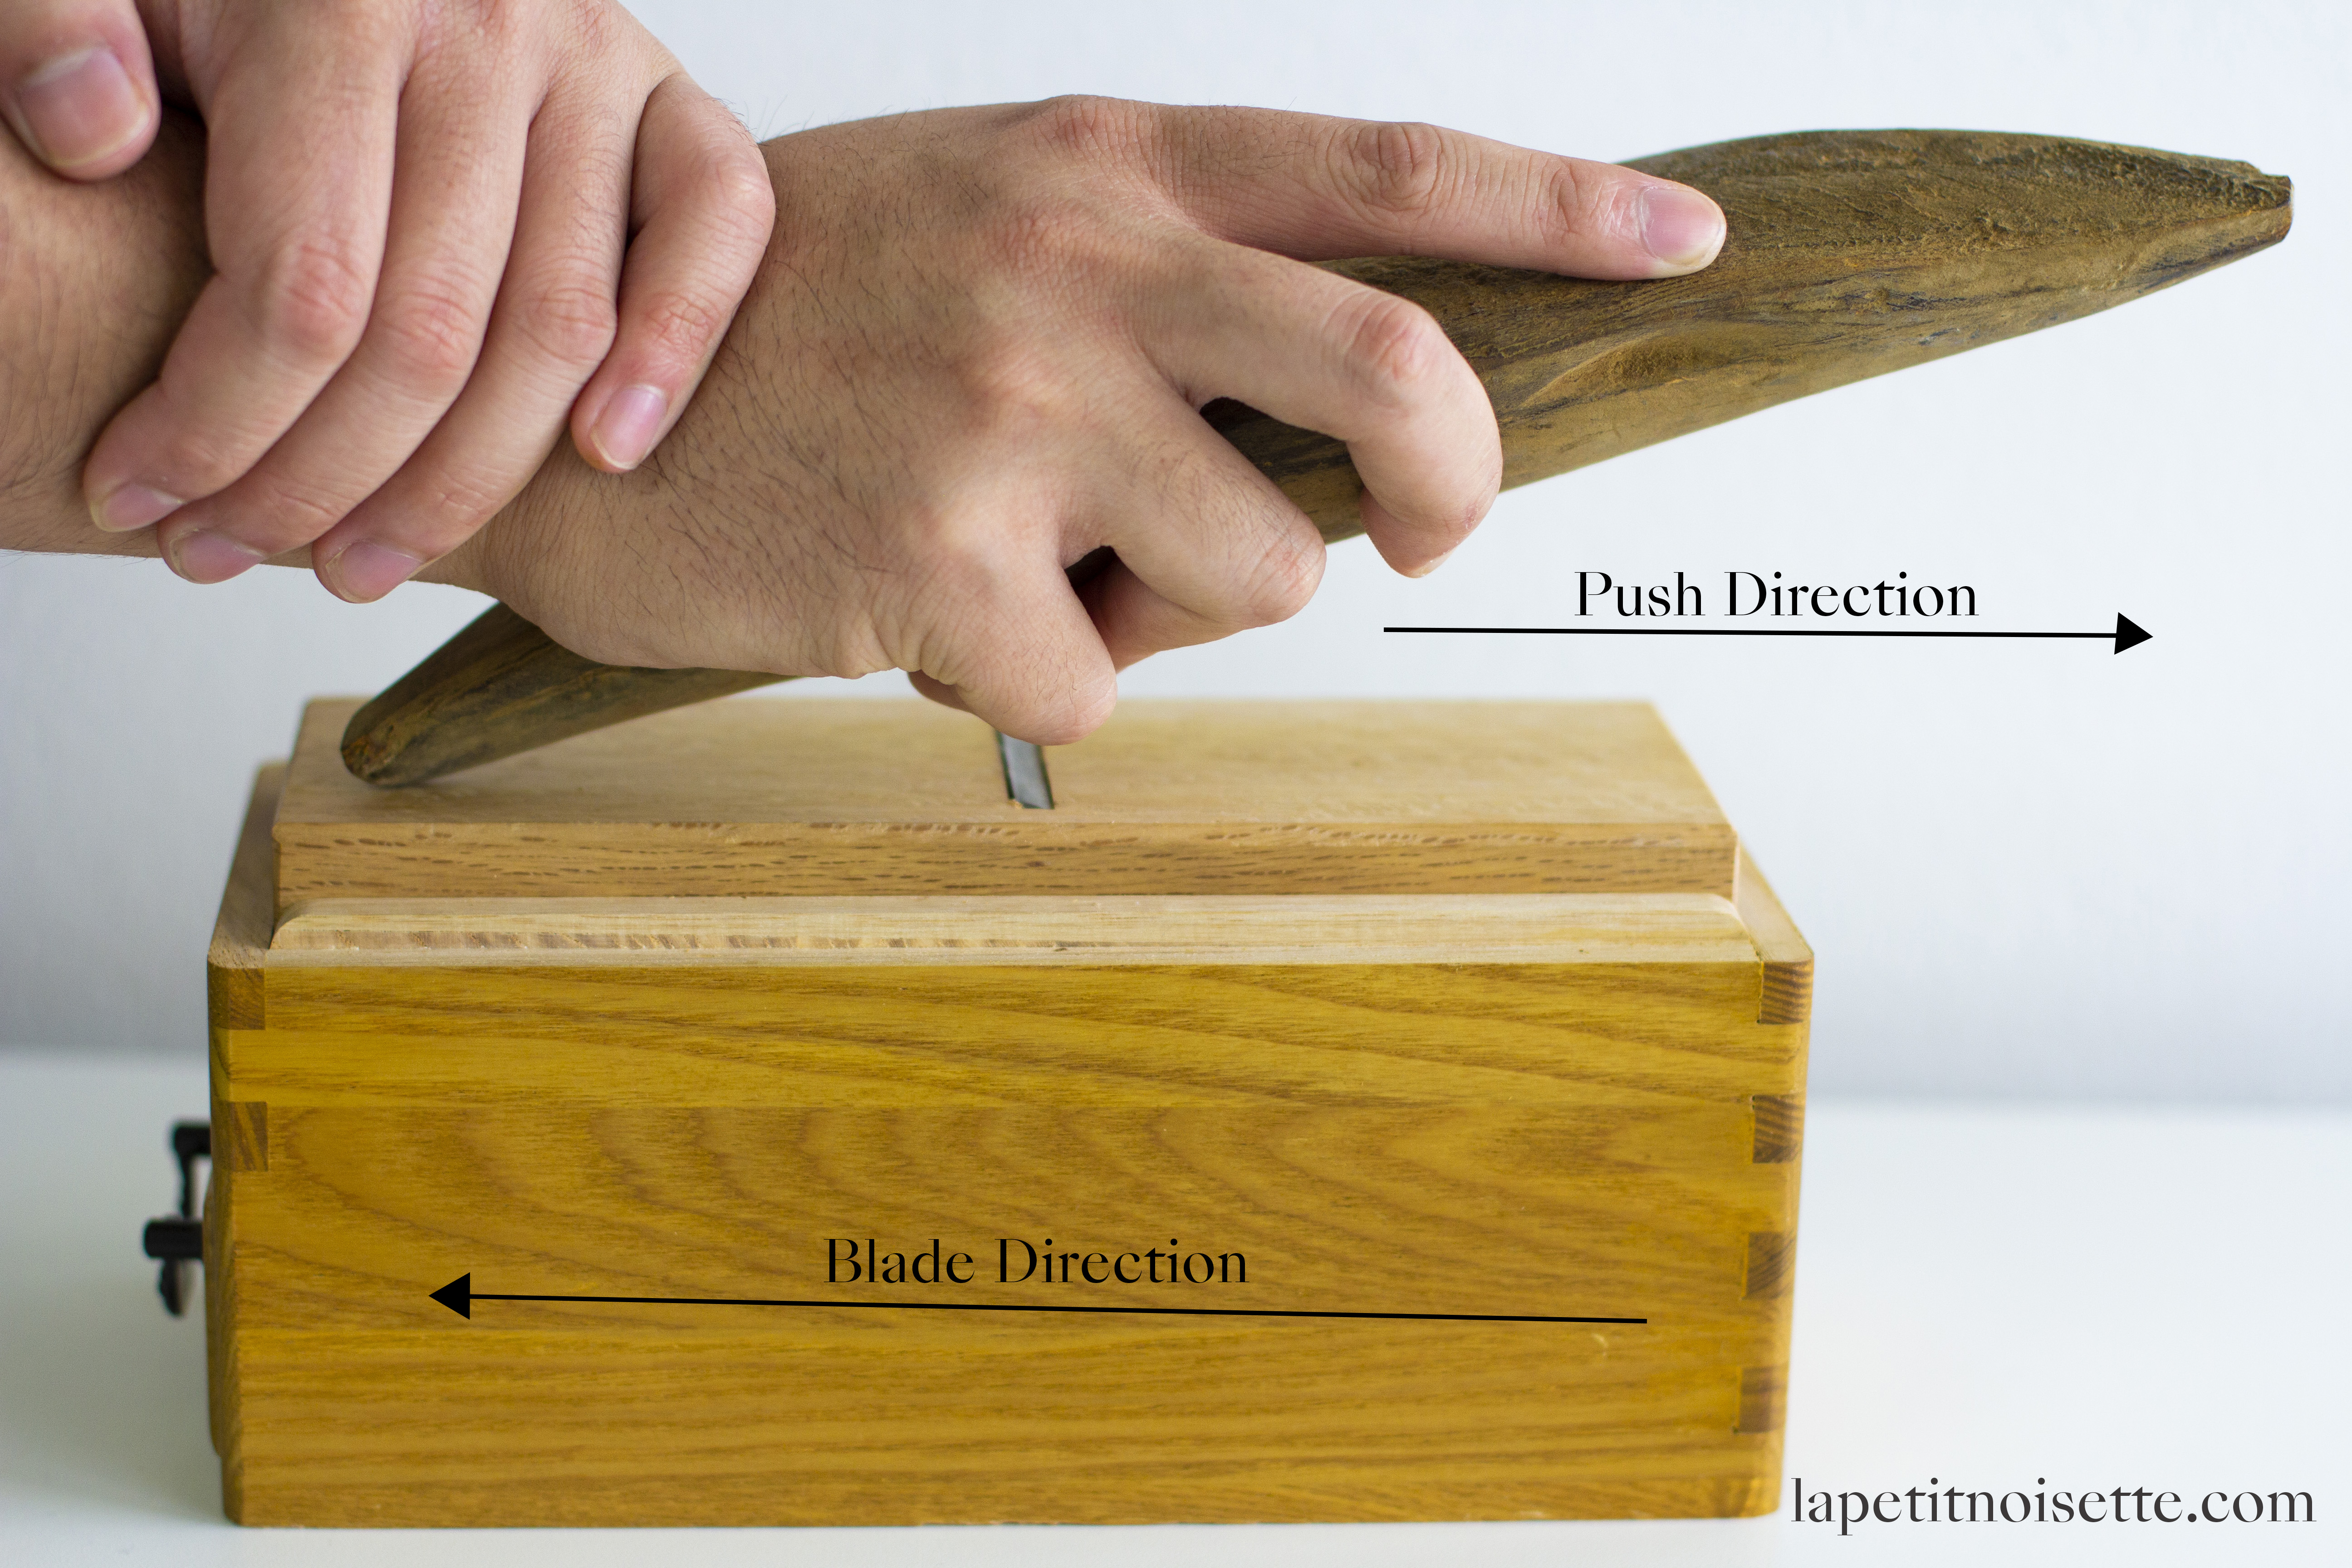
It is also possible to shave the katsuobushi by pulling against the blade but just remember to turn the blade and katsuobushi around, so that you are still shaving from tail to head.
Below are two illustrations on how the Katsuobushi flakes would ultimately be shaved:
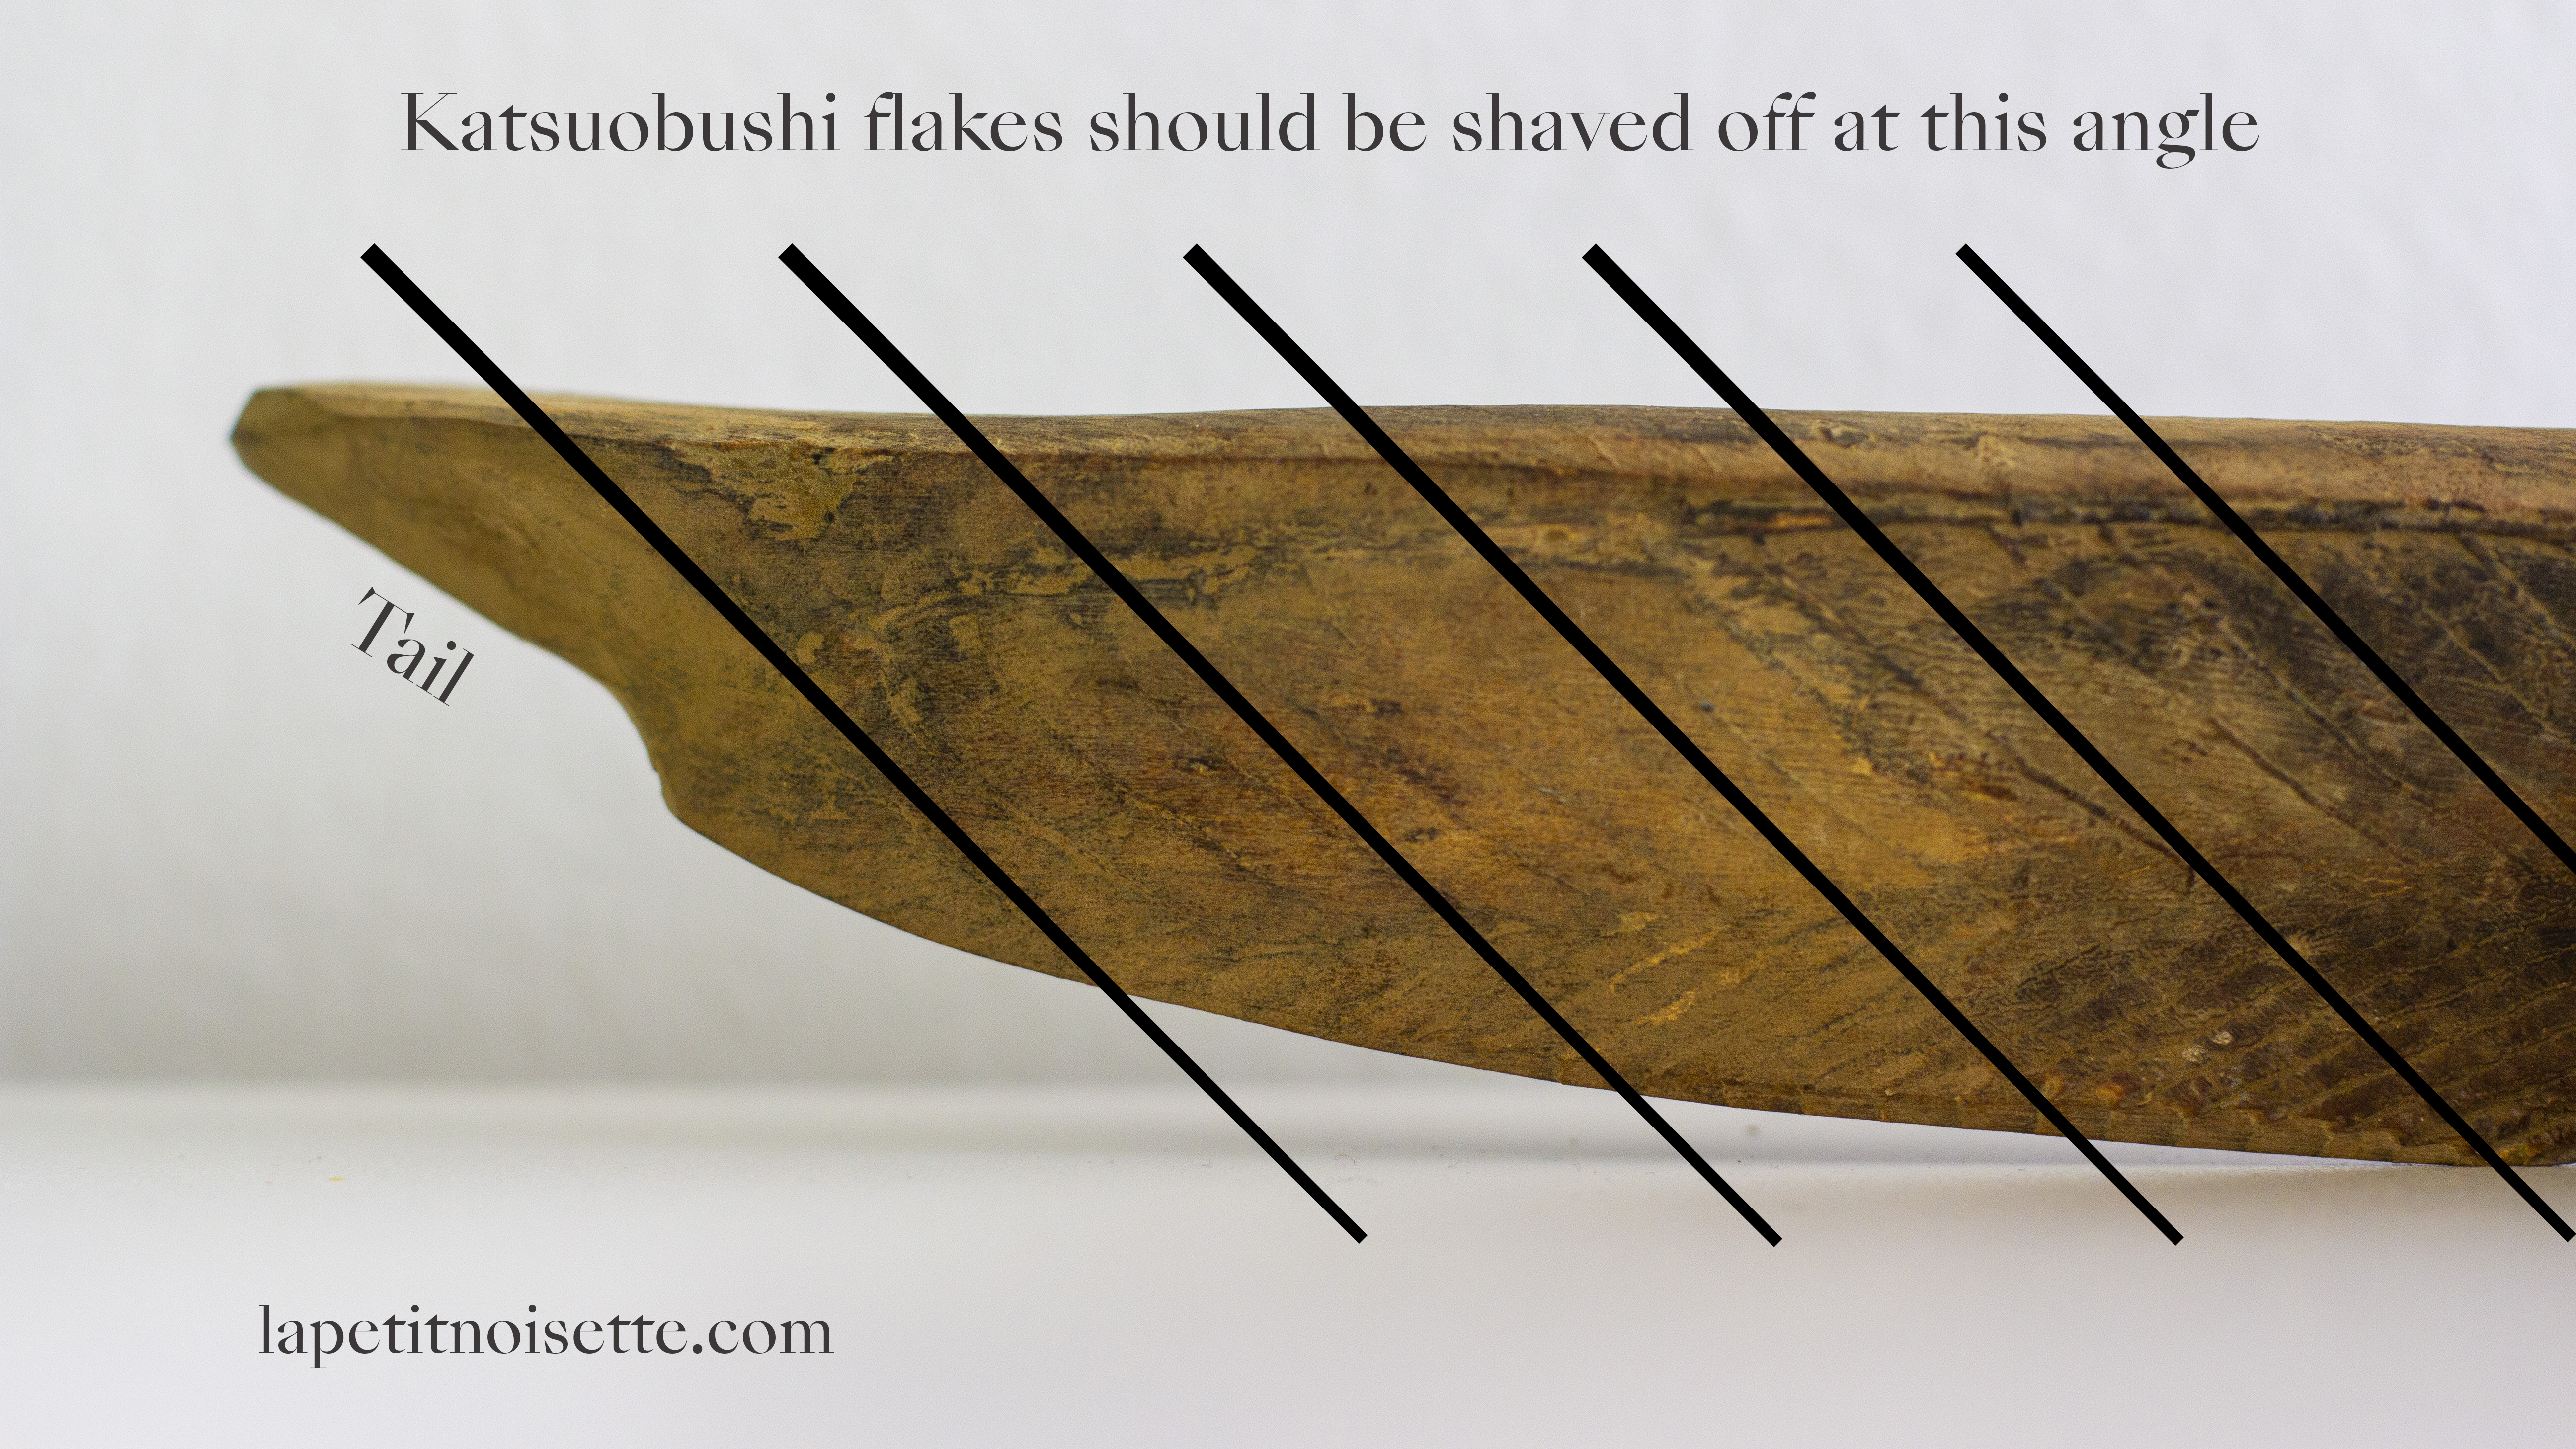
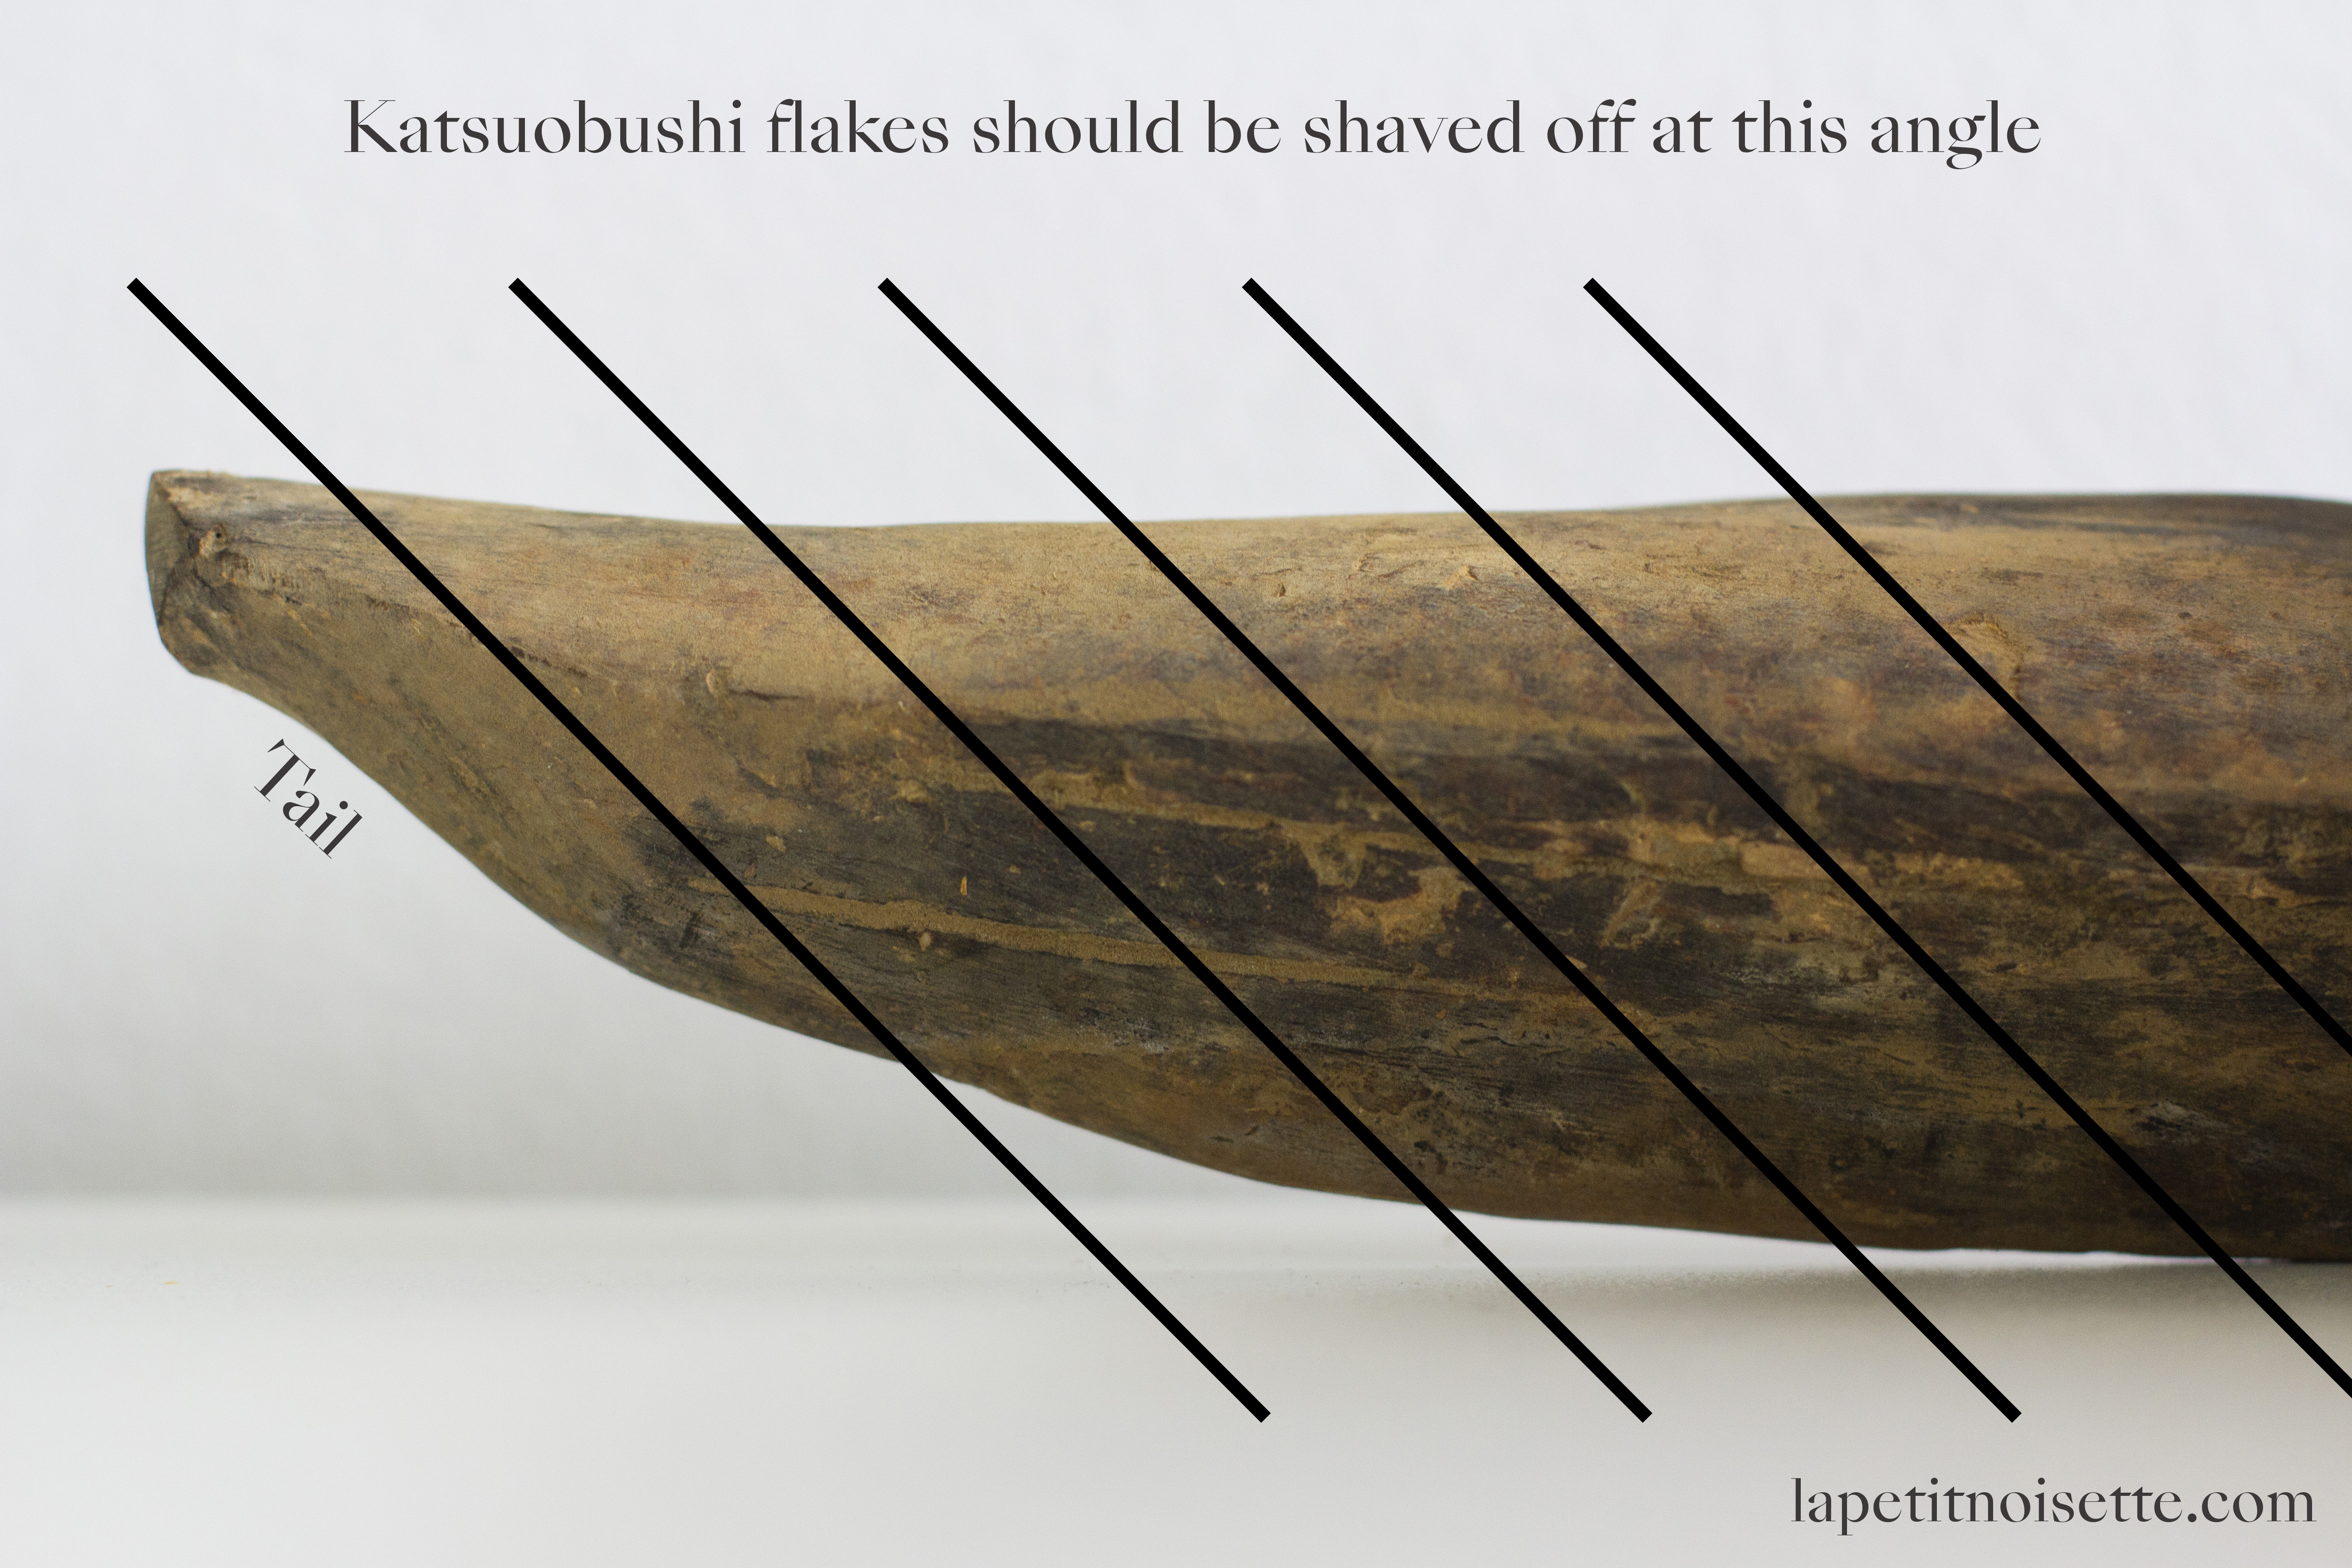
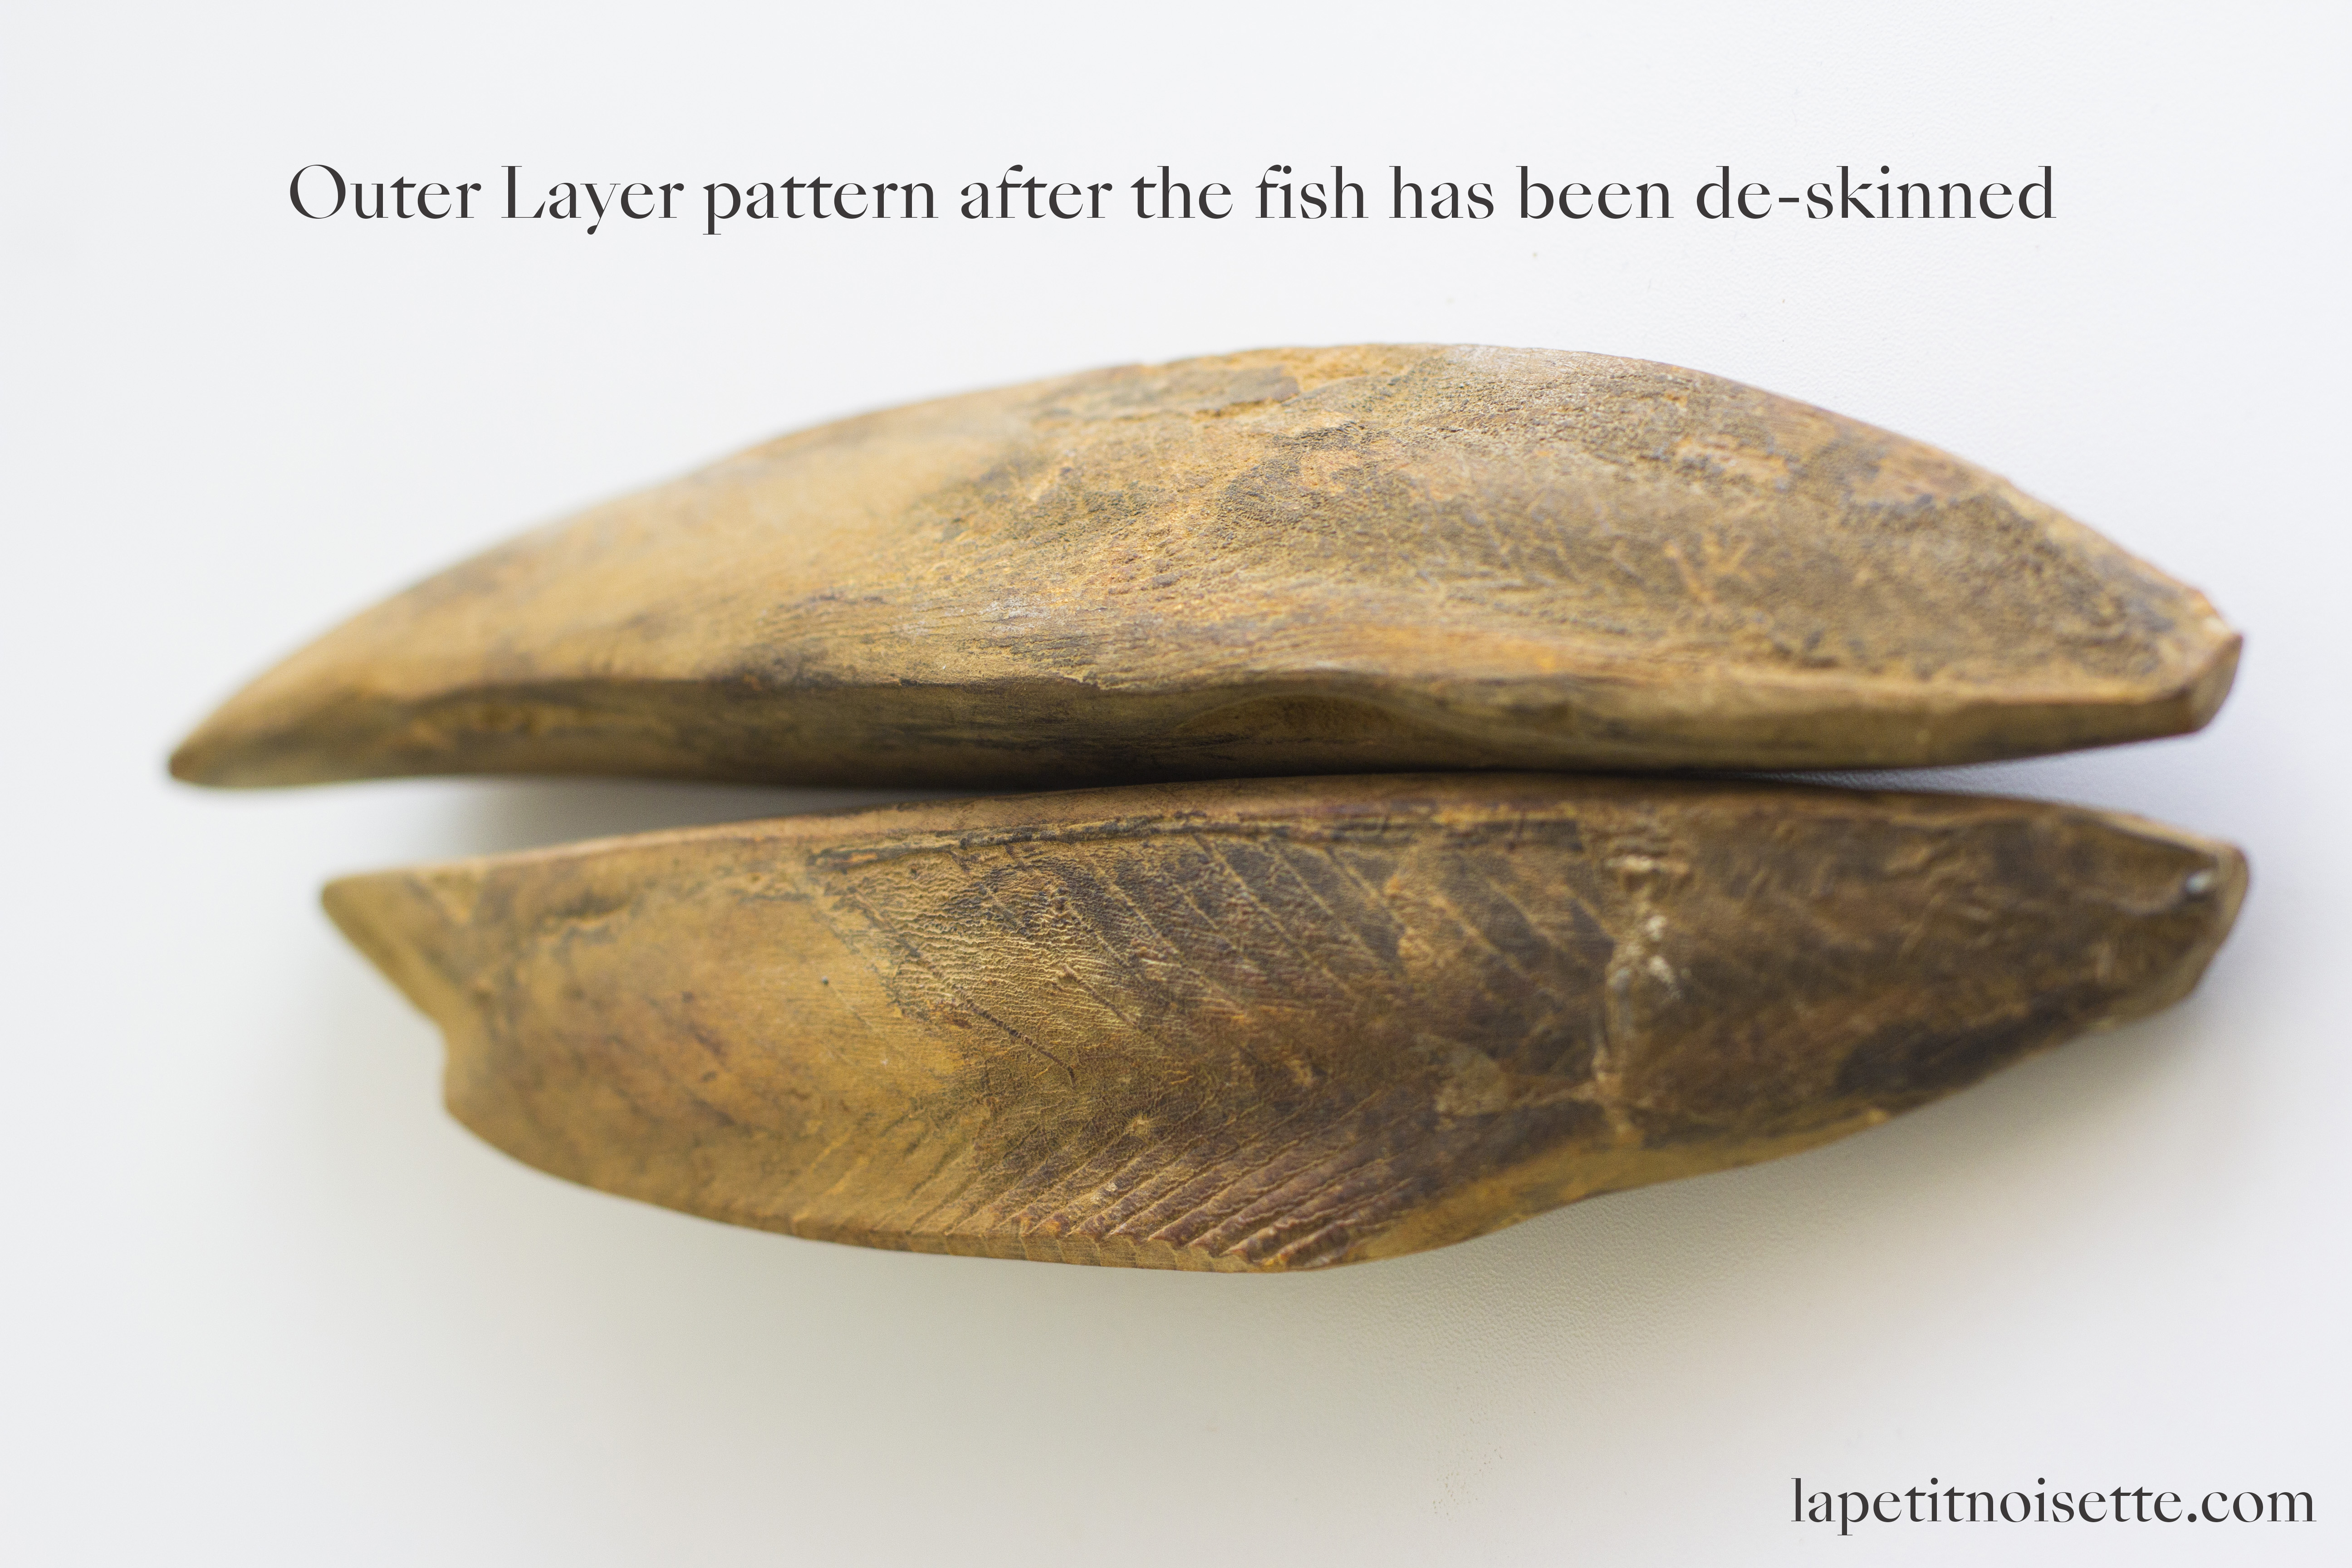
The outer skin of the fish – identifiable by the wavy pattern it leaves – should be facing upwards and be in contact with the palm of your hand when you shave the katsuobushi.
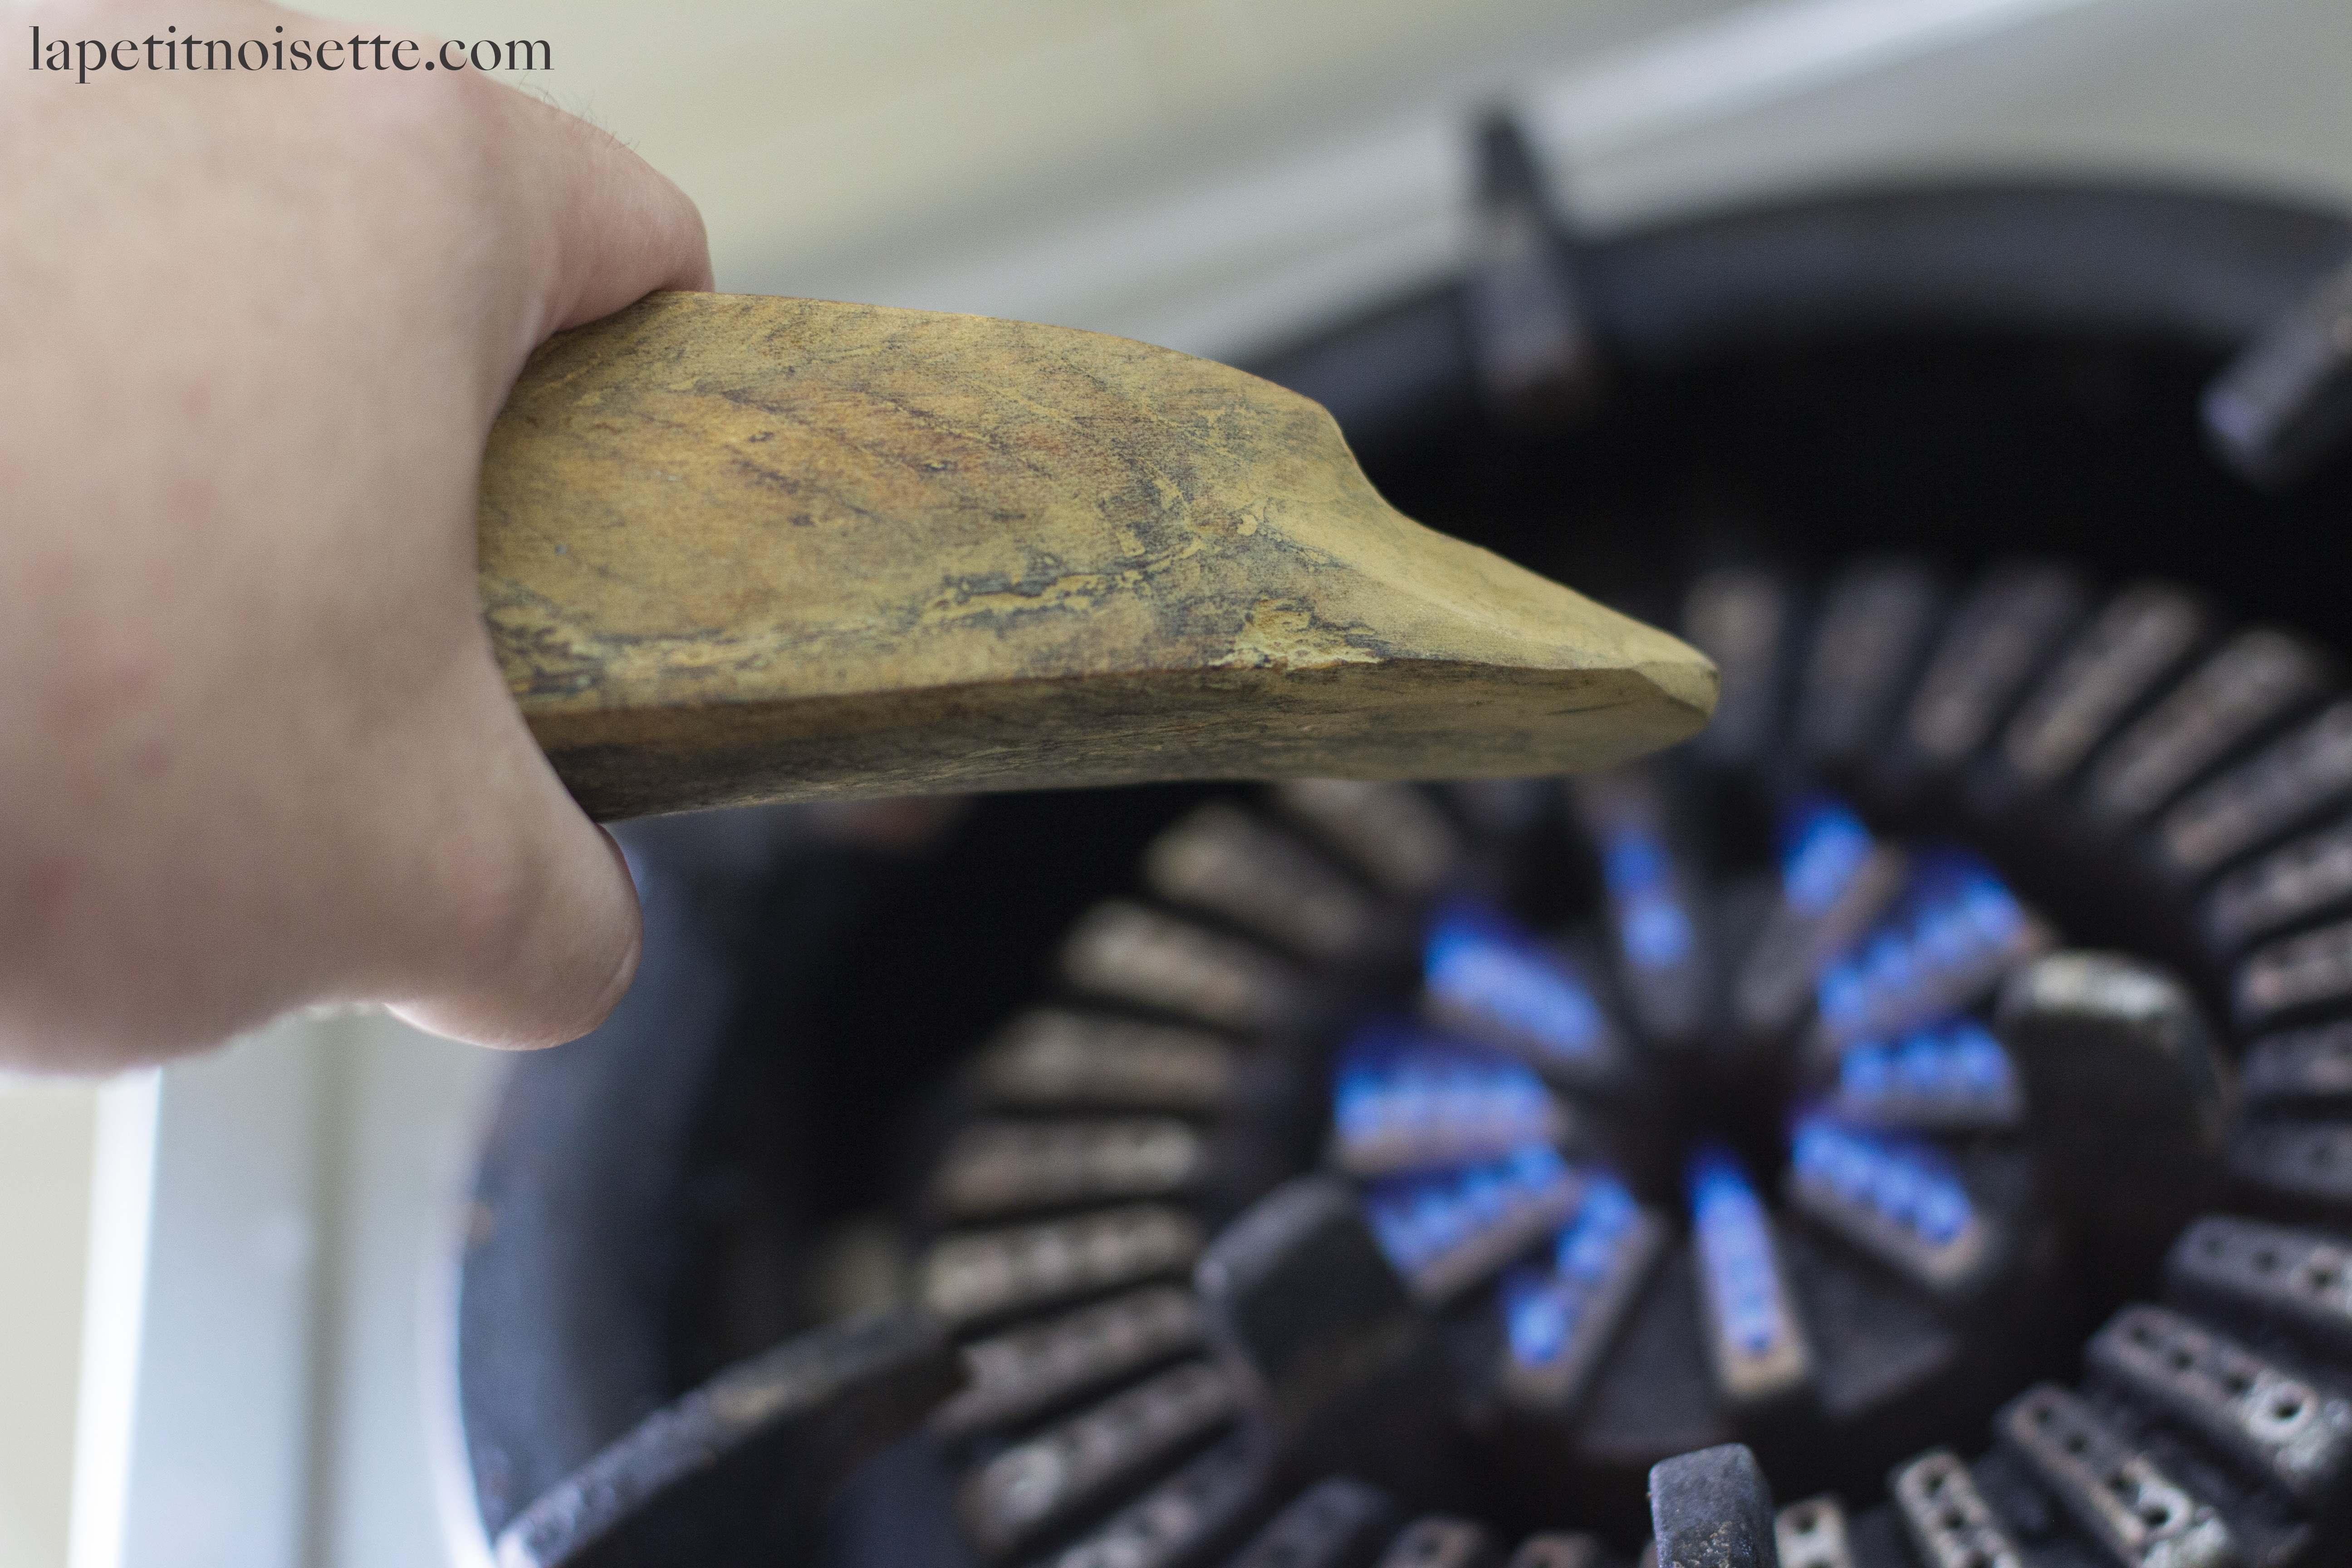
During winter, I would recommend very slightly warming the tip of the Katsuobushi you intend to shave over the stove (not the entire block, just the end you want to shave). It is easier to shave katsuobushi if it is at normal room temperature, as the chill can cause the block to harden.
Storing the Fillet and Equipment
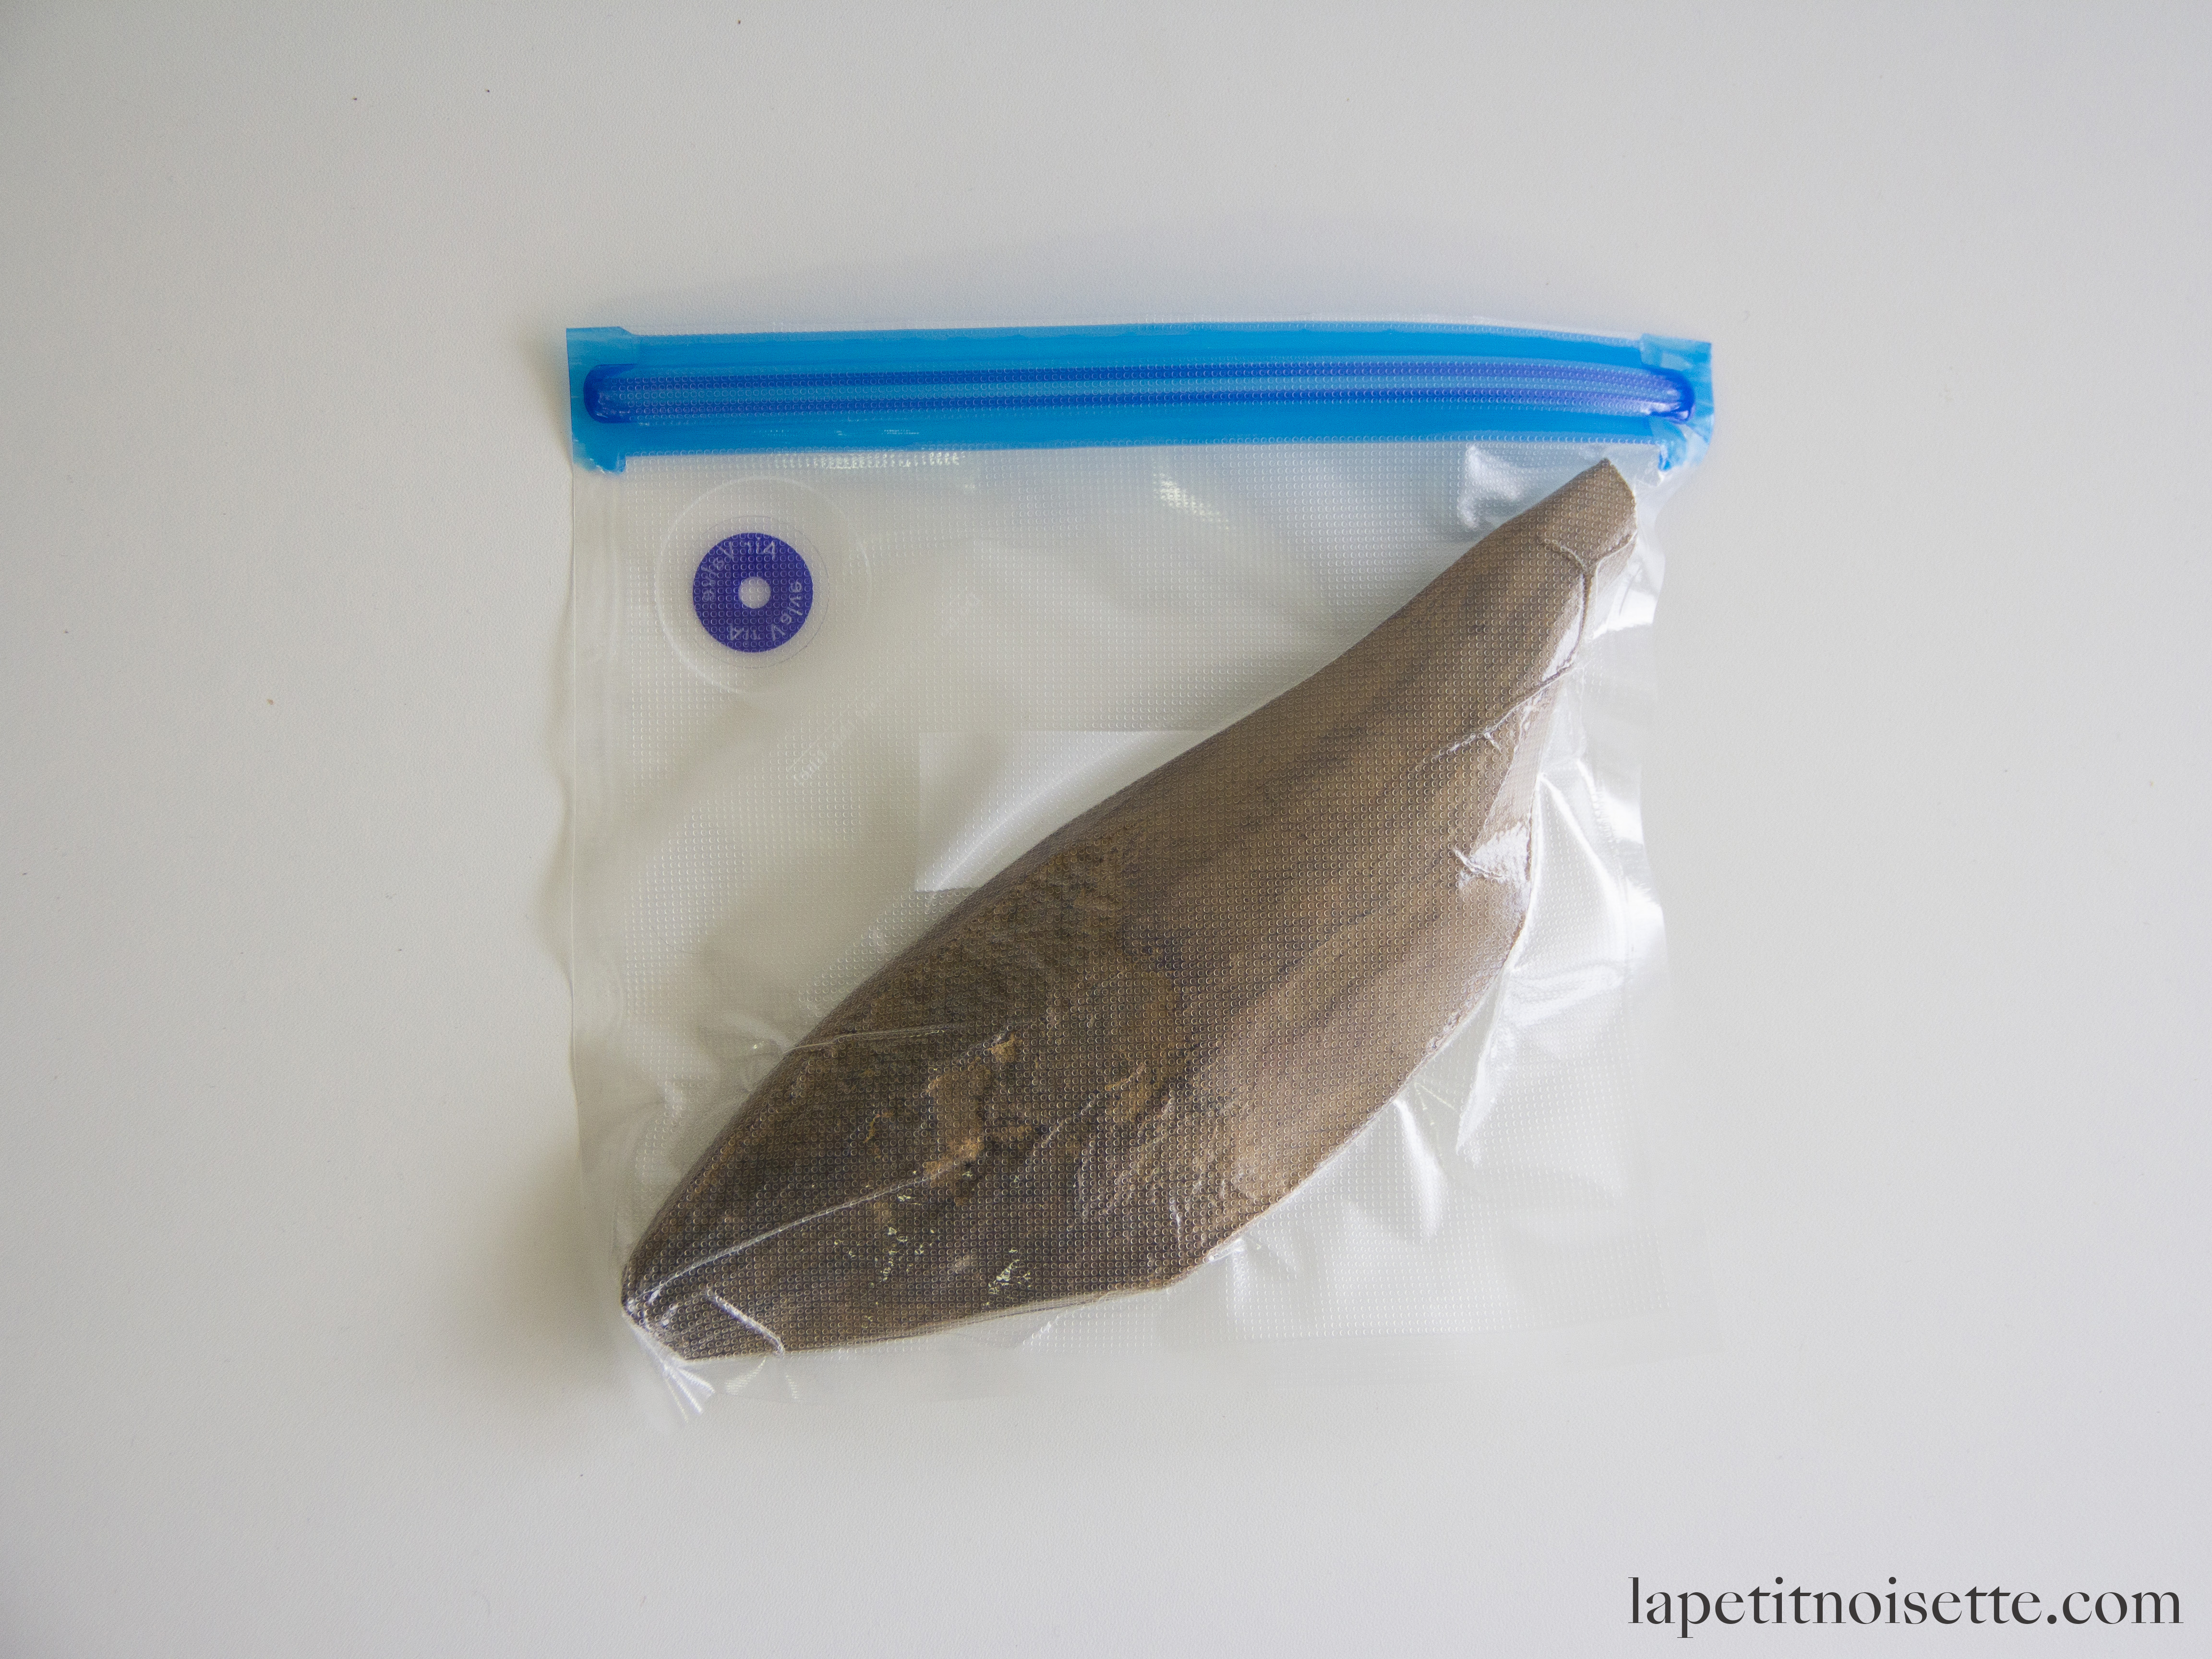
Once you have finished shaving, store the katsuobushi in the fridge wrapped tightly in cling film or in a Ziploc bag with all the air pressed out of them. If placed in the fridge without any protection, instead of flaking nicely when you try to shave it, you’ll just end up with powder, as the fridge will dry out the katsuobushi.
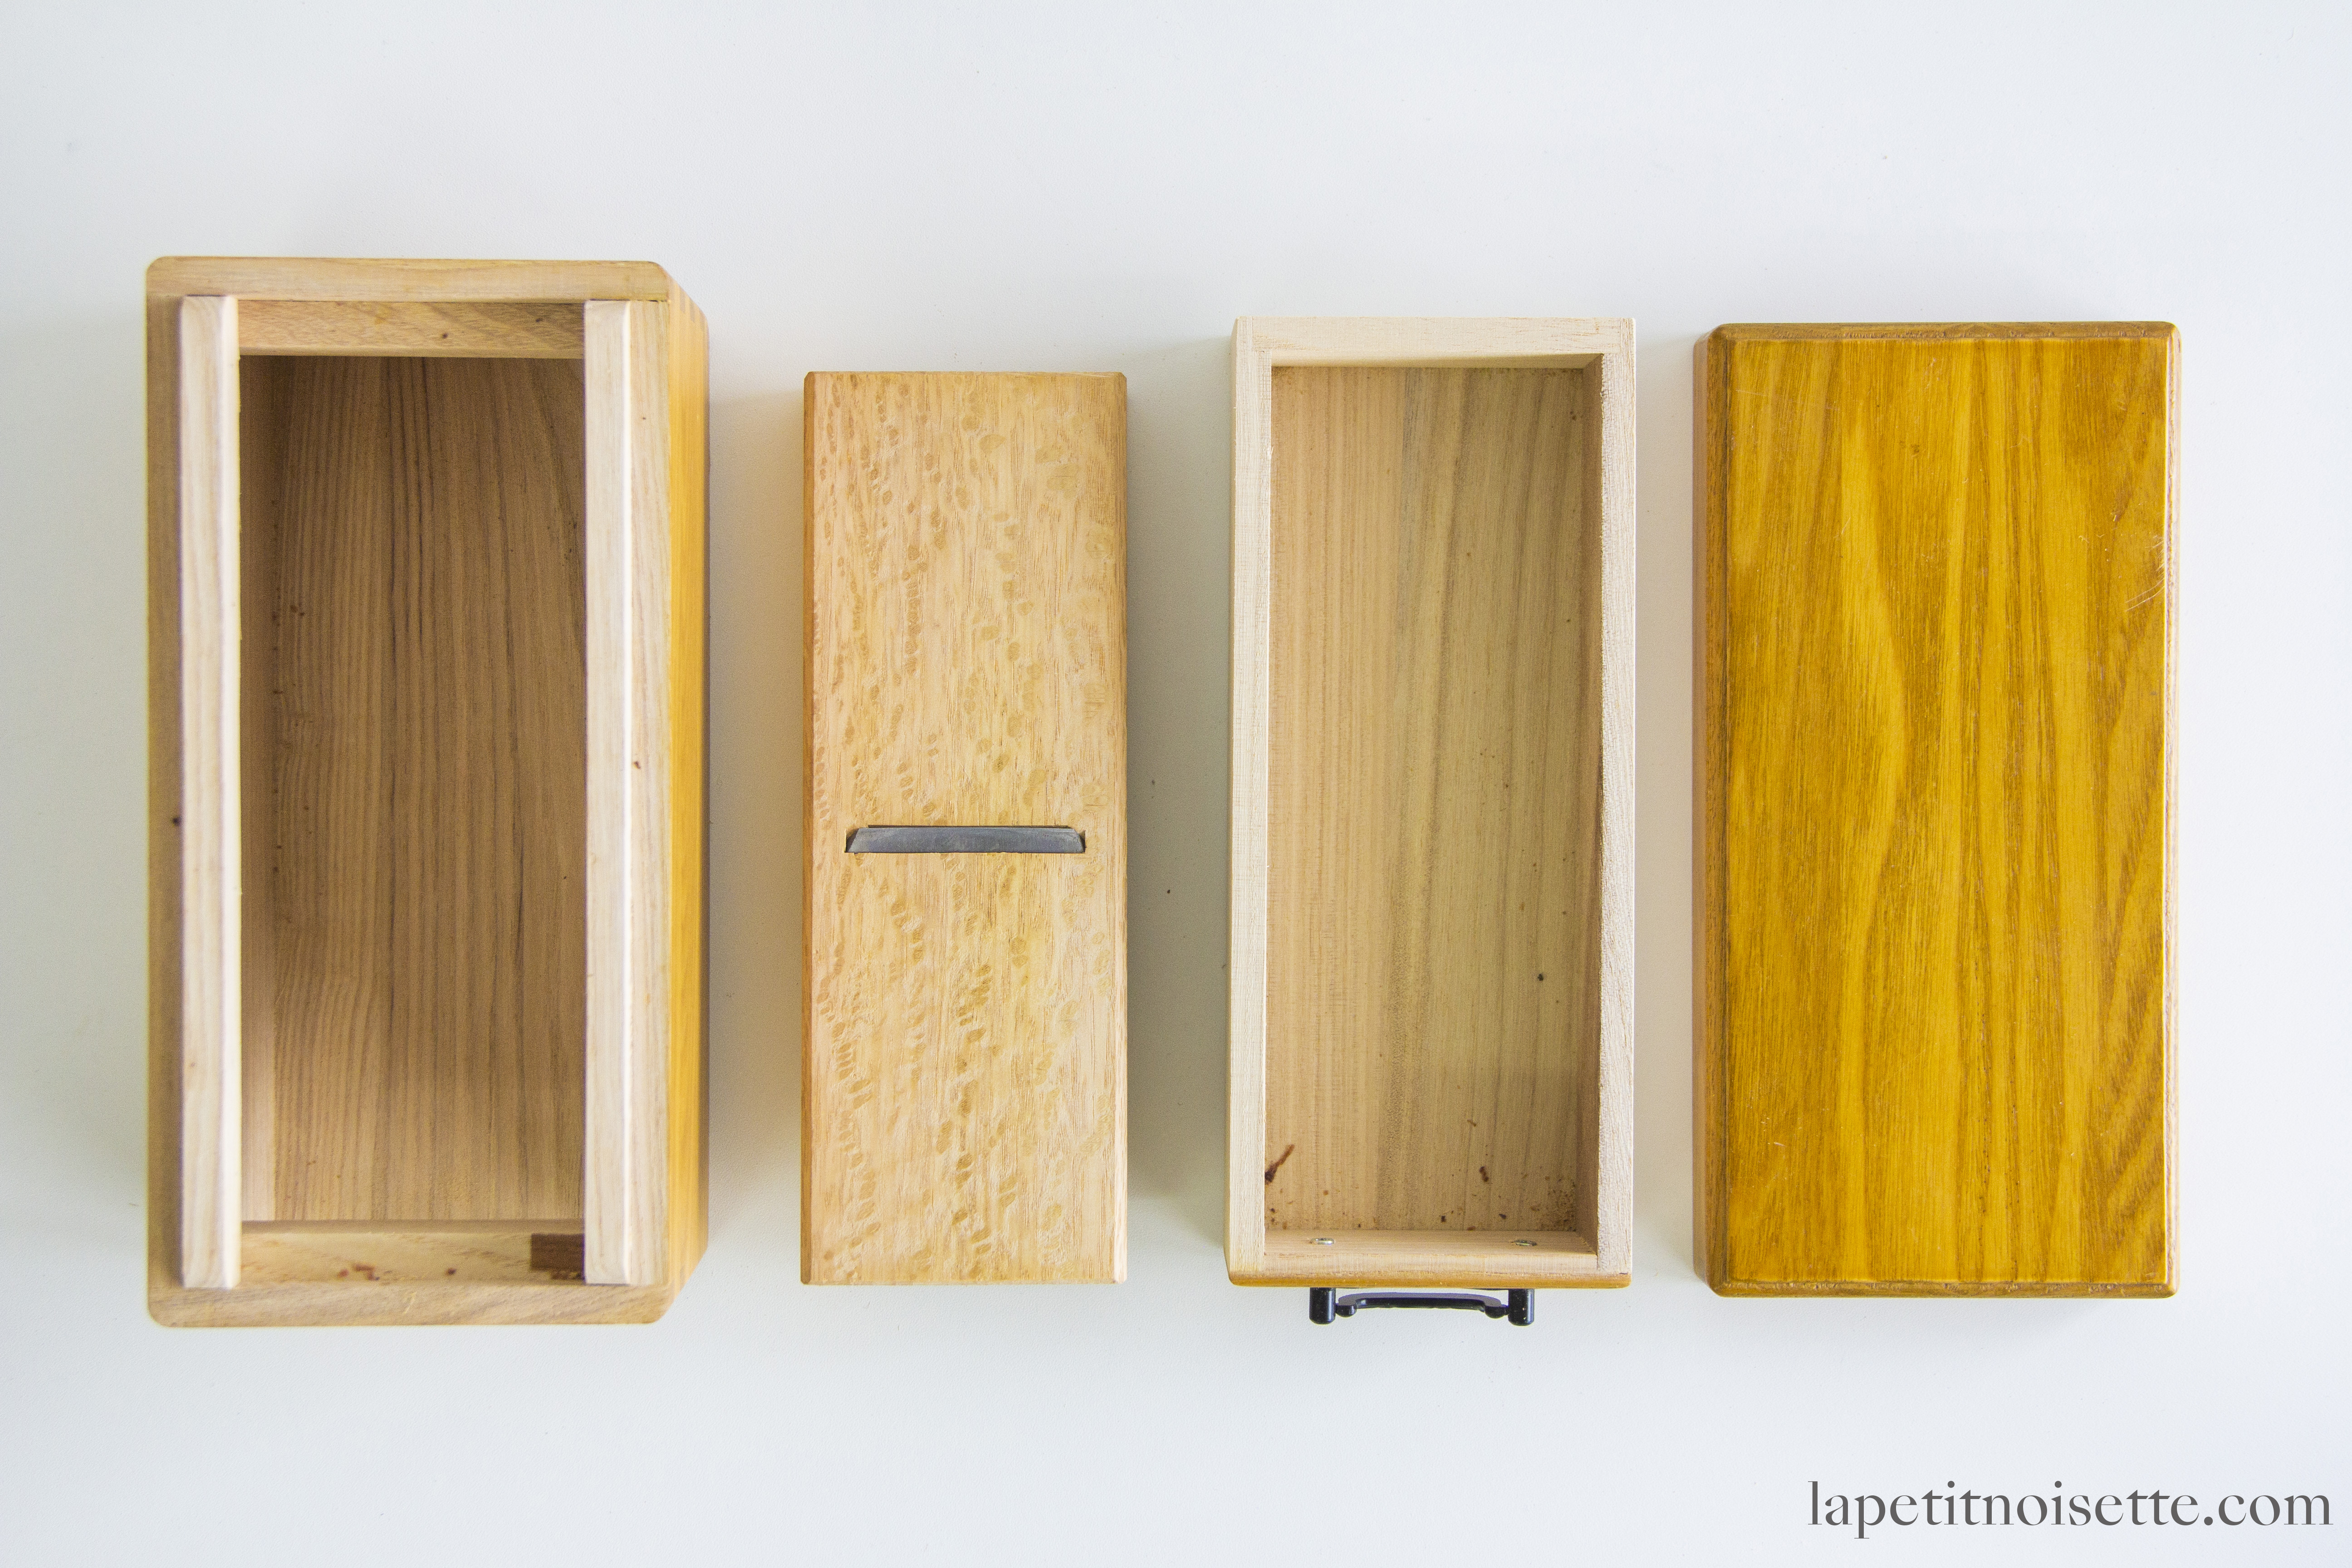
To clean the kezuriki, use a dry brush to brush off all the excess powder from the blade and box. Then, take a clean dry cloth and give the kezuriki a wipe down. I wouldn’t recommend using a damp cloth to wipe the plane or box. The wood of the box goes moldy very easily, and you risk transferring moisture to the fillet. The blade is – usually – made from carbon steel and so easily rusts when in contact with water.
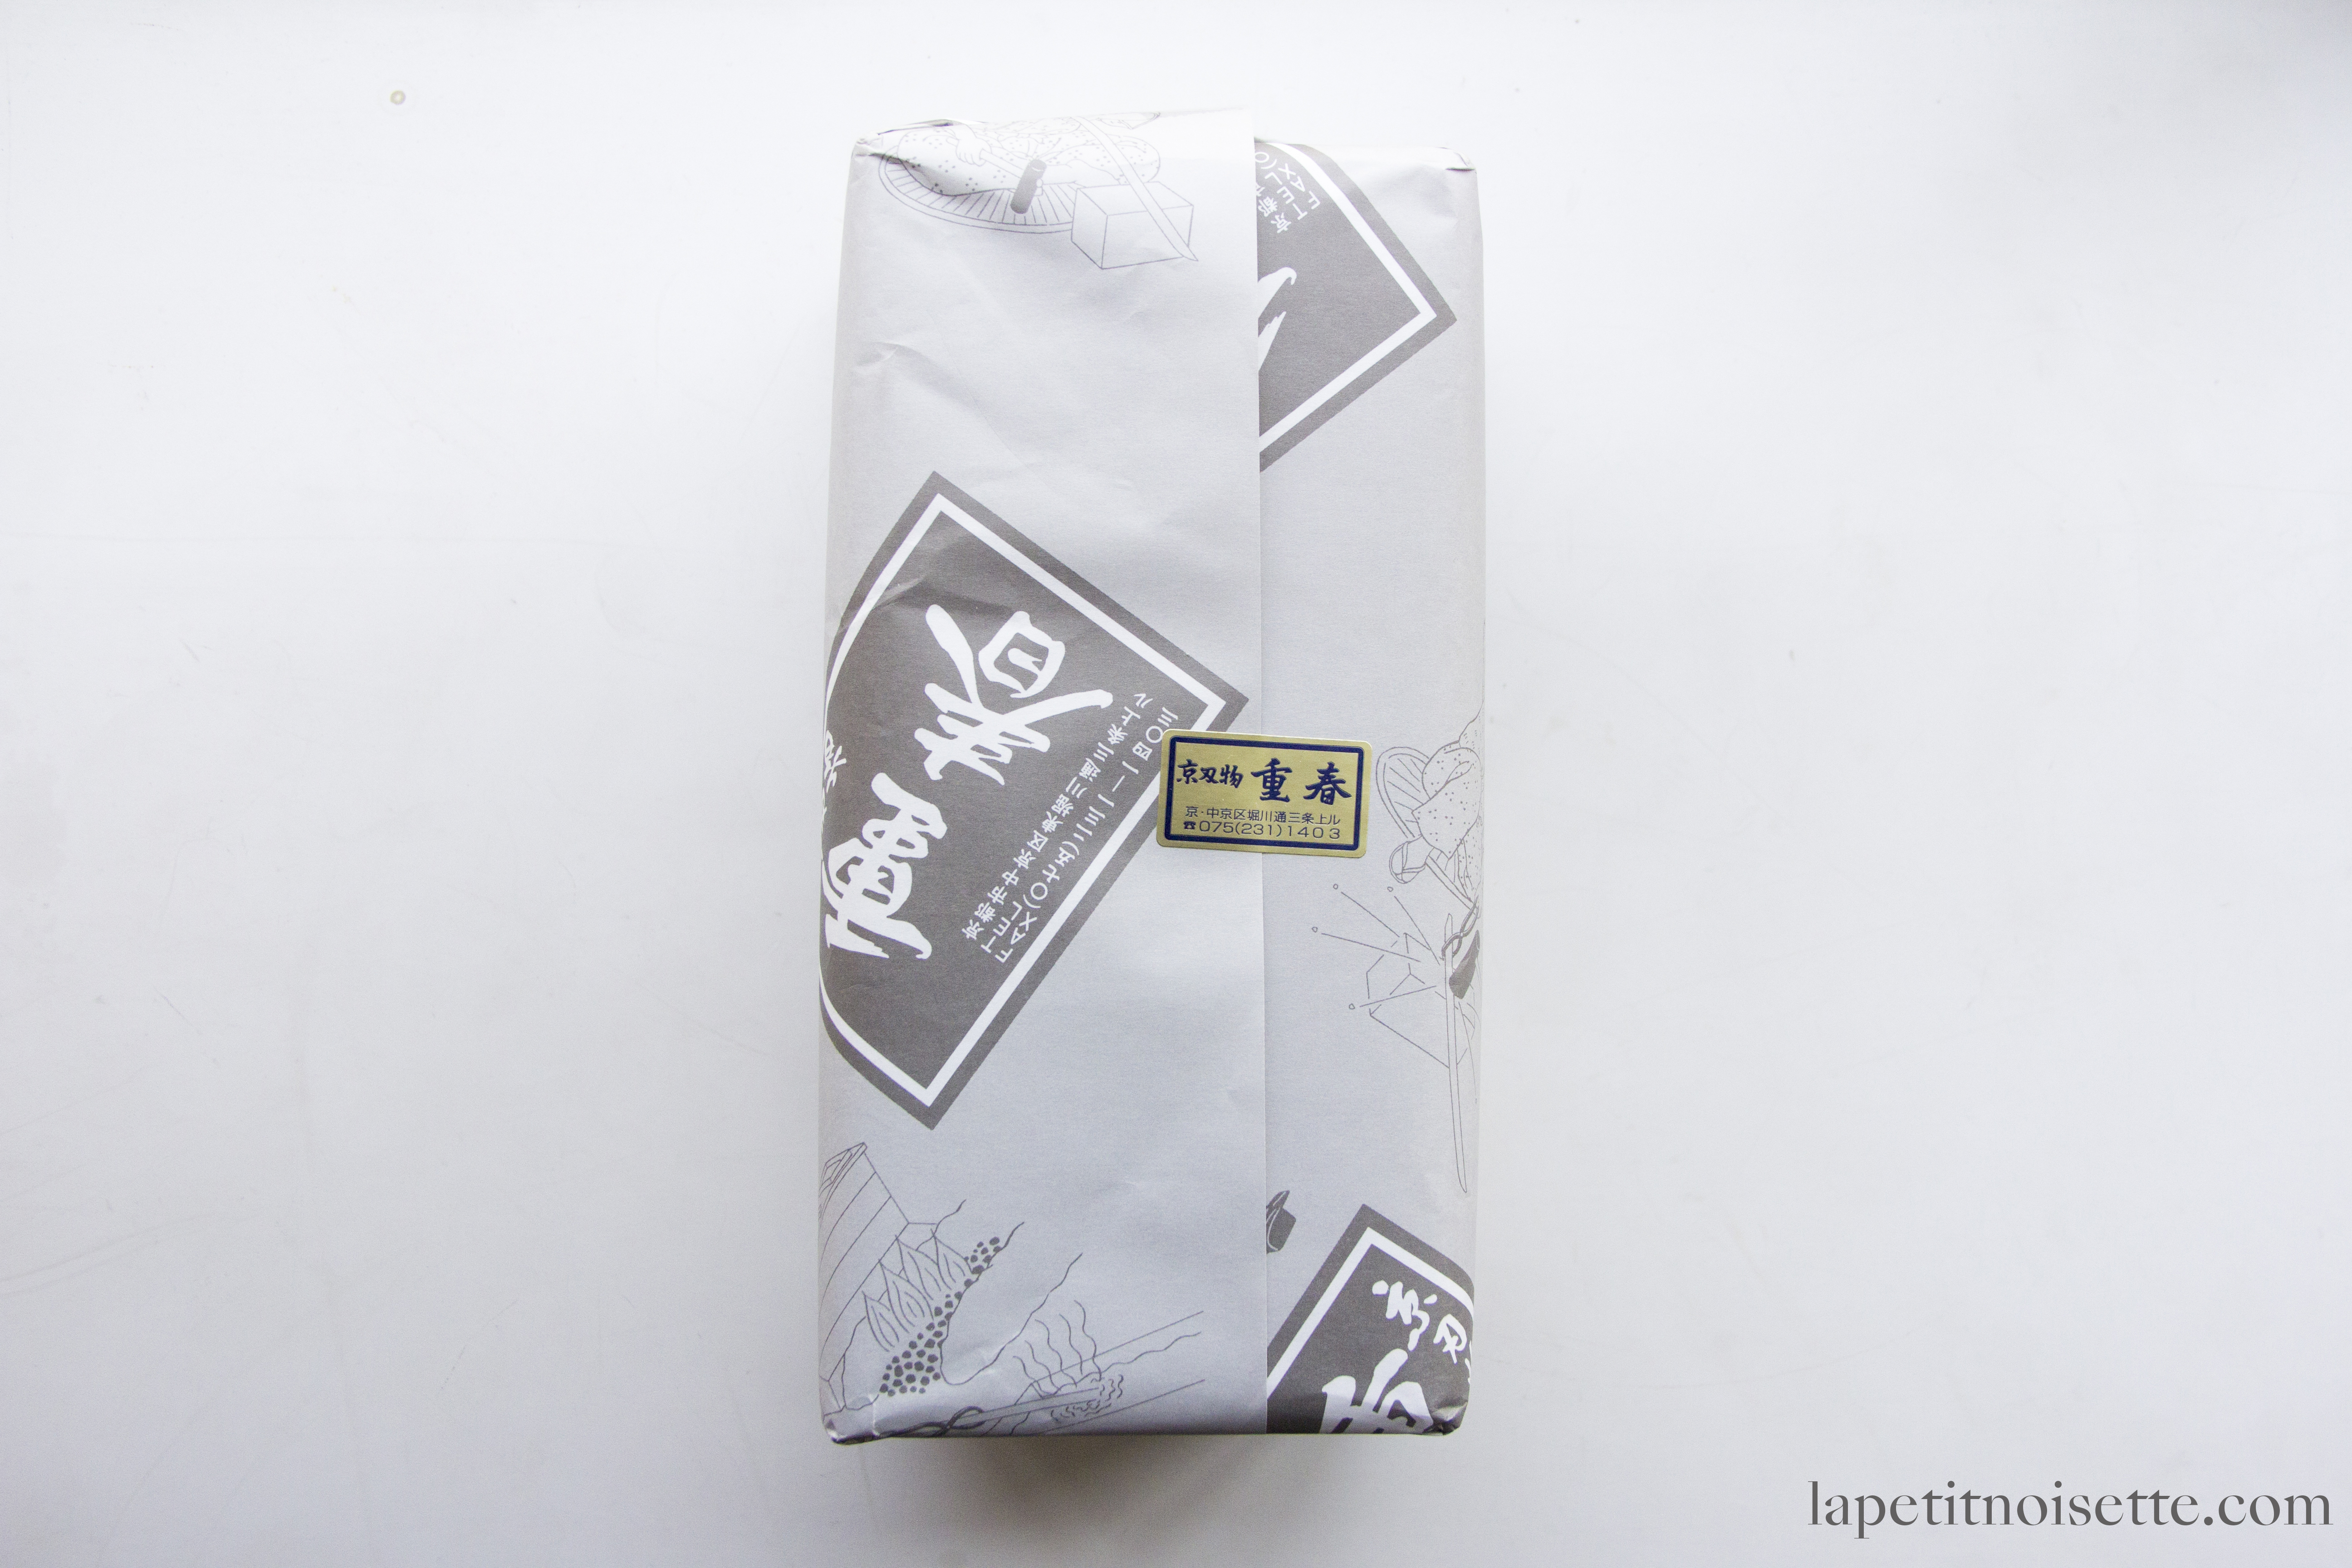
My own kezuriki blade was made at Aritsugu (重春) in Kyoto by Mr Aritsugu. It came with the knife I used when I first began apprenticing at the sushi restaurant. The kezuriki box however, was made by someone else, whose name escaped Mr Aritsugu.
This article continues on to 5. How to make Dashi/鰹節のプロがこっそり教えるだしの取り方
Your instructions are inconsistent and contradictory. Is it Tail to head, or head to tail? See your contradictions below.
1. You want to start shaving by pushing in the direction from tail to head in one continuous
2. If you shave it from head to tail, you will obtain powder
3. Push the fillet – head to tail – onto the blade
4. so that you are still shaving from head to tail.
Thank you so much for pointing out such a huge error in the instructions. The correct direction should be from tail to head, with the head of the katsuobushi touching the wood and the tail pointing upwards. This means that point 3 and 4 that you listed were incorrect. They have now been corrected. Thank you again.
Can I just use a skill saw?
You might be able to just use a skill saw, but I doubt you’d get it as finely shaven. Your best bet is to probably find a wood plane instead.
Hmmm, any hints on shaving that last few inches of a filet? The fingers get dangerously close to the blade.