This article follows on from this Tamahimo Okayodon recipe, which gives a more in-depth explanation on what unlaid eggs are and how they’re used in Japanese cuisine. In summary, these eggs, which are known as tamahimo (たまひも) in Japan, are the unlaid egg yolks found inside egg laying hens which are slaughtered after they no longer produce enough eggs to make them worthwhile keeping alive.
Whilst these unlaid eggs are typically grilled over binchotan in Japan for yakitori, they are actually used in countries all around the world, from the Philippines all the way to Italy. They’re even mentioned in one of Guiliano Bugialli’s books, though I can’t remember which one right now. More recently, they’ve been incorporated into high end restaurants such as Dan Barber’s Blue Hill at Stone Barns, who’s goal of eliminating waste in his restaurant means using every part of the chicken.
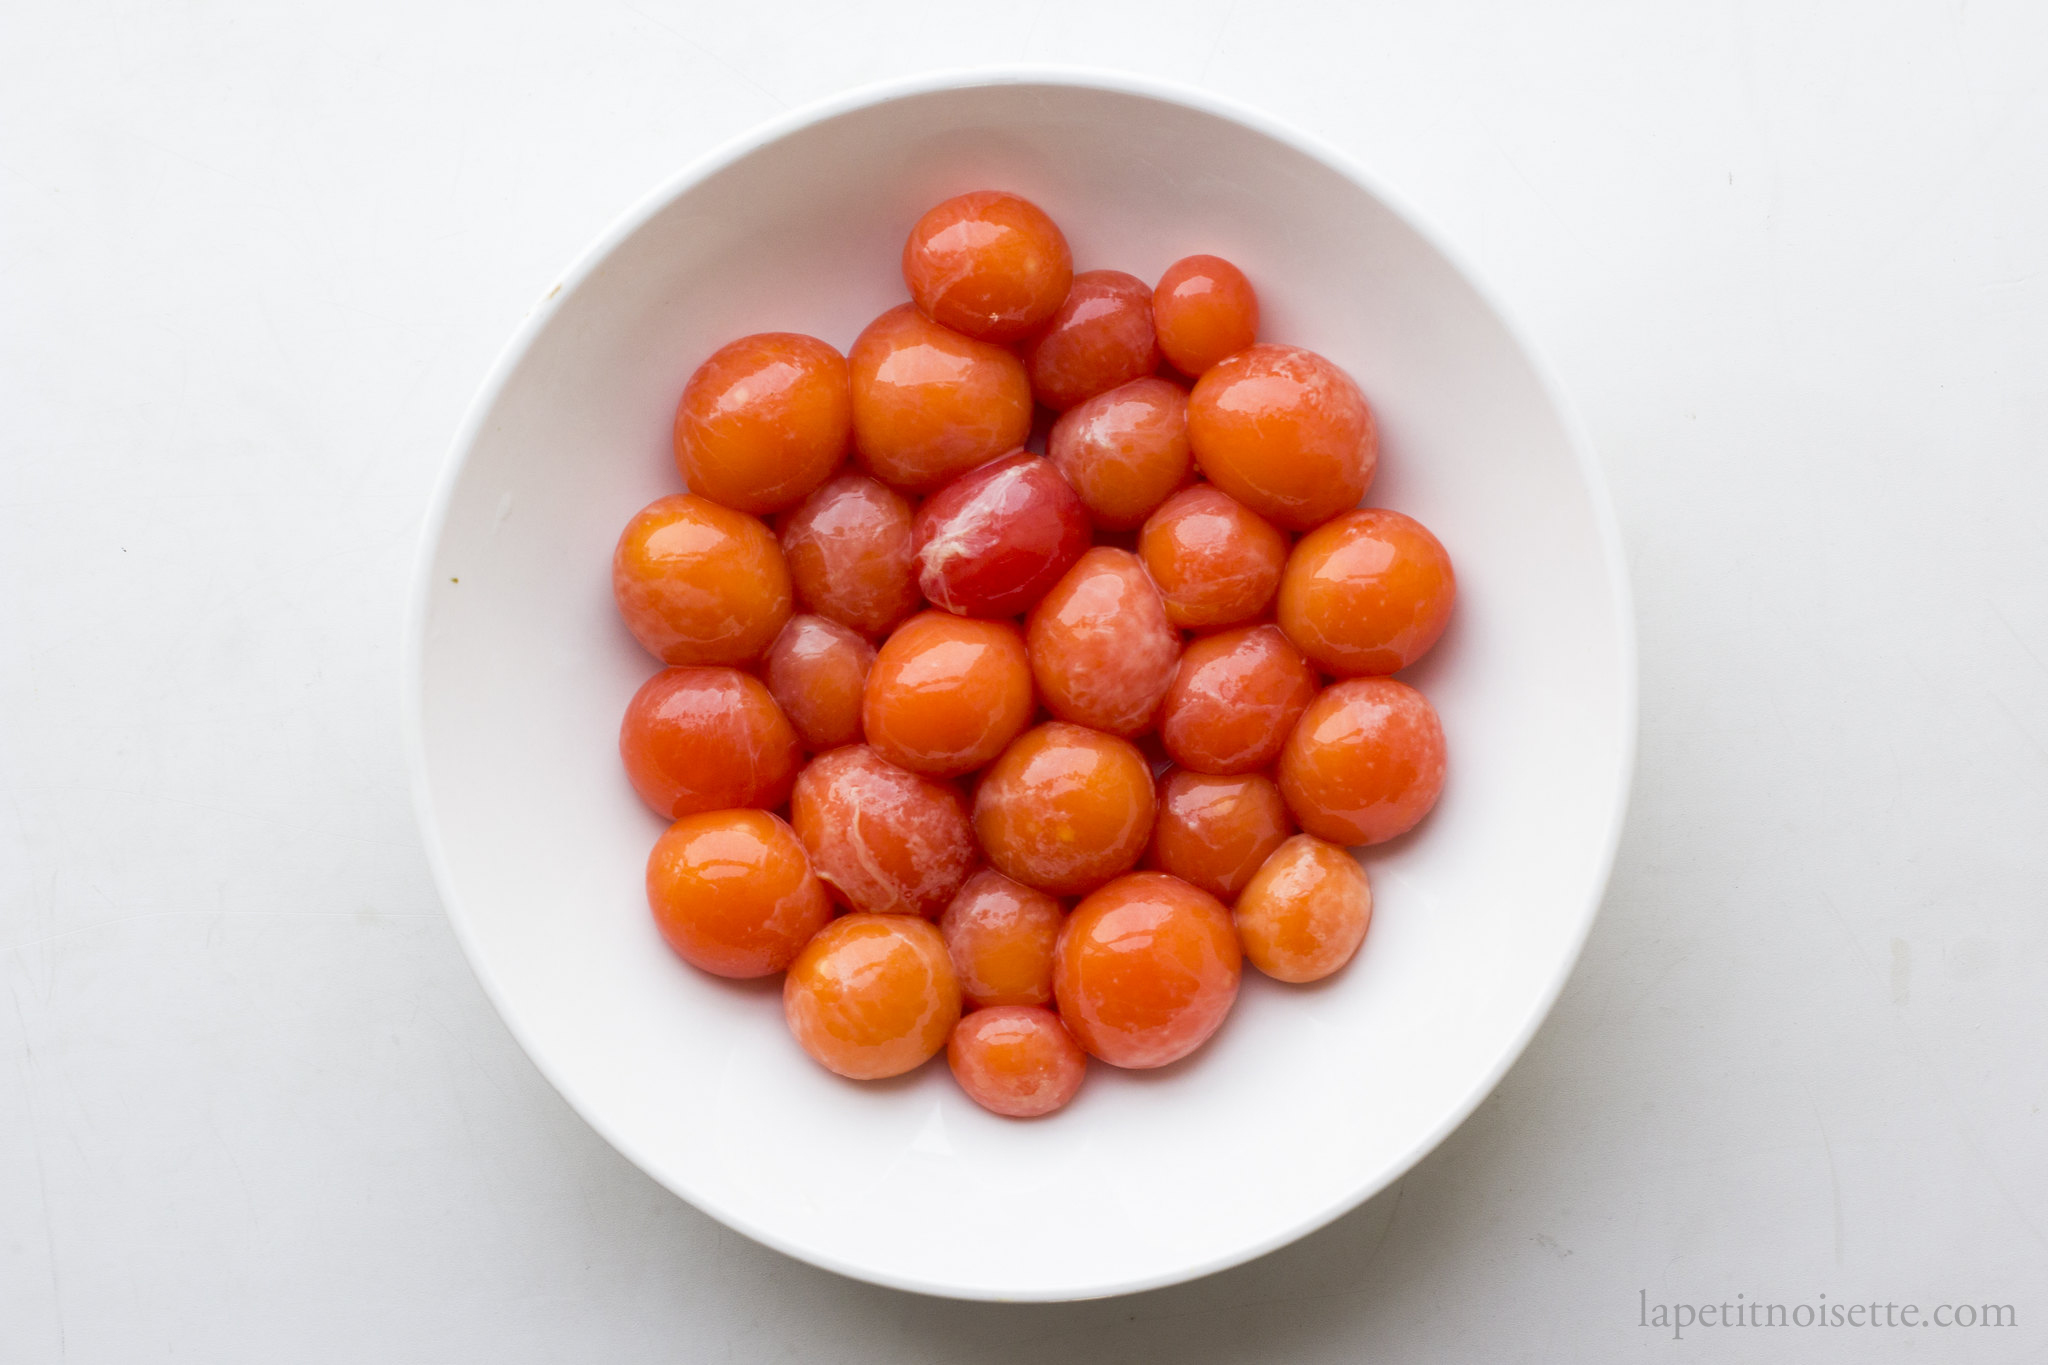
As any baker can tell you, the yolks of eggs are typically very fragile, and may burst when you try and separate them away from the egg whites, a problem that most of you who make a lot of meringue will understand. These unlaid egg yolks are different however, and have a very thick membrane around them, which I assume dissolves after the egg white develops around them. This means you can safely pick them up and handle them, even throwing them into soups.
I’ve come across these eggs being added to Jewish’s chicken soup as well to a ragu sauce from Emilia Romagna, but given the fact that they are just plain egg yolks without any egg white surrounding it, they’re fairly easy to overcook, and are thus only added towards the end of the cooking process, so that you have these nuggets of yolks that burst in your mouth when you bite into them.
The texture of the yolk is also very different from a normal yolk. Underneath the thick membrane, it’s very similar to the viscous and gooey texture of marinated ramen eggs, or that of an egg yolk sous vide pasteurised at 57.2ºC for 2 hours. They’re also much brighter orange in colour, the sort that you’d usually only find in the most expensive Japanese eggs. When trying to figure out other uses for these eggs, I immediately thought of using them in carbonara sauce or fresh egg pasta, but of course there’s no such thing as a new idea, as I soon found out that the use of these eggs in fresh pasta was actually what inspired Dan Barber.
When developing this pasta recipe, I noticed a few things worth noting. Because they are 100% fat, they have a much stronger smell than you would typically associate with egg yolks, and they also have a higher tendency to go rancid quite quickly, so I recommend against storing them in the fridge too long. Additionally, some of the pasta recipes that i’d found online in Italian use 100% unlaid egg yolks in their dough, which resulted in a very rich and springy pasta. However, because of the lack of water, I found that the pasta lacked the gluten strength that gives the pasta its characteristic texture, so instead I opted to using a mixture of both normal eggs and unlaid eggs, as the egg white in normal eggs is almost 80% water to begin with.
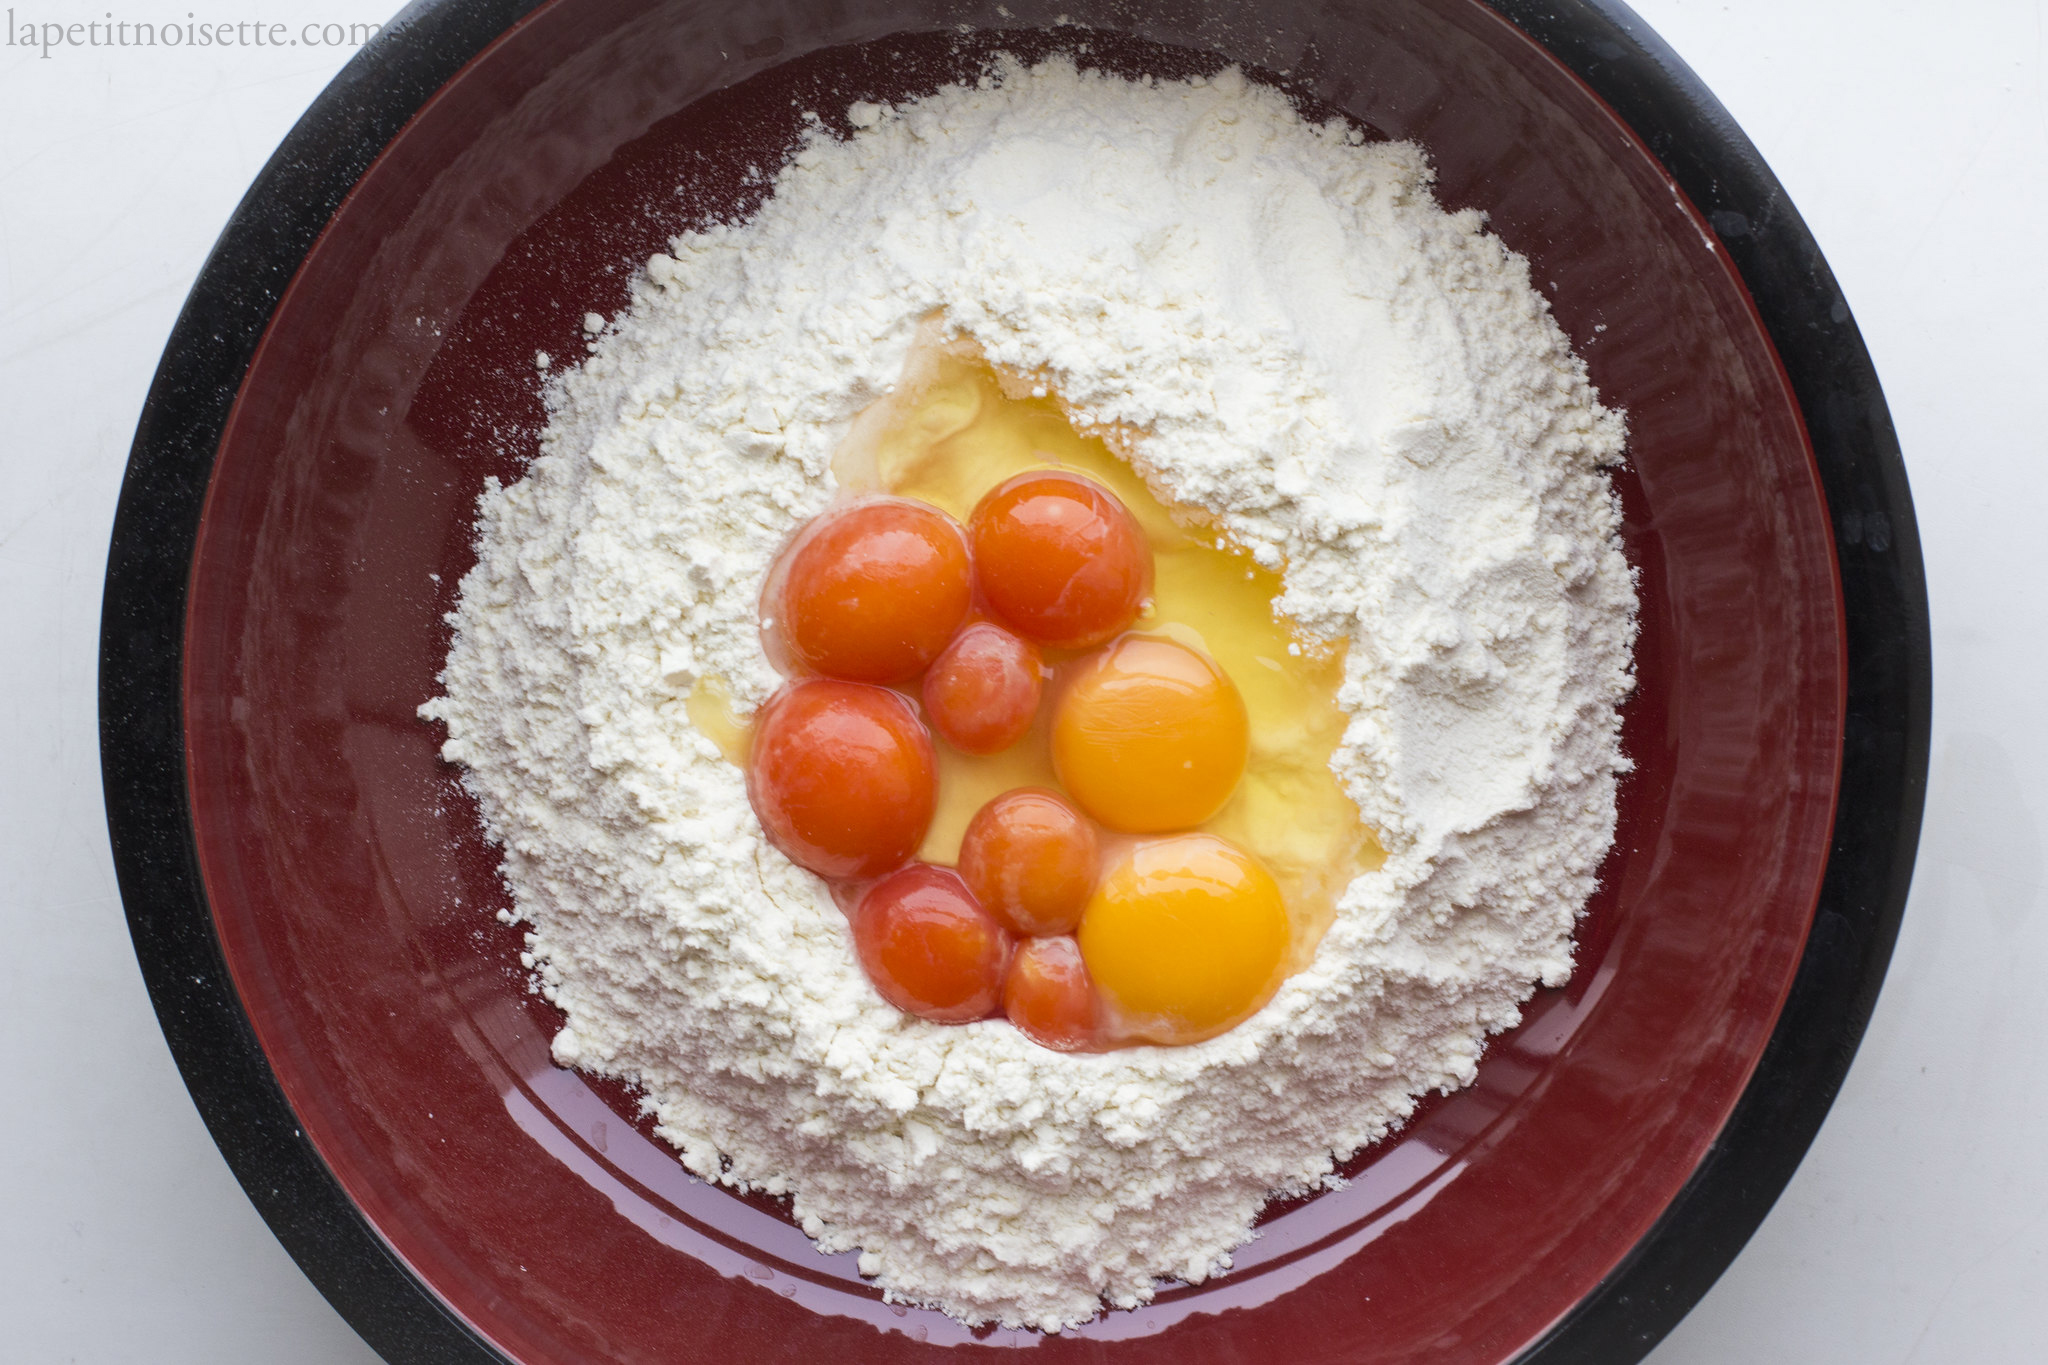
I’m not going to go into the details of how to make homemade pasta dough, which you can find practically anywhere online, so instead we’ll cover the bits that make this recipe unique. The typical amount of egg to pasta ratio you’d find anywhere on the internet is one egg for every 100g of pasta flour (preferably 00 flour as it makes for a much smoother pasta). This roughly translates to 50-55g of egg per 100g of flour. This means that we want around 50g of unlaid egg for every 100g of flour. Why is weight important? Because to add the unlaid eggs to the pasta, you cannot add the whole egg as the membrane on the egg will not mix into the pasta. Instead, you need to break the membrane and squeeze out all the yolk. I recommend you do this into a separate bowl and weigh it as you go.

Unlaid Egg Yolk Pasta Dough
- 1 Egg (around 50-55g without the shell)
- 55g of Unlaid Egg Yolks (without the membrane)
- 200g of 00 Flour
- 5g of Salt
- 5ml of Olive Oil
- Add the flour to a large bowl or large surface and make a well in the centre of the flour.
- Make a well in the centre of the flour. Add the eggs, salt and olive oil into the well.
- Add in the unlaid eggs yolks to the well by gently squeezing out the contents of the yolk sacs and discarding the membrane.
- Mix all the ingredients together gently, slowly incorporating the flour together to form a dough.
- Use the dough to mop up and flour left over and start the knead the dough
- Knead for up to 5 minutes. The dough is ready if it bounced back slight when gently pressed or is at the same softness as your earlobe.
- Place the flour on a board or in a bowl. Make a well in the centre and crack the eggs into it. Beat the eggs with a fork until smooth.
- You can mix the dough together using a food processor initially before pouring the out the contents and kneading it together into a dough.
- Wrap it in cling film and let it rest in the fridge for a minimum of half an hour.
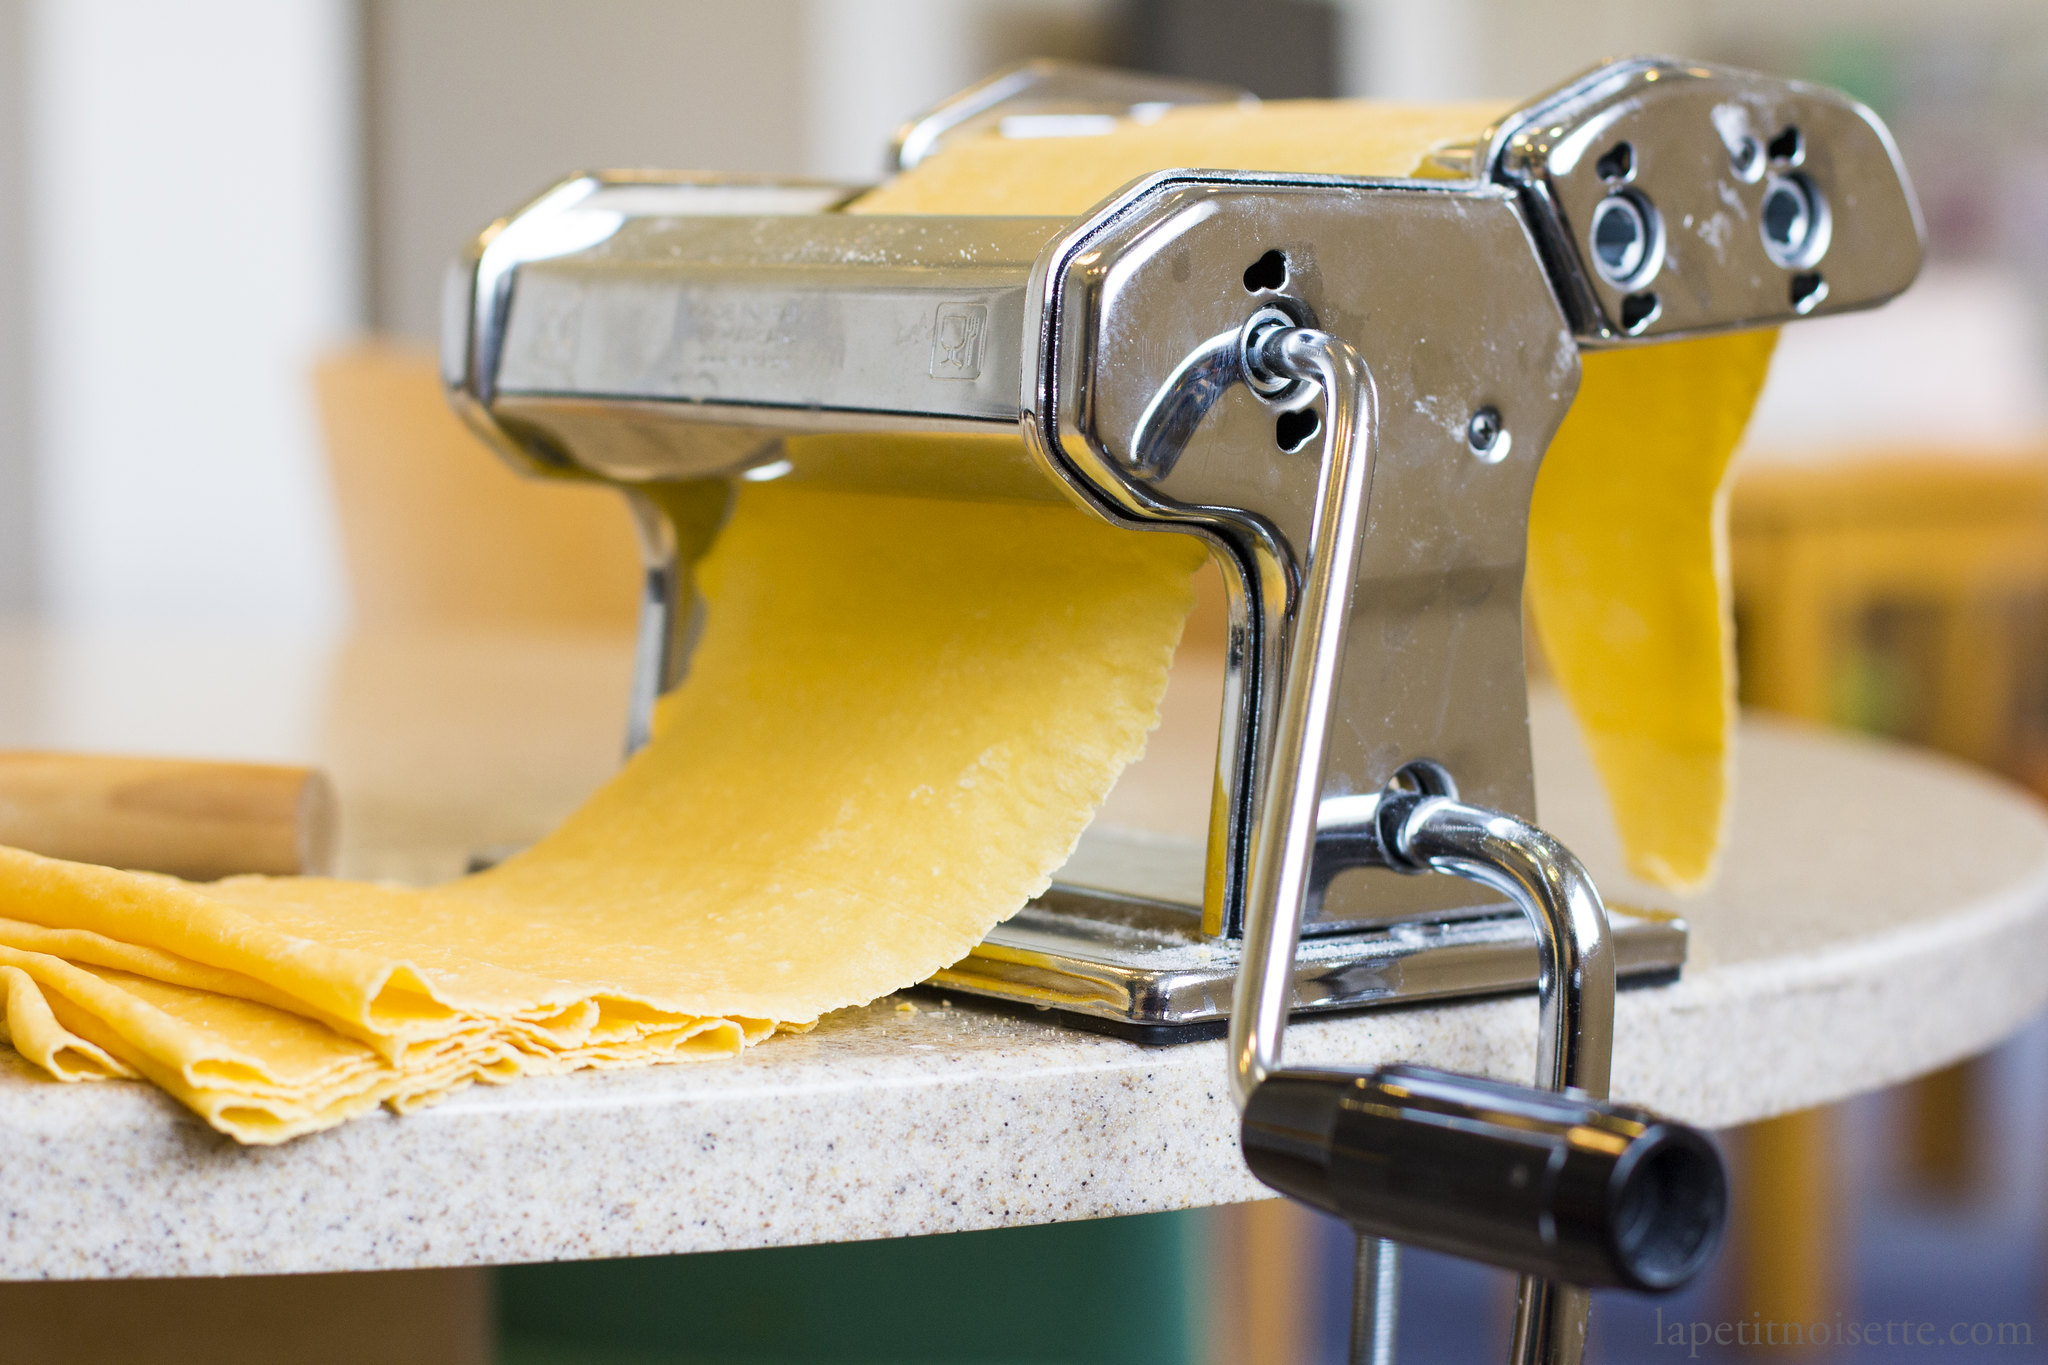
Rolling out the pasta dough with a pasta machine:
It’s probably much easier to simply follow the instructions on a youtube video on how to make pasta than to read through written instructions, but just in case you’re the type who prefers written instructions, here they are:
- Dust your work surface with some flour to prevent the dough from sticking and then dust the dough as well.
- Using a rolling pin, press the dough gently into an oval shape and then slowly roll out into a narrow thin sheet.
- Set your pasta machine to the widest setting, usually “0” for most machines, and then feed the pasta through it. Don’t worry if it looks ugly or doesn’t fit through properly at this point, the idea here is to start getting it into the right shape and size. Feel free to dust with more flour if it’s very sticky.
- Feed the pasta through the next setting down, usually “1” for most machines.
- Fold the pasta in half lengthwise and then re-roll the pasta back at the widest setting.
- Repeat step three to five 5 or 6 times. As you continue to do this, the pasta dough should become more and more smooth and even in texture. Remember to always fold the dough lengthwise to give it it’s characteristic bite due to gluten alignment (an in-depth explanation can be found here).
- Once the dough is a more uniform texture and shape (it should be the same width as your pasta machine), you can start rolling the dough in progressively narrower and narrower settings, until you eat the desired thickness of pasta, usually setting “5” for me on a standard Mercato pasta machine.
- Each time you roll the pasta though, remember to dust it with flour to prevent sticking.
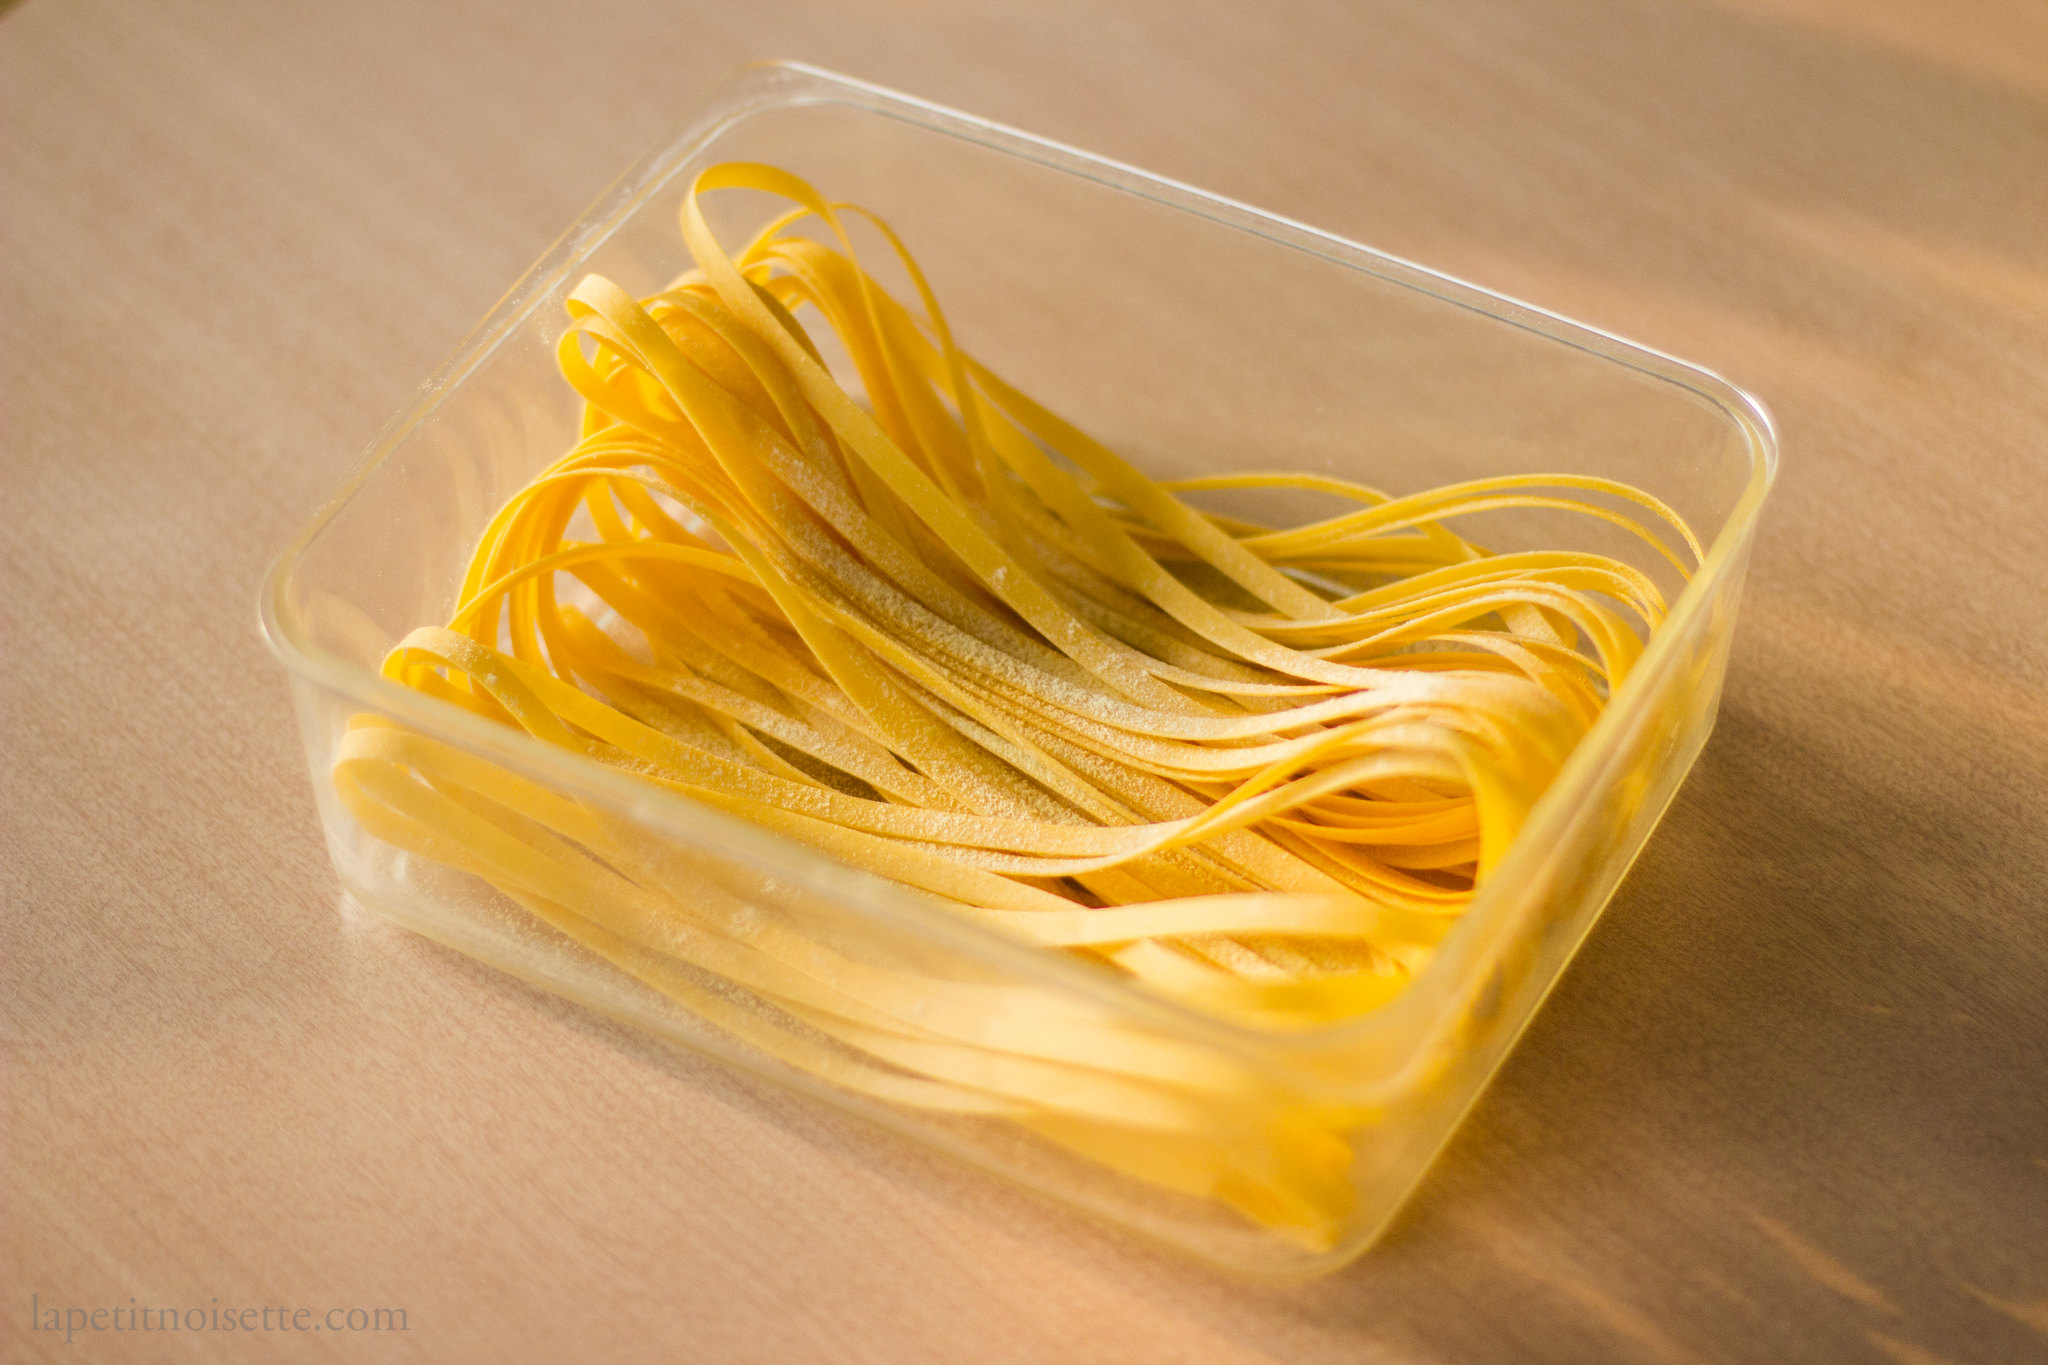
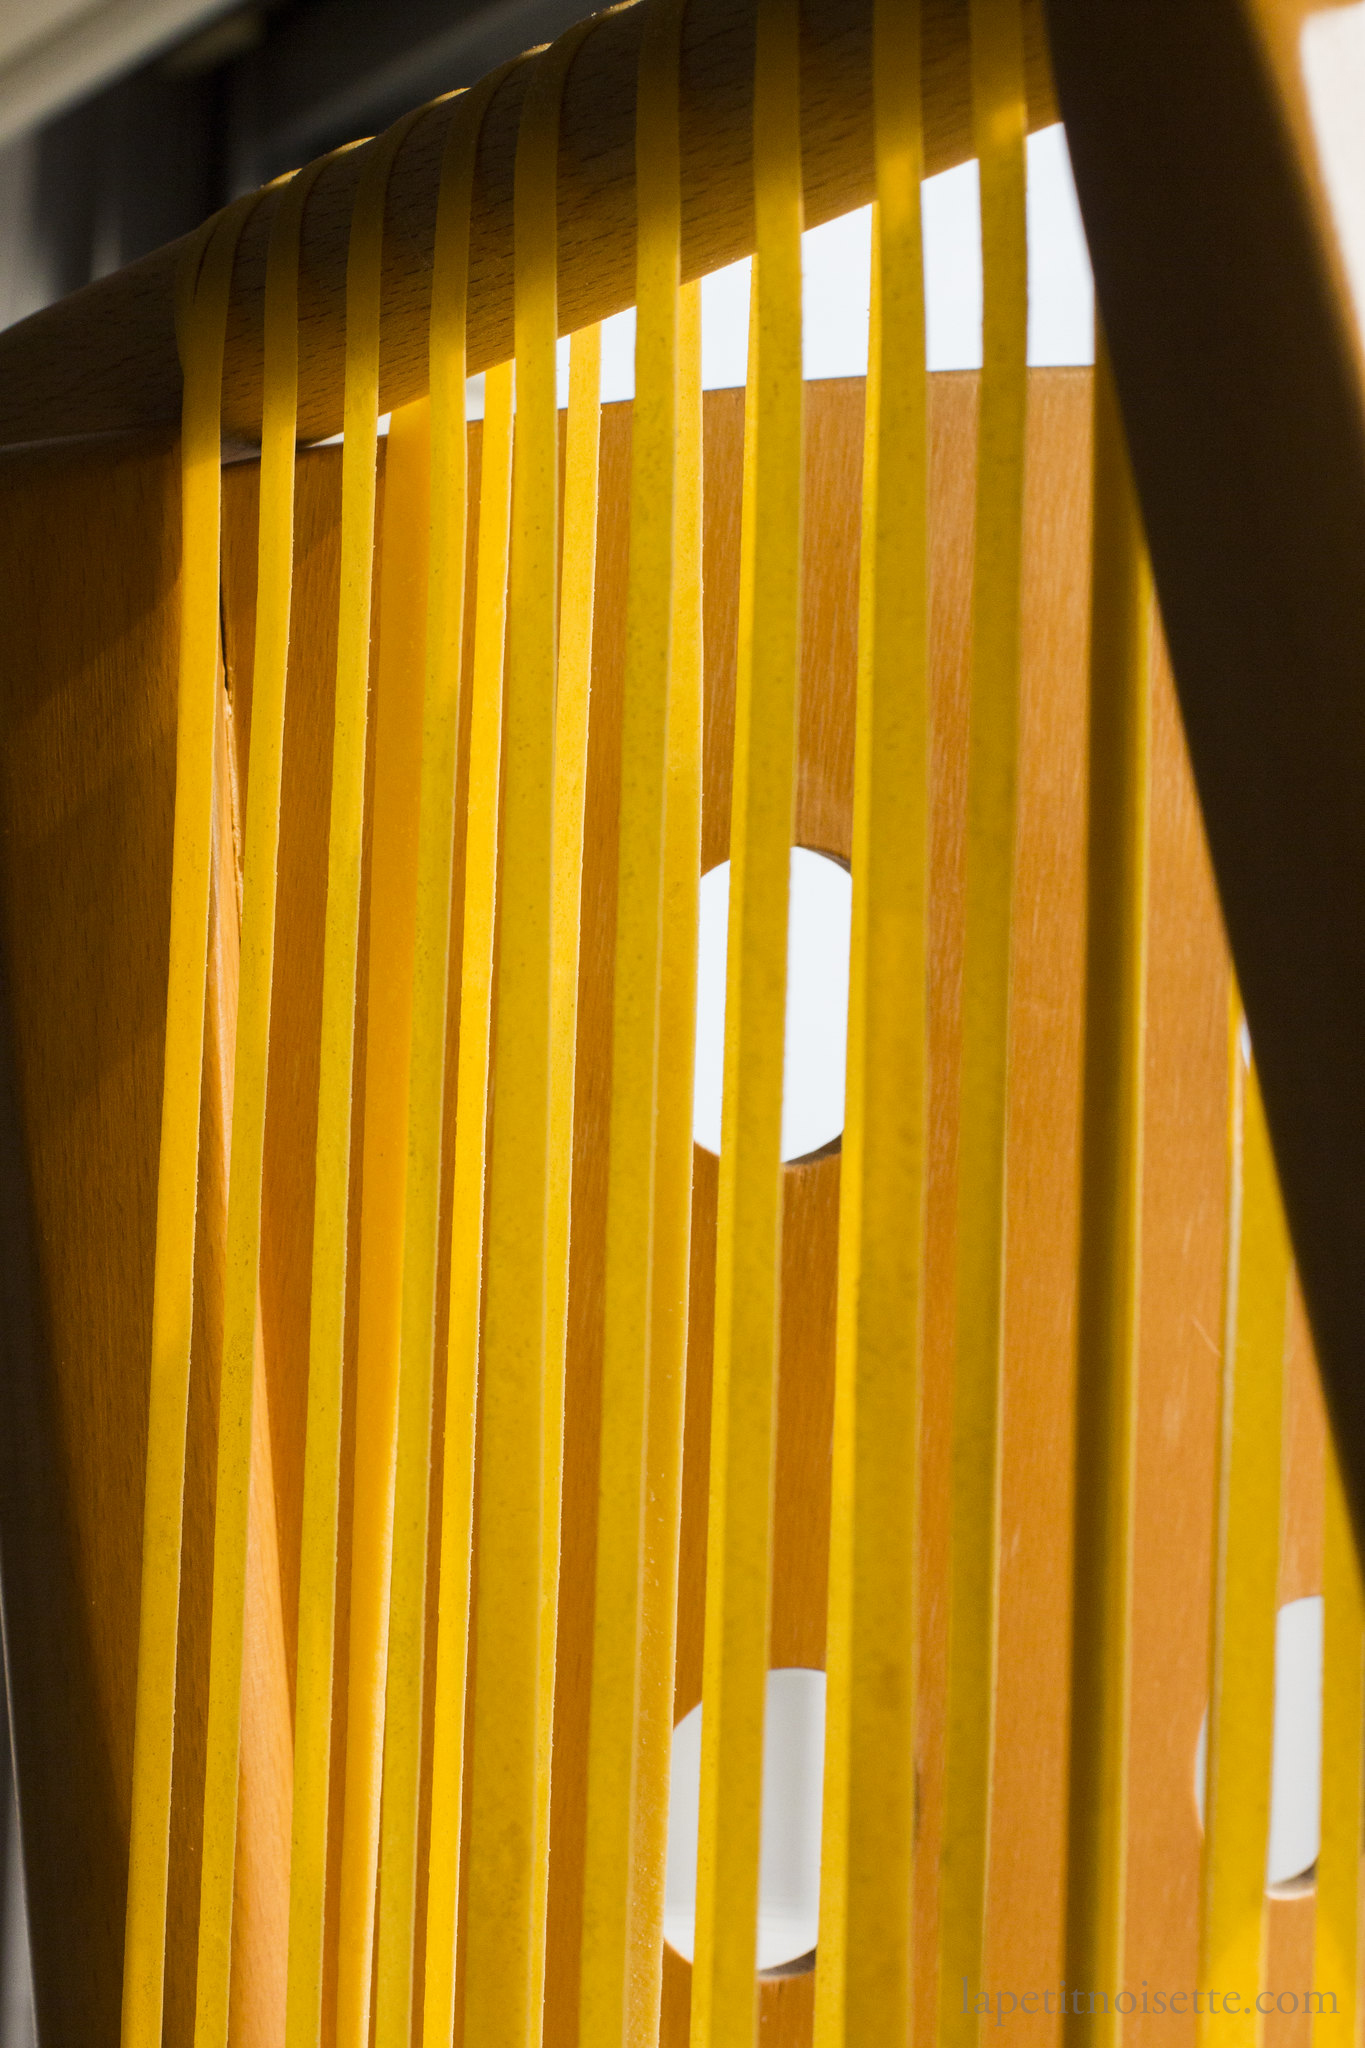
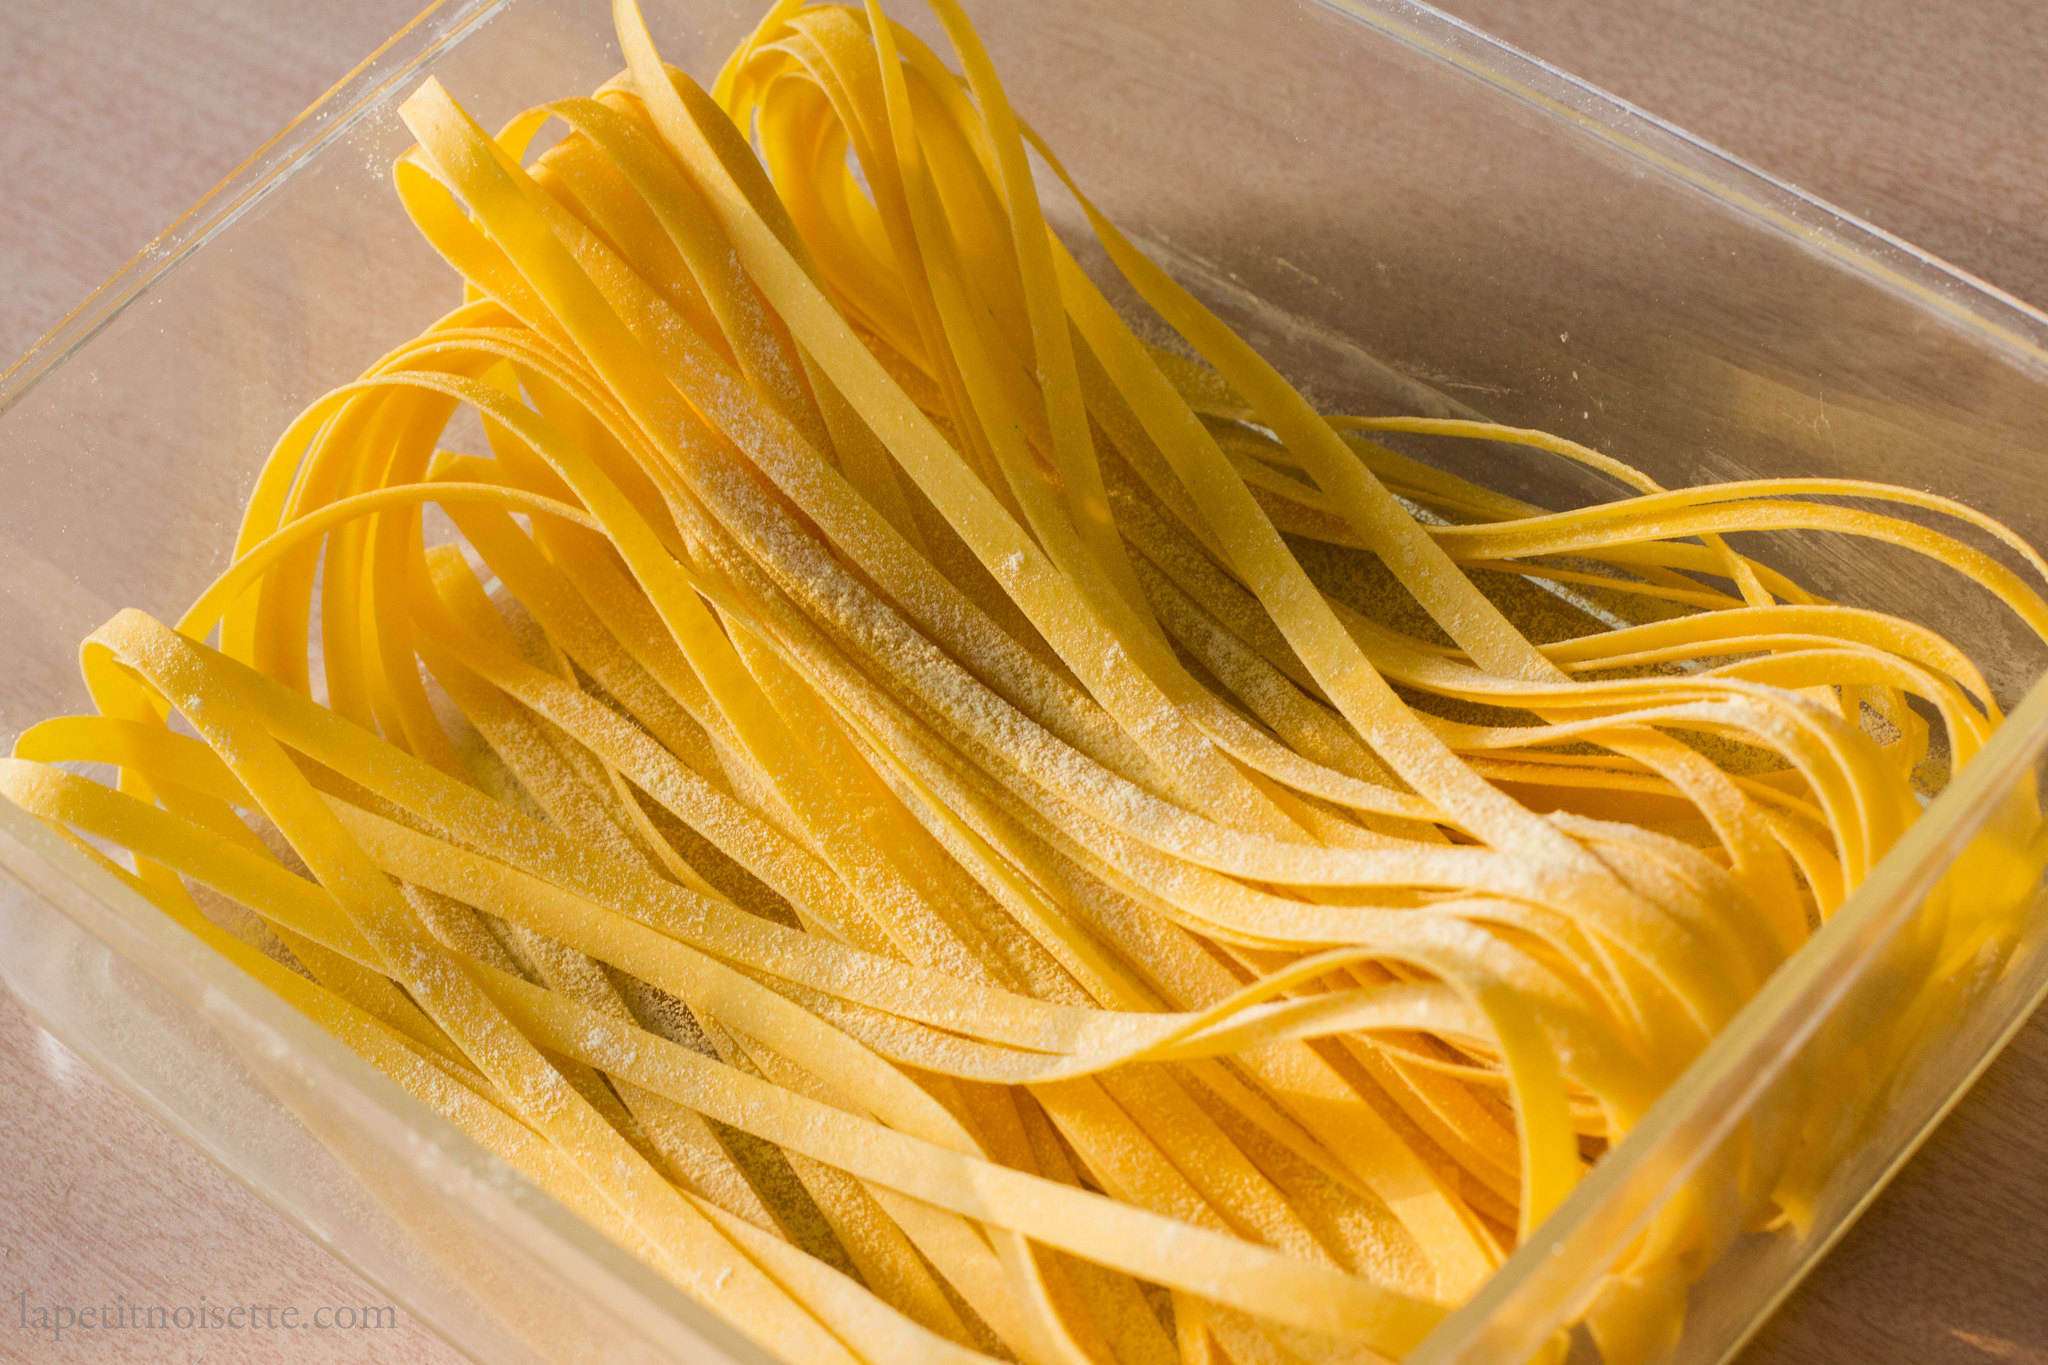
- If using as lasagne sheets they just need to be cut into size with your knife. If not, change the attachment to your pasta machine to the tagliatelle attachment and roll it though that cutter to get your tagliatelle pasta.
- If using within the next week, you can hang your pasta to dry it out but remember to store it in the fridge. I usually allow the pasta to dry until it is quite firm but still flexible enough to fold, before folding it into a container and storing it in the fridge.