Be smooth and graceful like a wave, adapting to the changes like water flowing down a river. Don’t get set into one form, harmonize to your surroundings and let it grow, be water.
So you’ve made your vinegar mix, cooked your rice, mixed your vinegared rice, grated your wasabi and prepared your fish. Now all that’s left is to form the final nigiri by sandwiching wasabi with rice and fish. A simple task right? The final step of shaping nigiri was something I always took for granted until I started making nigiri for my master to see. Time and time again he would say the taste wasn’t right and that the proportions were wrong. After trying, tasting and practicing myself, I can now say for certain that it doesn’t matter how the nigiri is shaped. But first, let’s talk about showmanship.
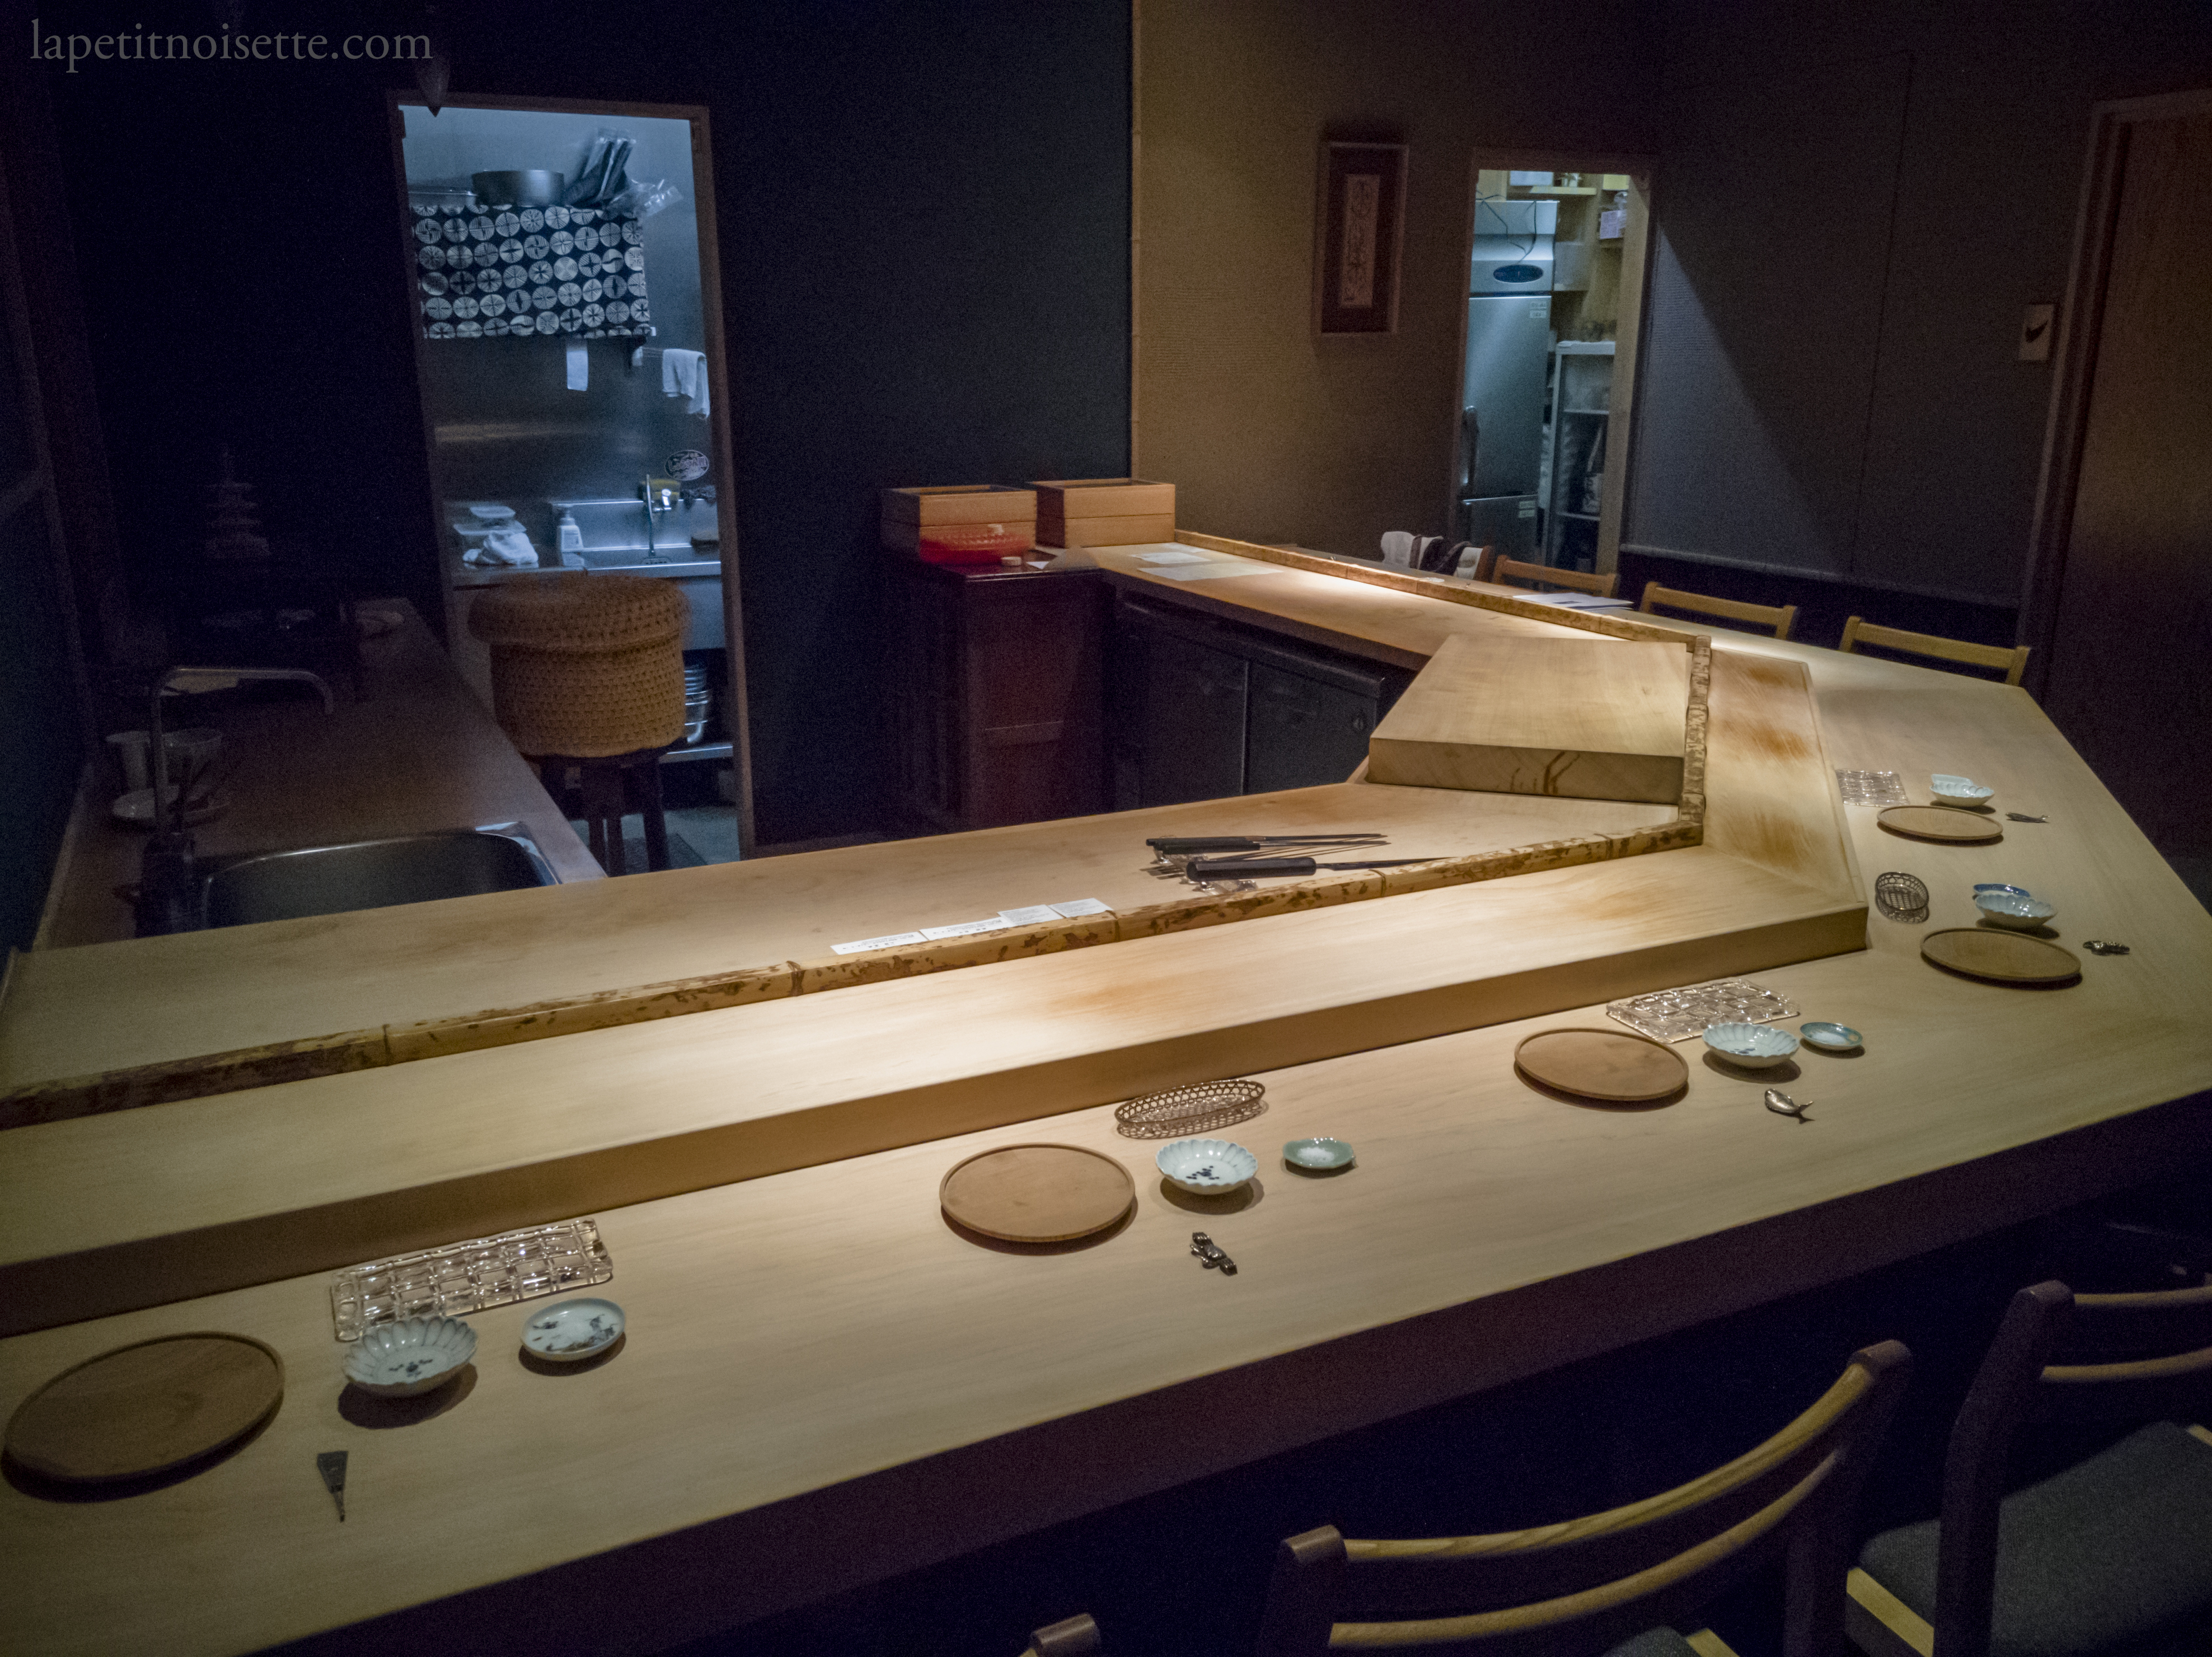
One aspect of the Japanese dining that is different from western dining experience has to be the showmanship. From ramen bars, tempura counters and high end sushi restaurant. They cater to small groups of people at a time, where each item of food is made meticulously in front of the customers, where they can watch and scrutinise every moment and action made by the chef, whether it was graceful gesture or a clumsy mistake. Whilst working at the restaurant, it was very much like a swan, gracefully swimming along the lake on the surface, where the pressure and turmoil under the water was hidden away. My master would always say, be smooth and graceful like a wave, adapting to the changes like water flowing down a river. Don’t get set into one form, harmonize to your surroundings and let it grow, be water. There was no rushing around the kitchen during service, everything was done gracefully, from the way we wiped the counters, to the way doors must be slid open gracefully.
Even the shaping the nigiri, he would watch me closely make it before eating it. Even if the flavour was right, the showmanship was wrong. The process needing to be graceful yet full of confidence without a pause of uncertainty. The whole process needed to be swift and deeply ingrained, as thought it had been practiced a million times over. The guest are always watching you carefully- he always said.
But he was right, even if the portion of rice to fish was correct, people’s experience of eating the nigiri was multi sensory, people ate with both their eyes and mouths. Try to bear that in mind when making nigiri for yourself.
In terms of size, a single piece of nigiri needed to be eaten in one single bite. And the proportion of rice to fish needed to be correct. As a guideline, each piece of nigiri contained around 8.5 to 10g of rice. The rice should be small enough to be wrapped around with fish. Not like what you would typically see in pictures, where the fish is on top of the rice. This is wrong because the balance of fish to rice is not correct, there is too much rice. The fish should be draped over the rice, hugging it like a warm blanket. If the fish is unable to do so, it either means there is too much rice or too little fish.
When going through the motions of making nigiri, your elbows should be facing downwards, as it is easier to lift your elbows. Your hands should also be steady and not bouncing up and down with each movement. The aim of the motions used to shape nigiri is to form a clump of rice where the inside of the clump is loose whilst the outside is tightly packed together. This is why we press a hole into the rice when we first start shaping the nigiri. Applying too much pressure would cause the rice to be too tightly packed together, making it dense and heavy. Imagine holding onto a hamster or baby chicken. you need to hold it firm enough that it wont run away, but not hard enough that it gets squished- that is the appropriate amount of pressure.
The rice temperature is also important. Rice that is too cold will be sticky and hard to handle, whilst rice that is too warm sticks to your hands. Rice that has been recently mixed with vinegar will also be sticky as the vinegar hasn’t had the chance to soak through. This is why we store our rice in an Ohitsu (お櫃) and Warabitsu (藁櫃). To prevent the rice from sticking to our hands, we also dipped our hands in a mild mixture of water and vinegar known as tezu (手酢/てず), which literally translates into hand vinegar. The recipe for tezu is as follows:
- 250ml of filtered water
- 40ml of rice vinegar
The temperature of the neta/fish is also extremely important. Whilst the temperature of rice is varied, the temperature of the fish is always at room temperature (with some exceptions such as Kuruma Ebi). This is because at room temperature, the fish fat starts to melt, giving the oiliness needed to match the acidity in the sushi rice. Served cold, the fish tastes bland and is actually less flavourful. Simmered and marinated items are also always drained before being used to make nigiri. If not, the excess liquid would make it impossible to make to shape the excess nigiri.
Whenever made nigiri, my master always put it in his mouth upside down, with the fish touching the tongue first instead of the rice. I was told this was because the rice is what sushi is all about, and the fish is just the accompaniment. Apparently this was an old tradition that seems to be dying, as less and less people do it nowadays, with some sushi chefs asking their customers not to do it. The argument against doing that is that the temperature of the rice and fish is important. Because the temperature of the fish is vastly different from your tongue, putting the fish in facing downwards would give your tongue an uncomfortable feeling. There’s isn’t a clear answer which way of eating nigiri is better. Either way, I still eat nigiri with my fish facing downwards, just as a tribute to the person who taught me though, not because one way is better than another.
Step by step instructions to make Edomae nigiri sushi
I am left handed, so the instructions and images here are for left-handers. Please do the reverse of what the instructions say for right-handers.
Start by dipping your left fingertips into the tezu. Transfer the tezu to your right hand and moisten by wiping the water from your left hand to your right hand. This prevents the rice from sticking to your hand. Dipping more than your fingertips into the tezu will collect too much water into your hands, making it hard to form nigiri.
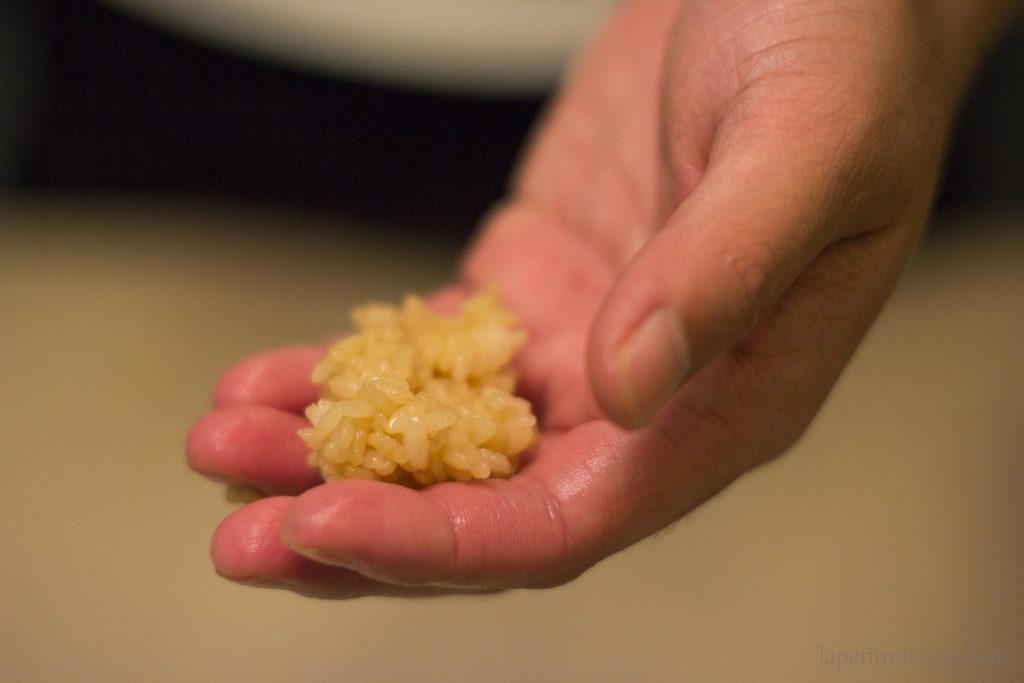
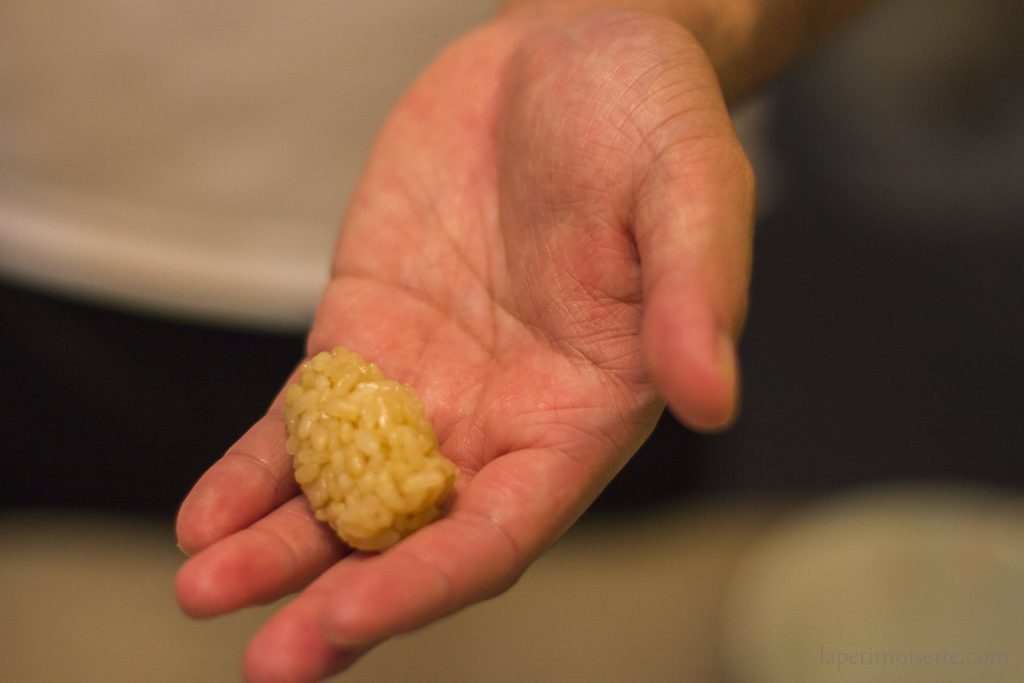
Take a small amount of sushi rice with your left hand and gently form it into a clump.
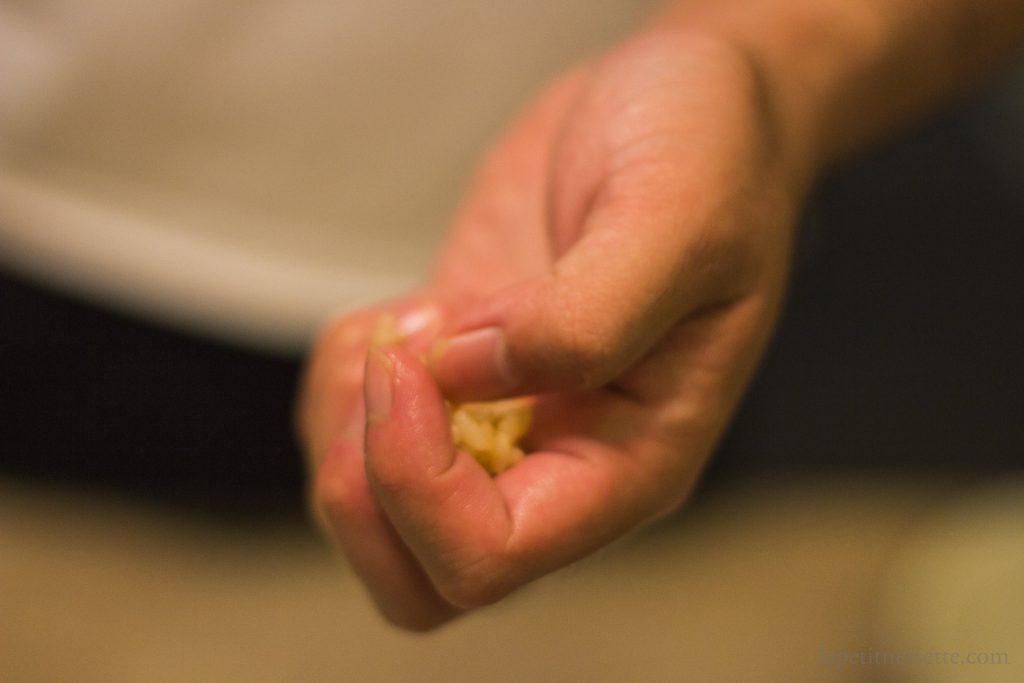
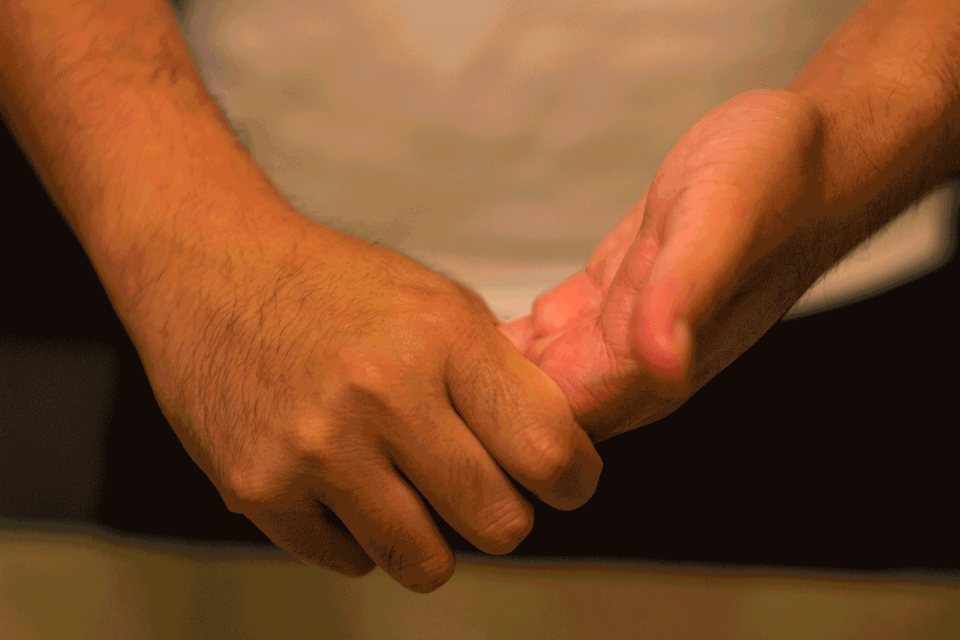
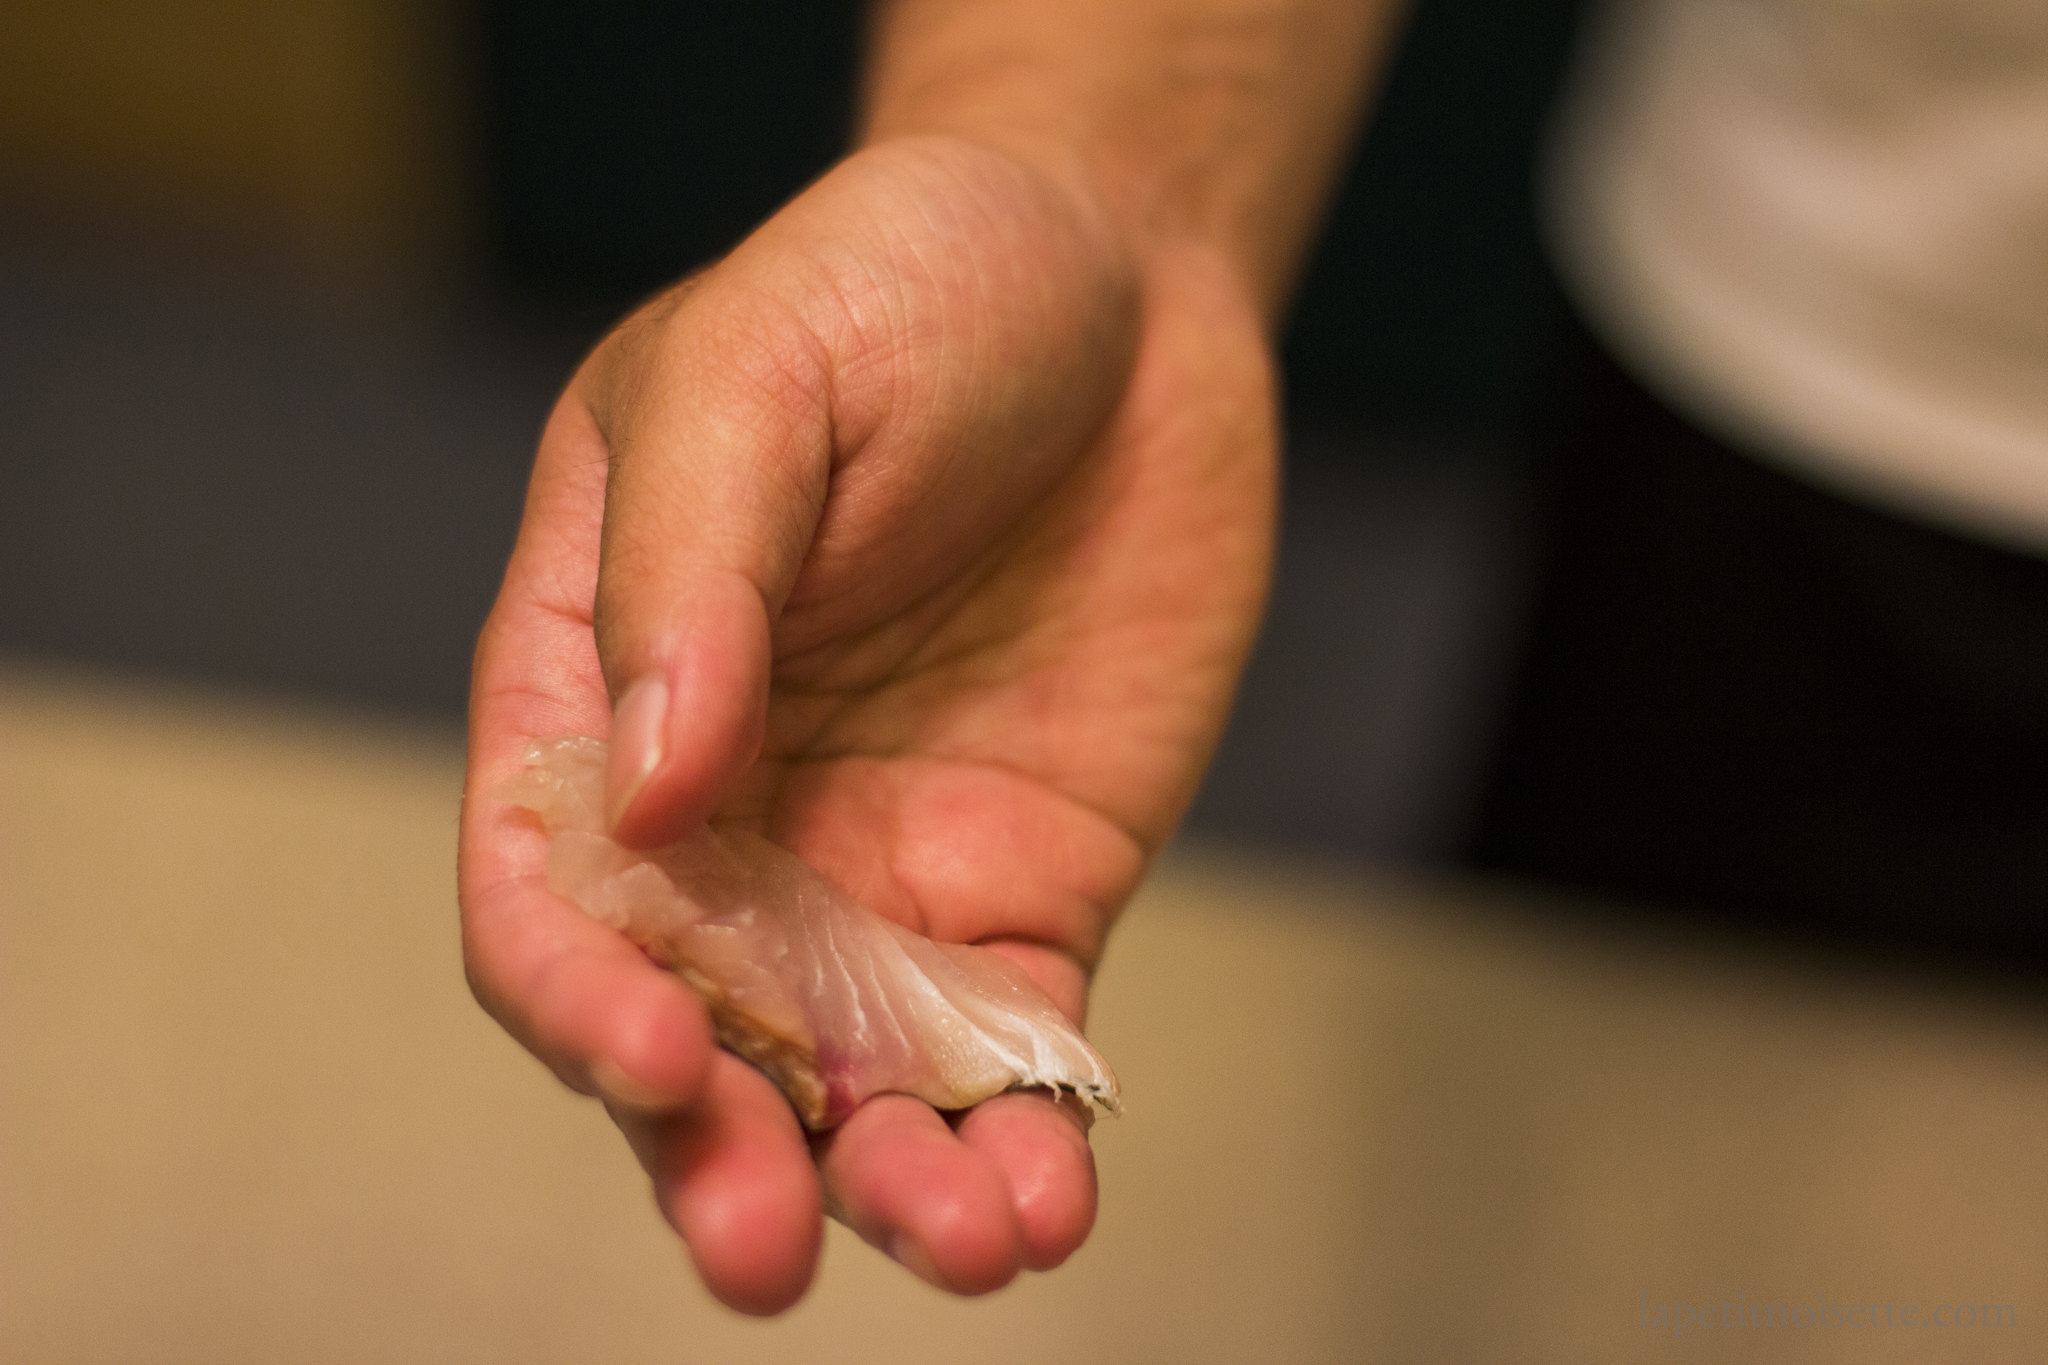
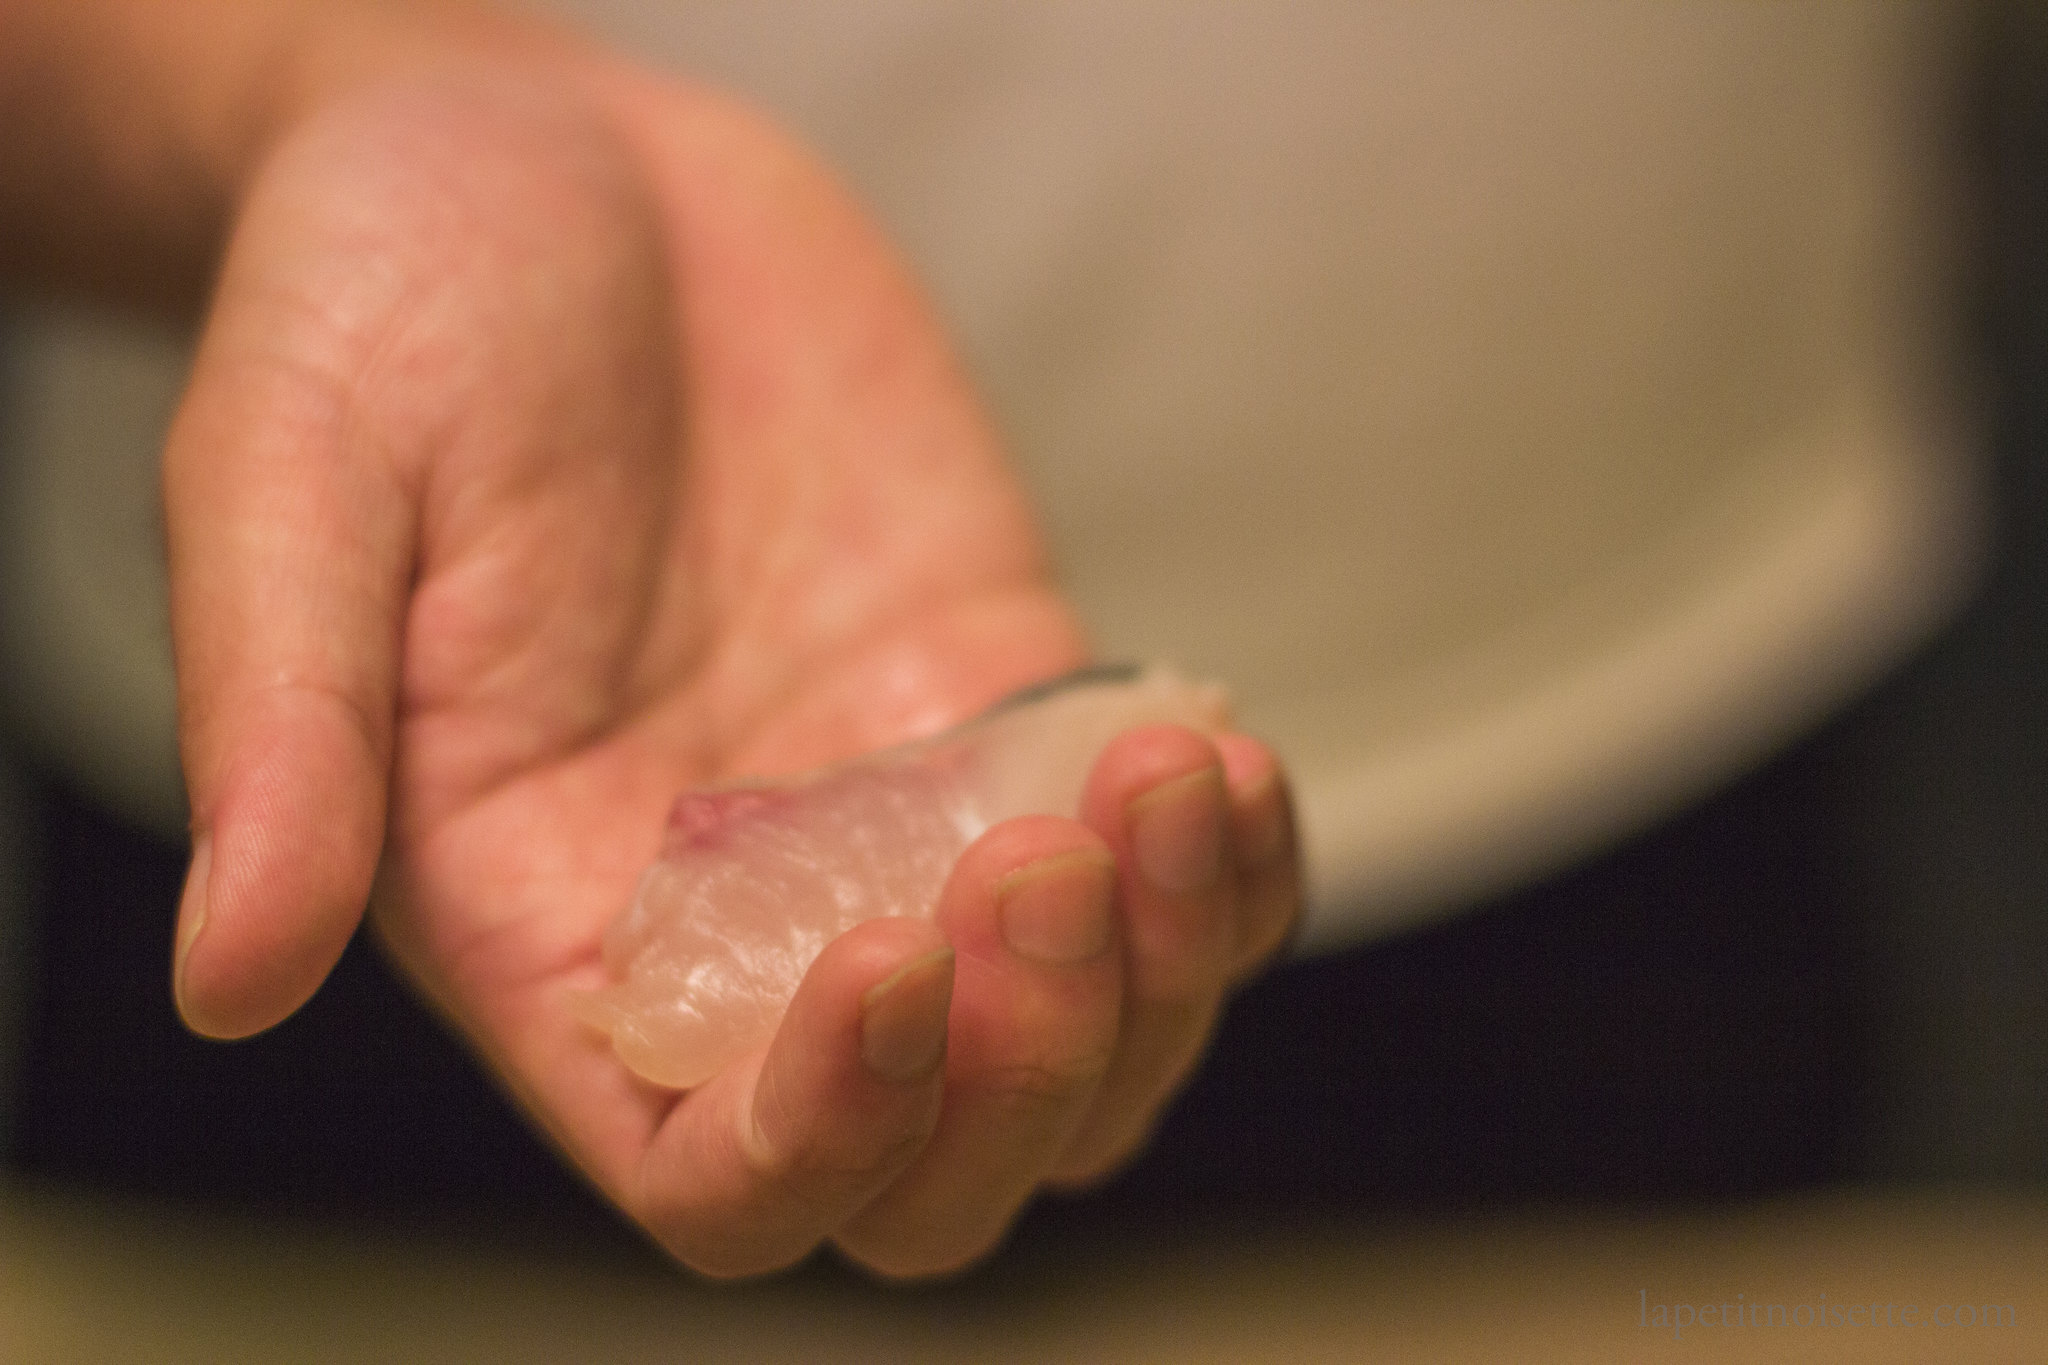
Pick up the tane/fish with your right hand, holding it between your thumb and base of your index finger.
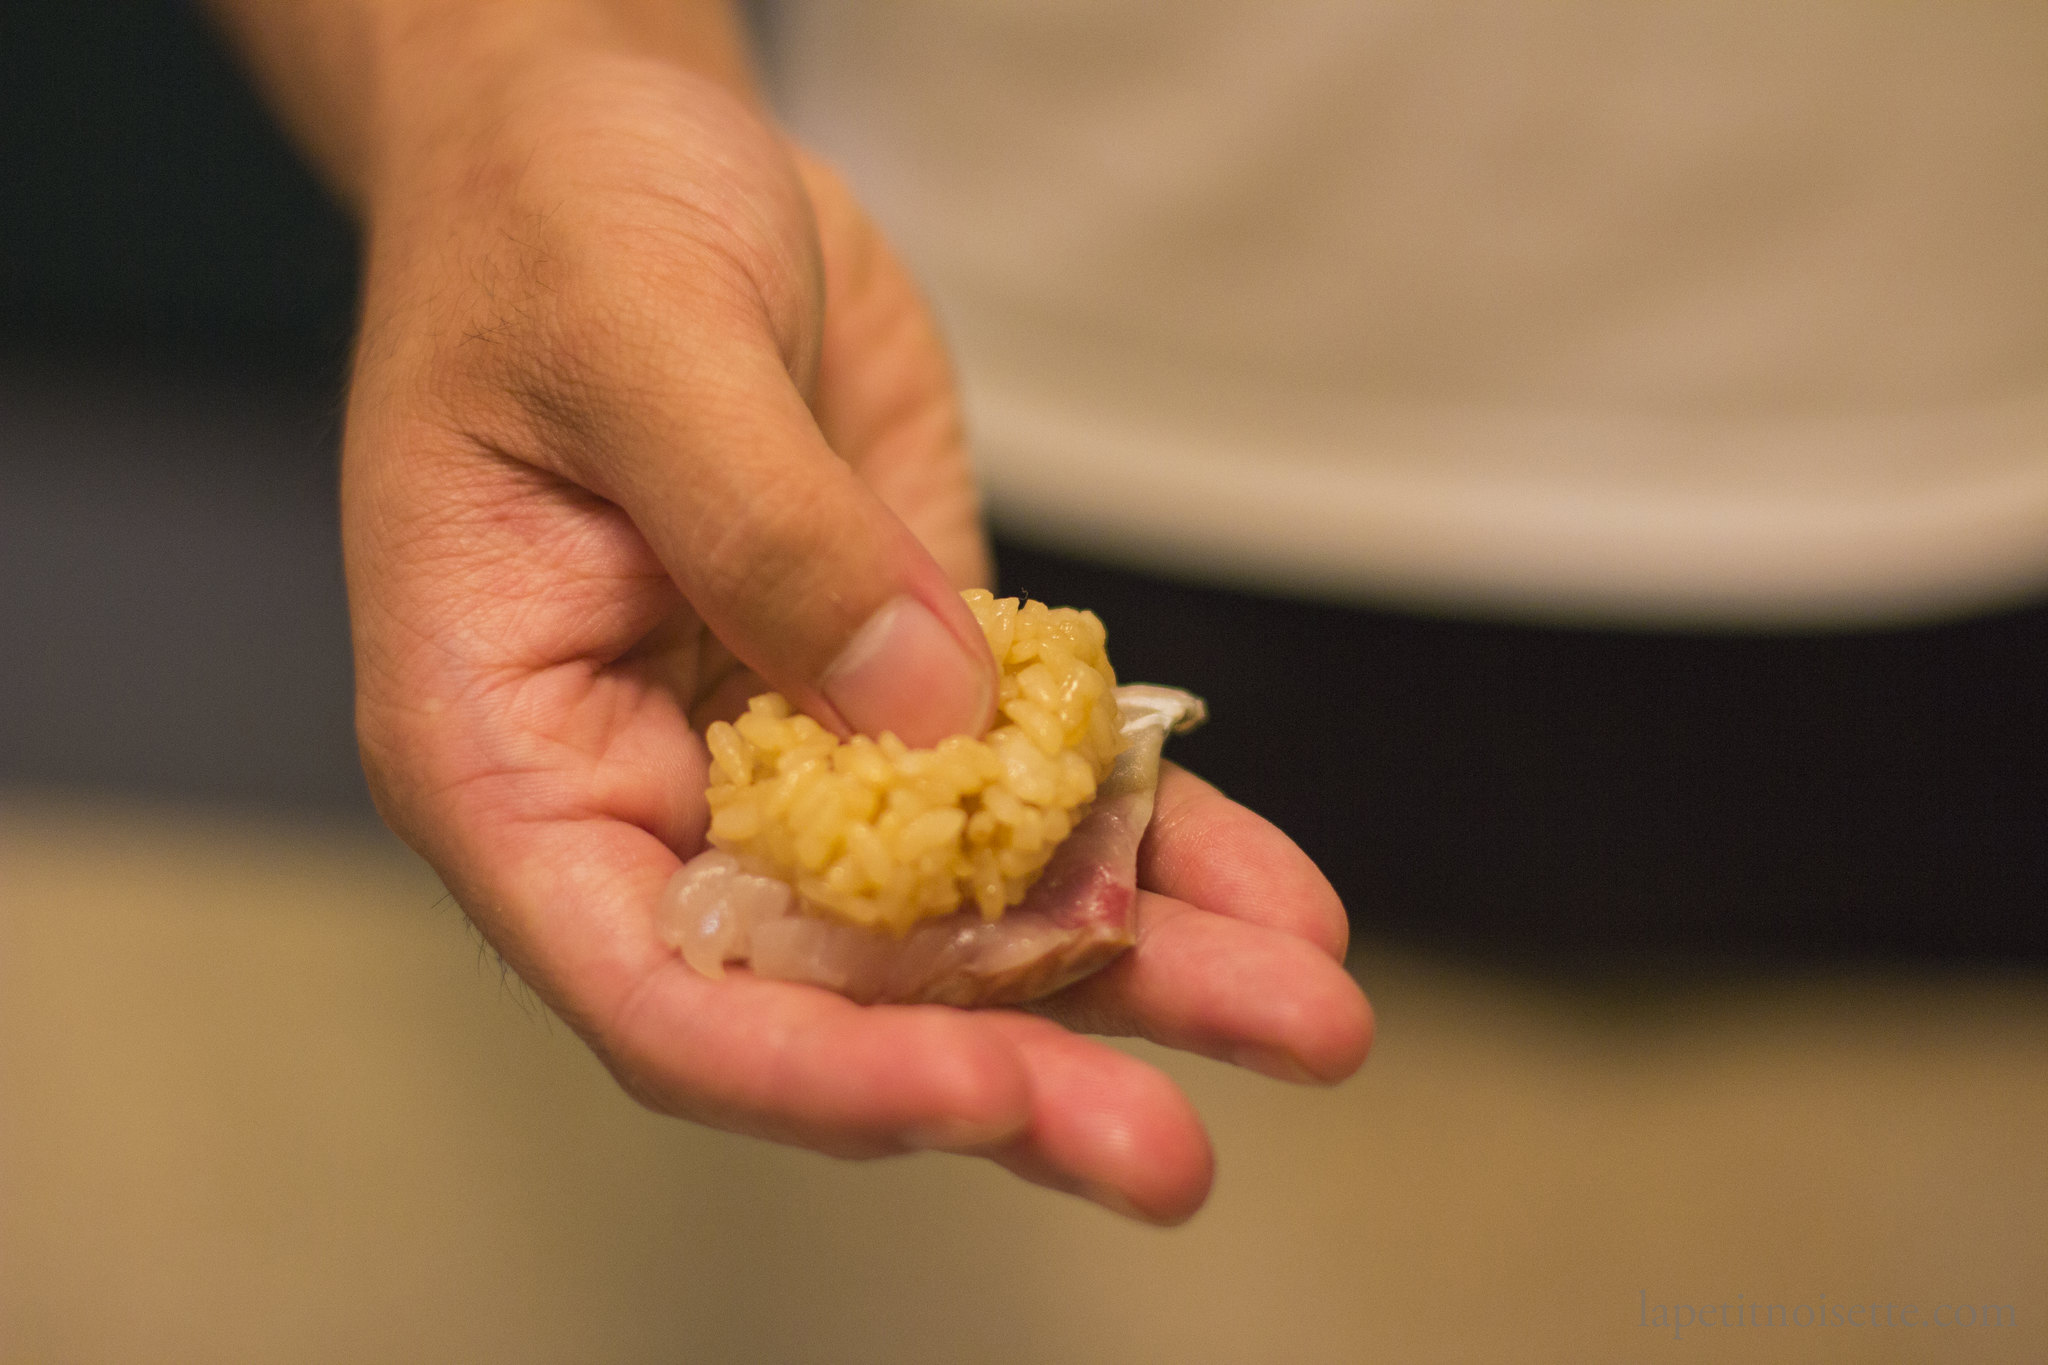
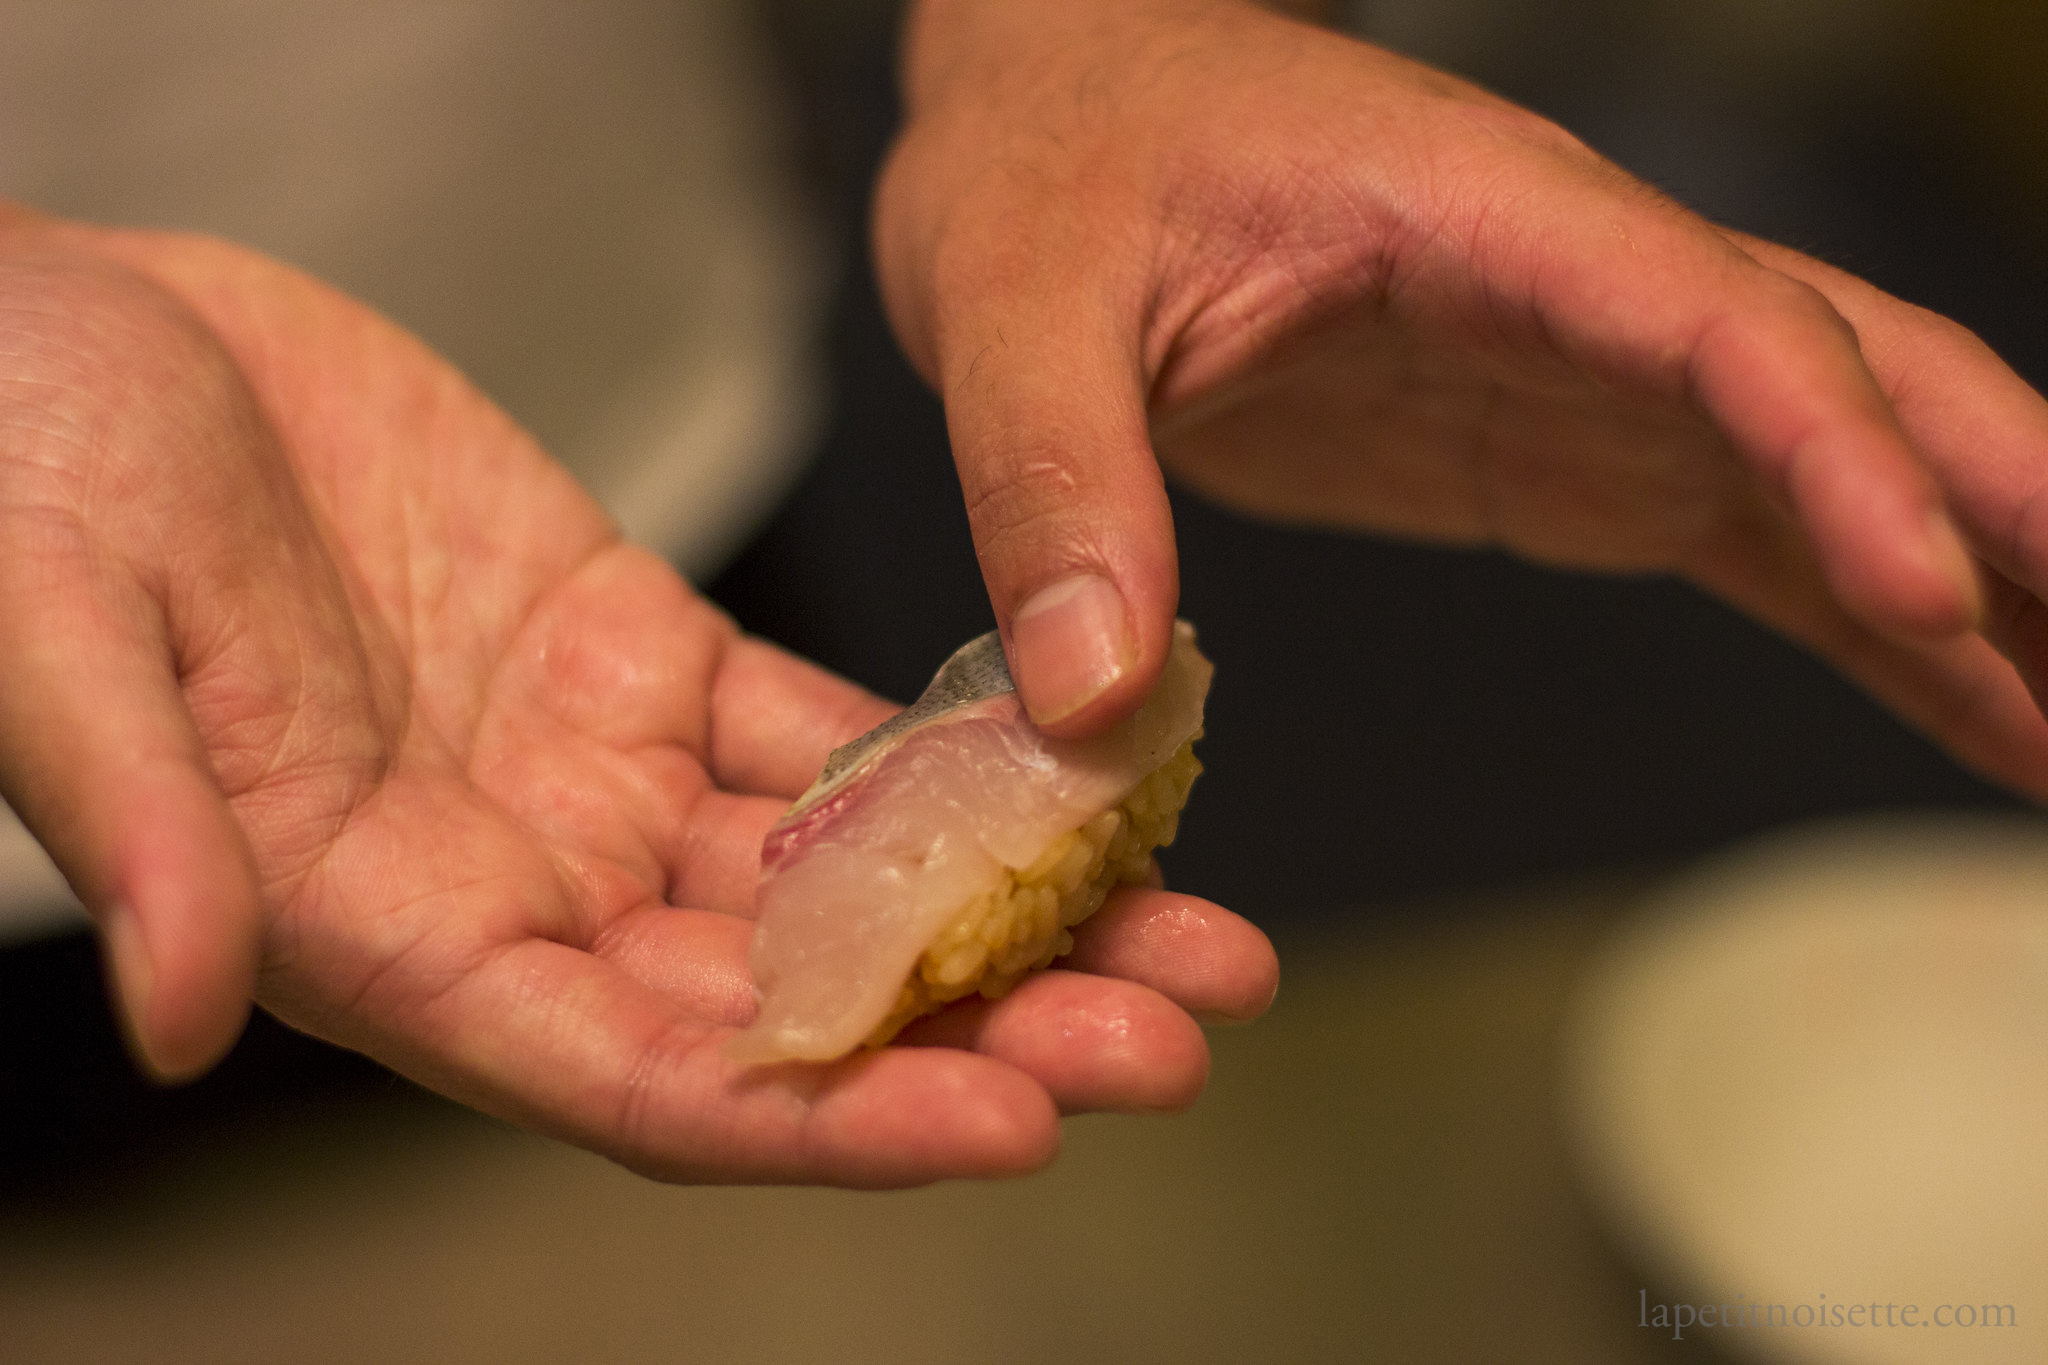
Take up some wasabi with your left index finger and place it in the middle of the tane/fish in your right hand.
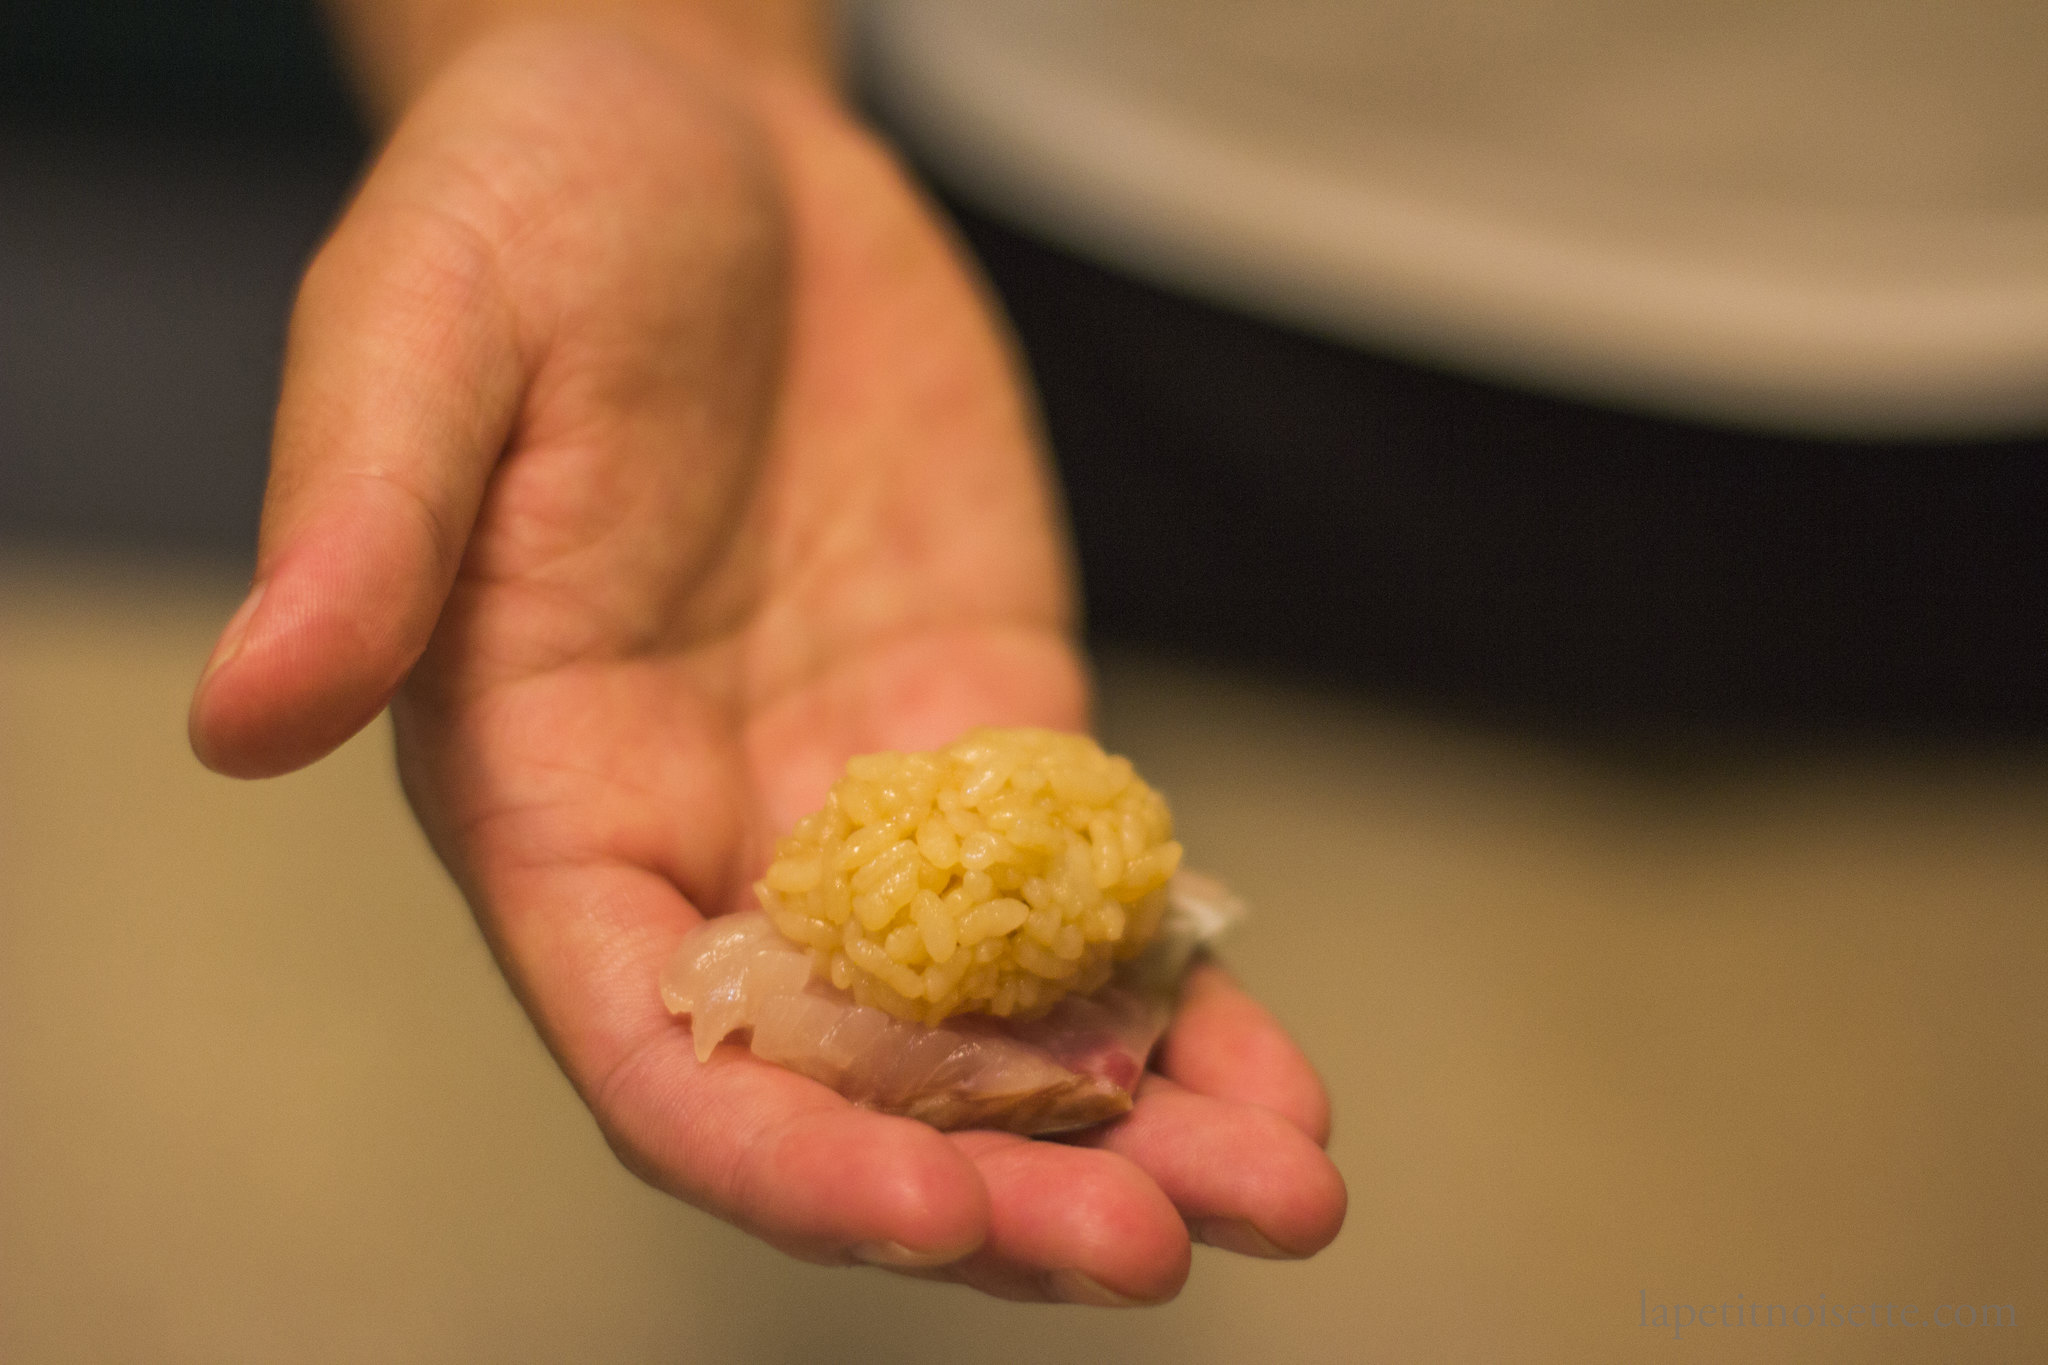
Place the sushi rice on the tane/fish.
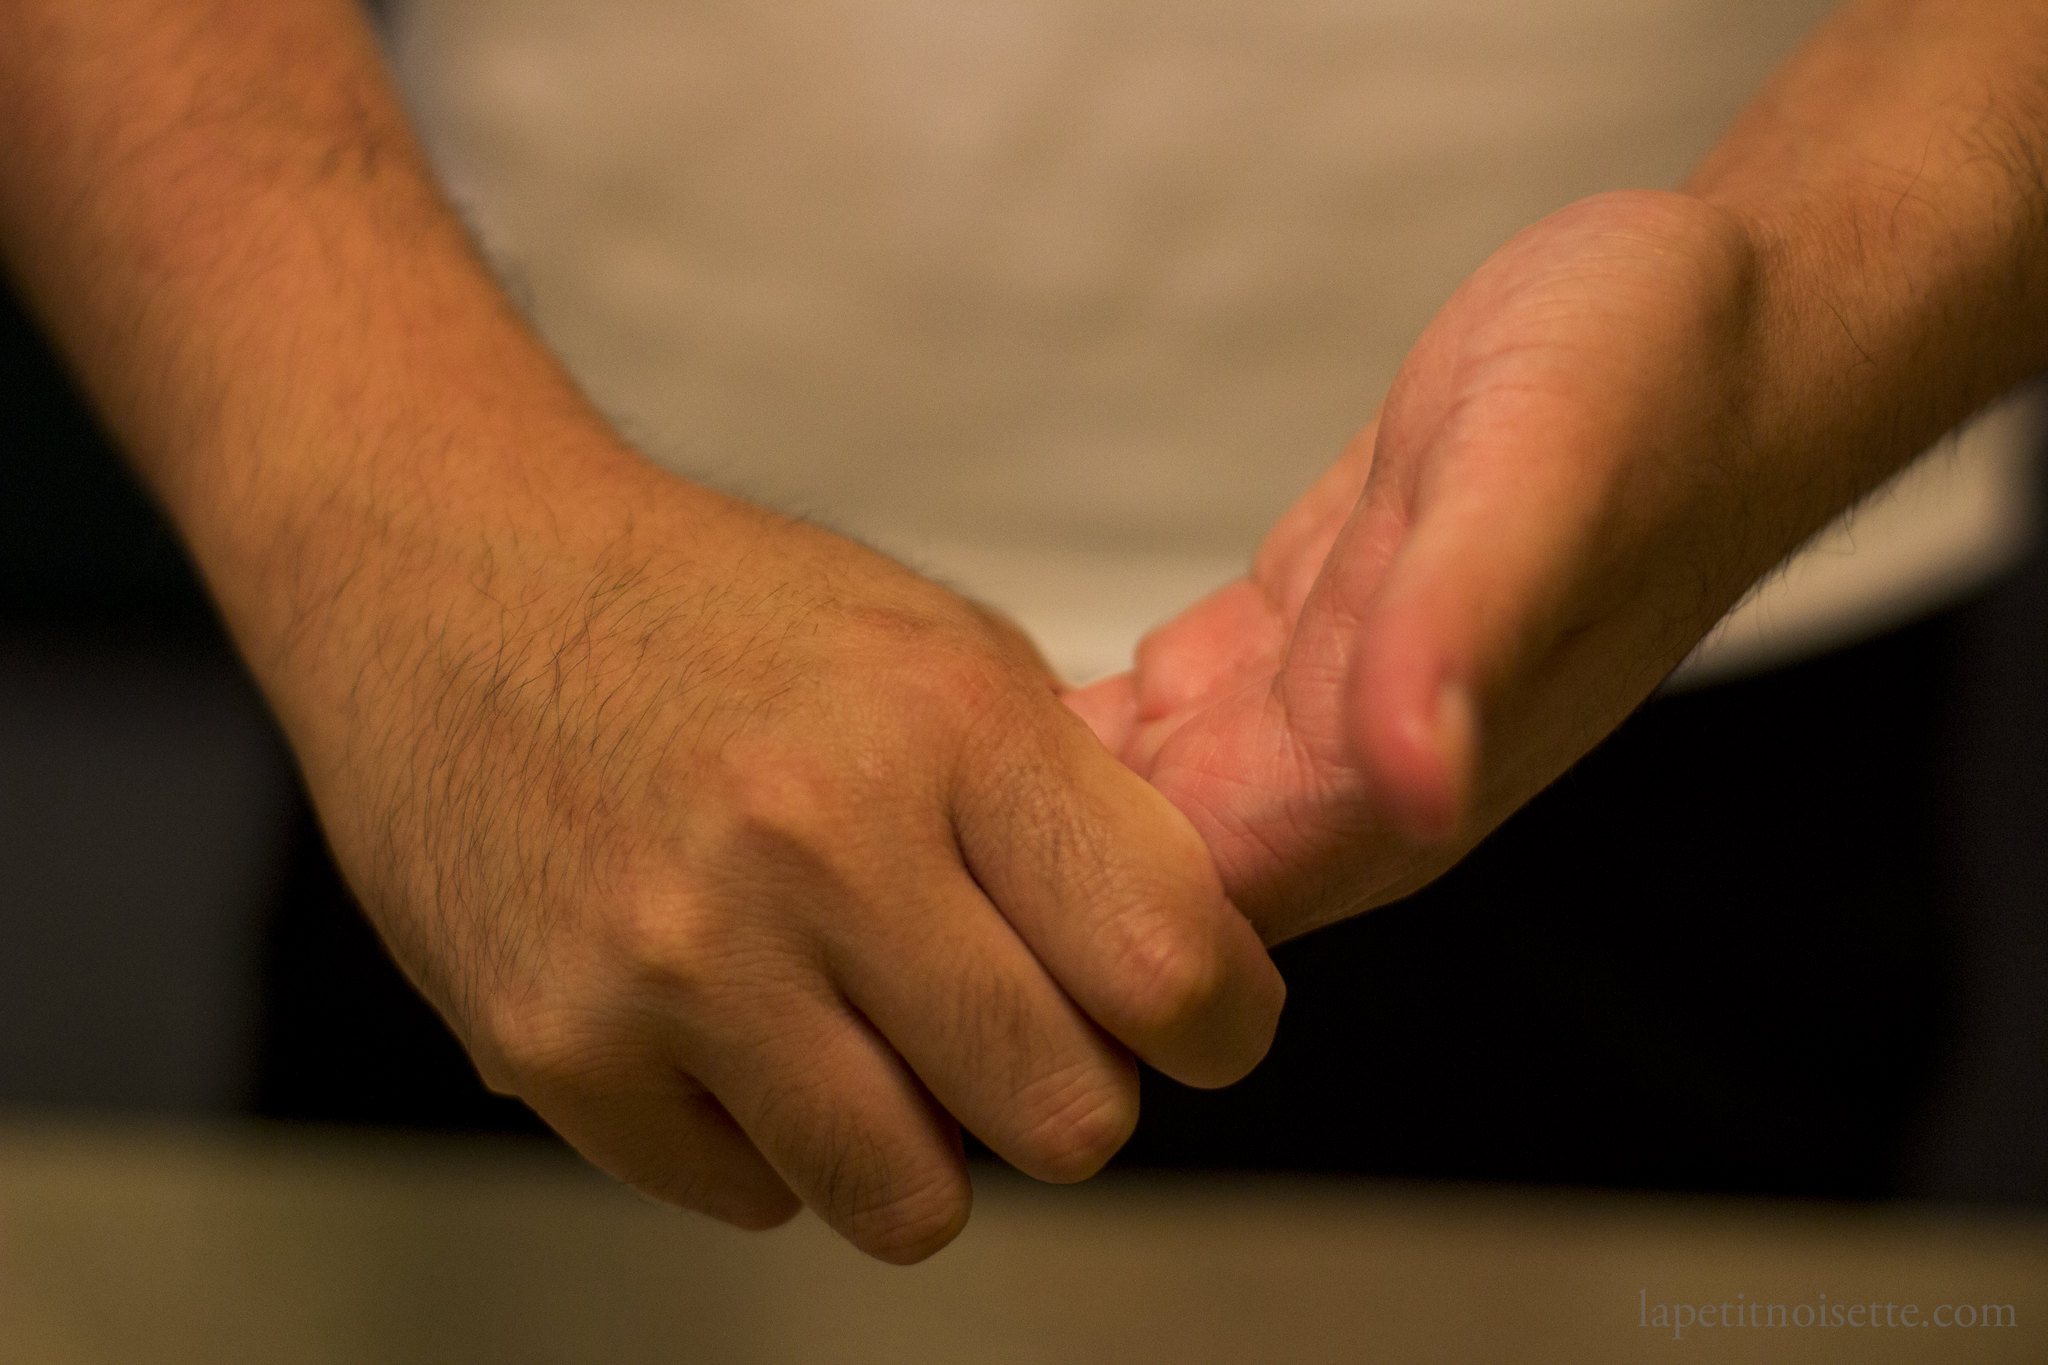
Using your right thumb, press down gently on the middle of the rice, making a slight dimple. This allows the inside the remain lightly packed even if the outside is shaped.
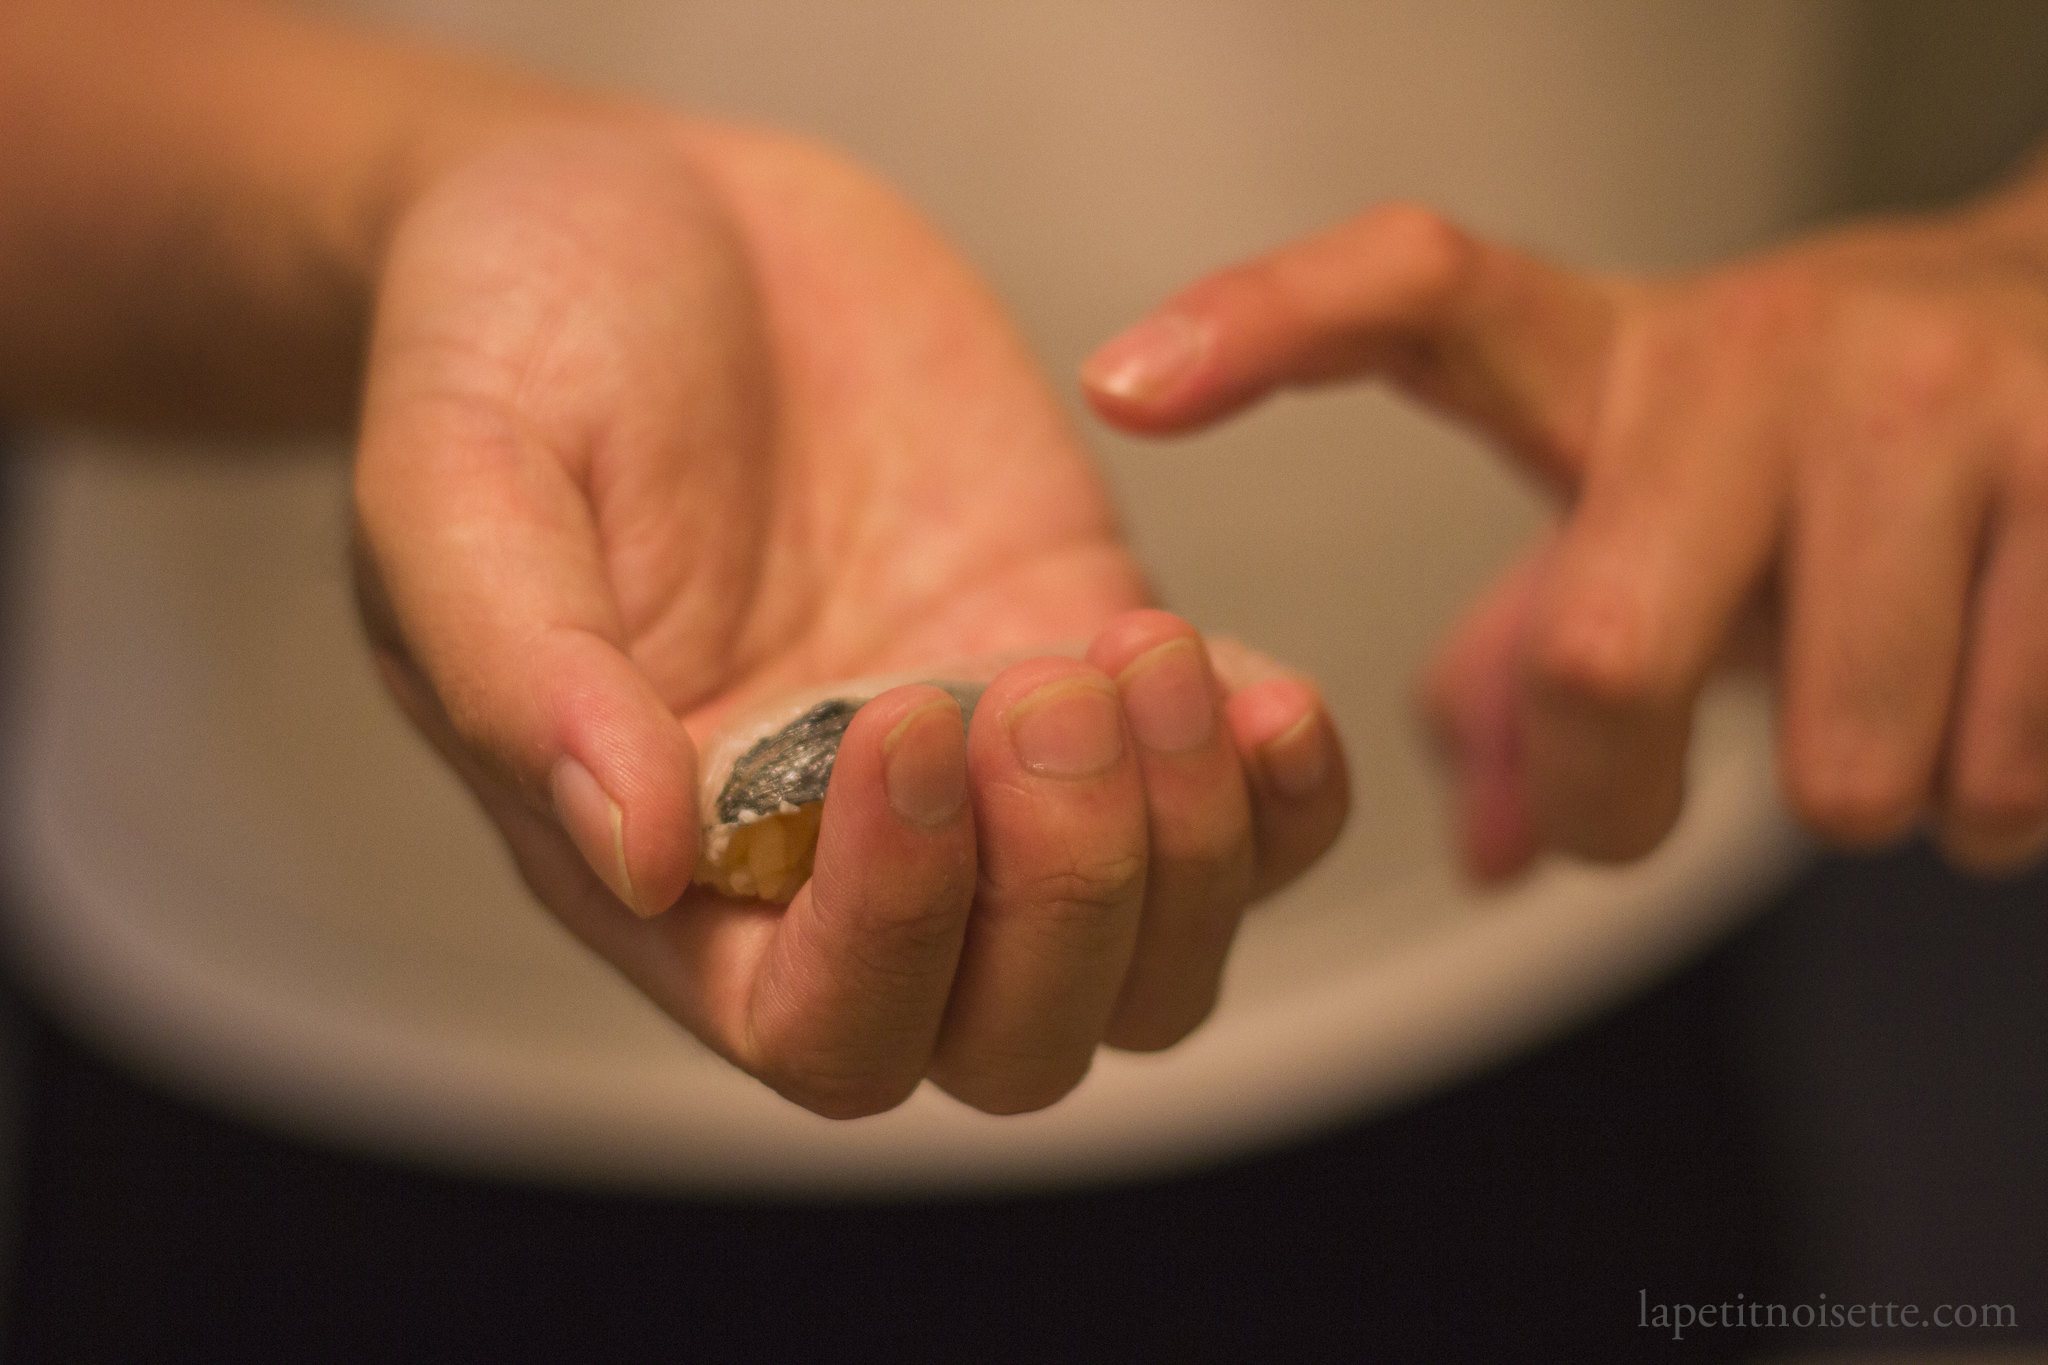
Shape the sides with your index finger and thumb.
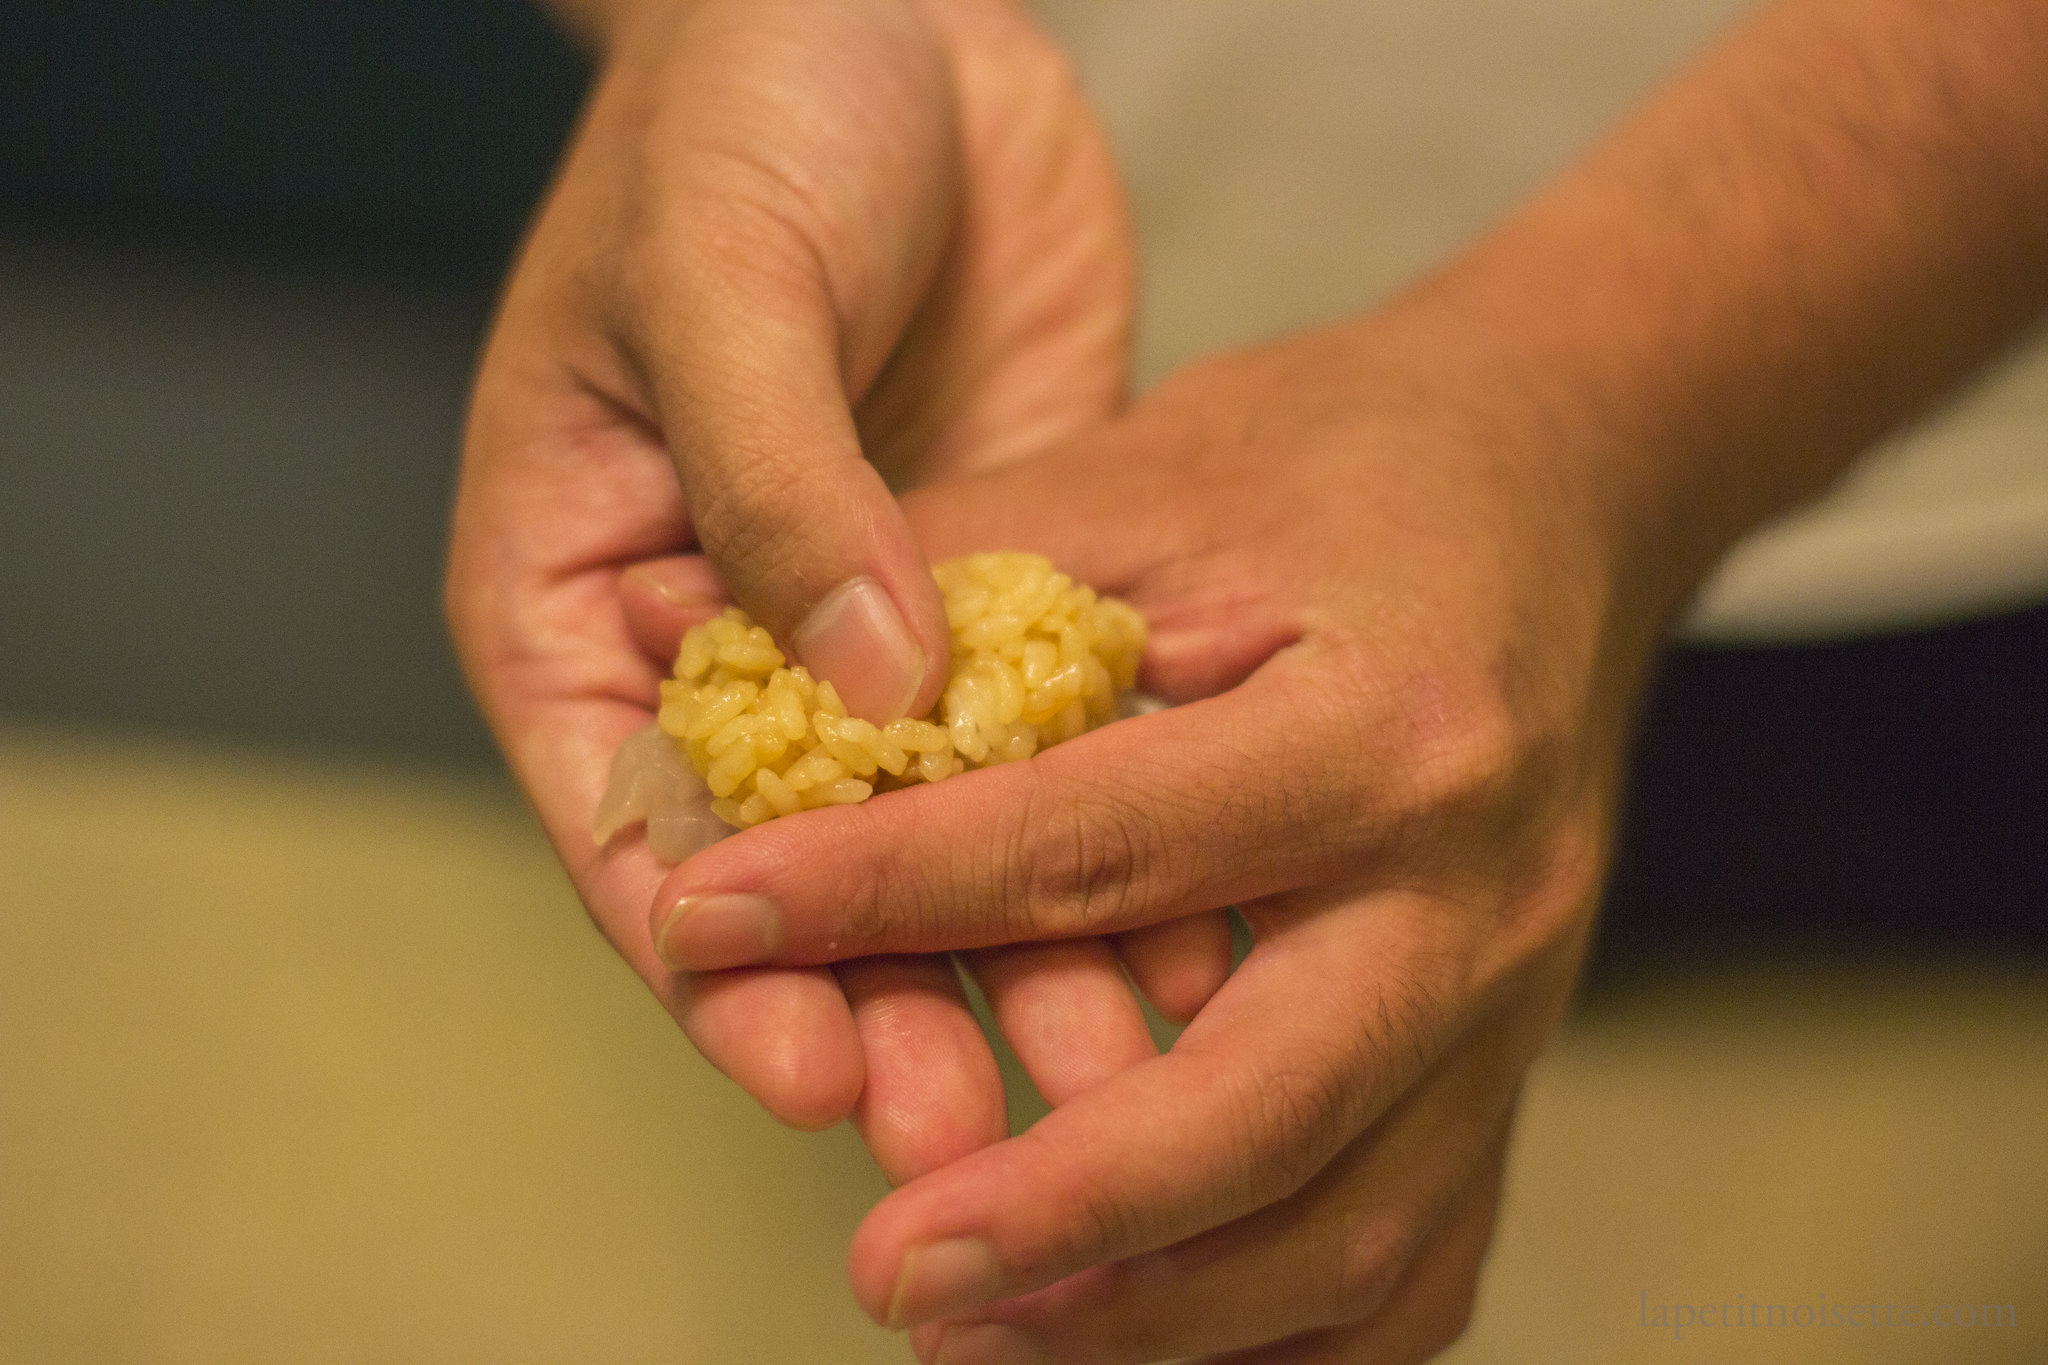
Cover the sushi rice with your left index and middle finger and gently press.
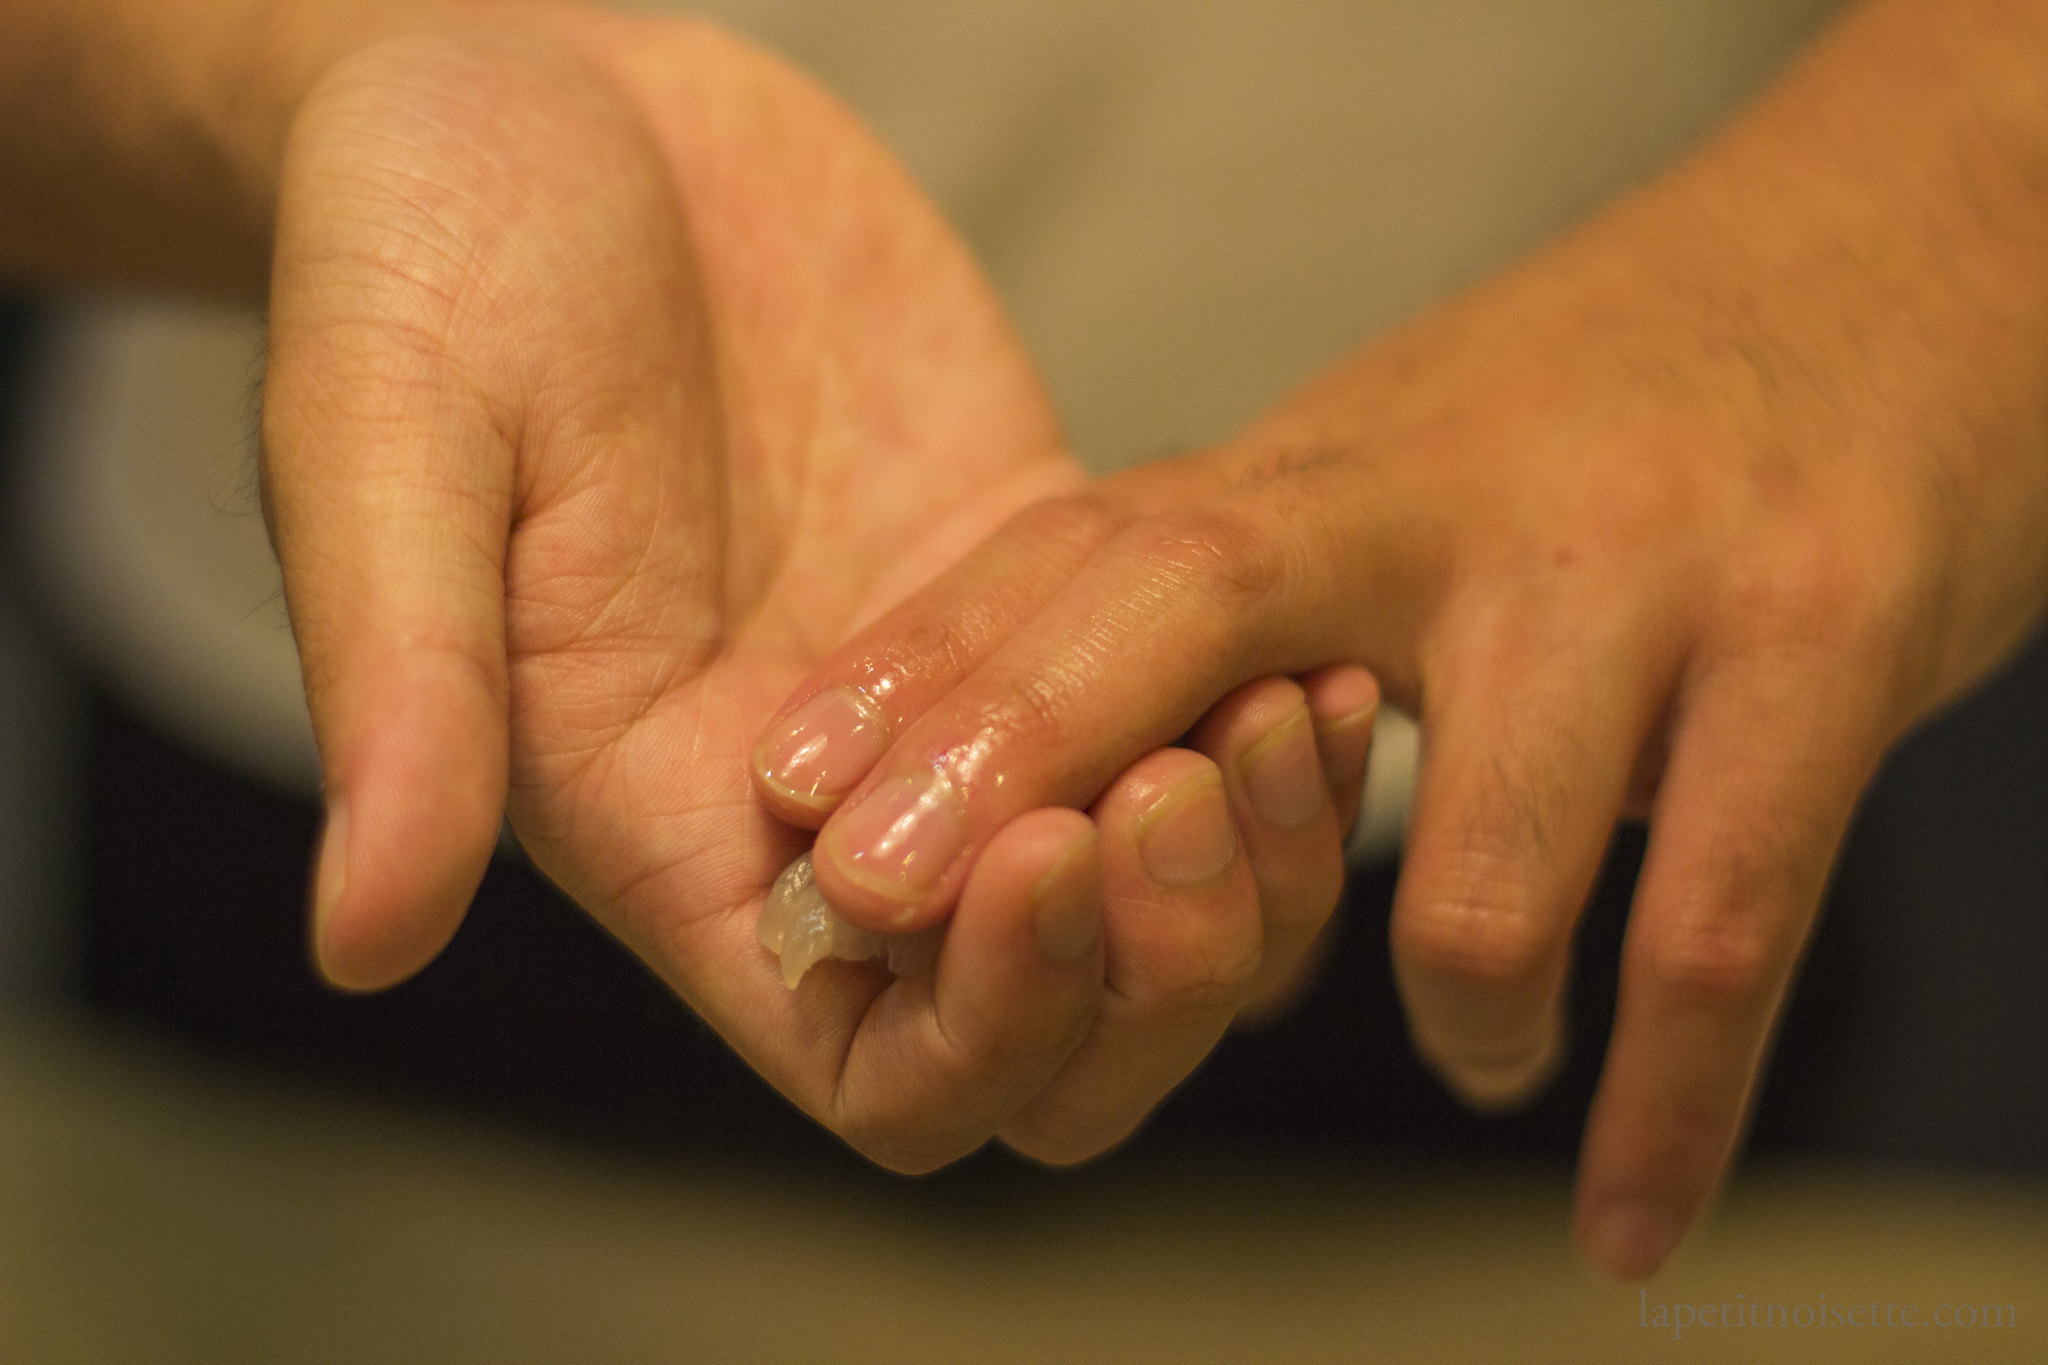
Stretch your right hand fingers and use the momentum of your fingers opening to gently roll the nigiri upside down with the fish on top.
If the momentum of opening your hand is not enough, use your left hand’s thumb to help roll the nigiri over.
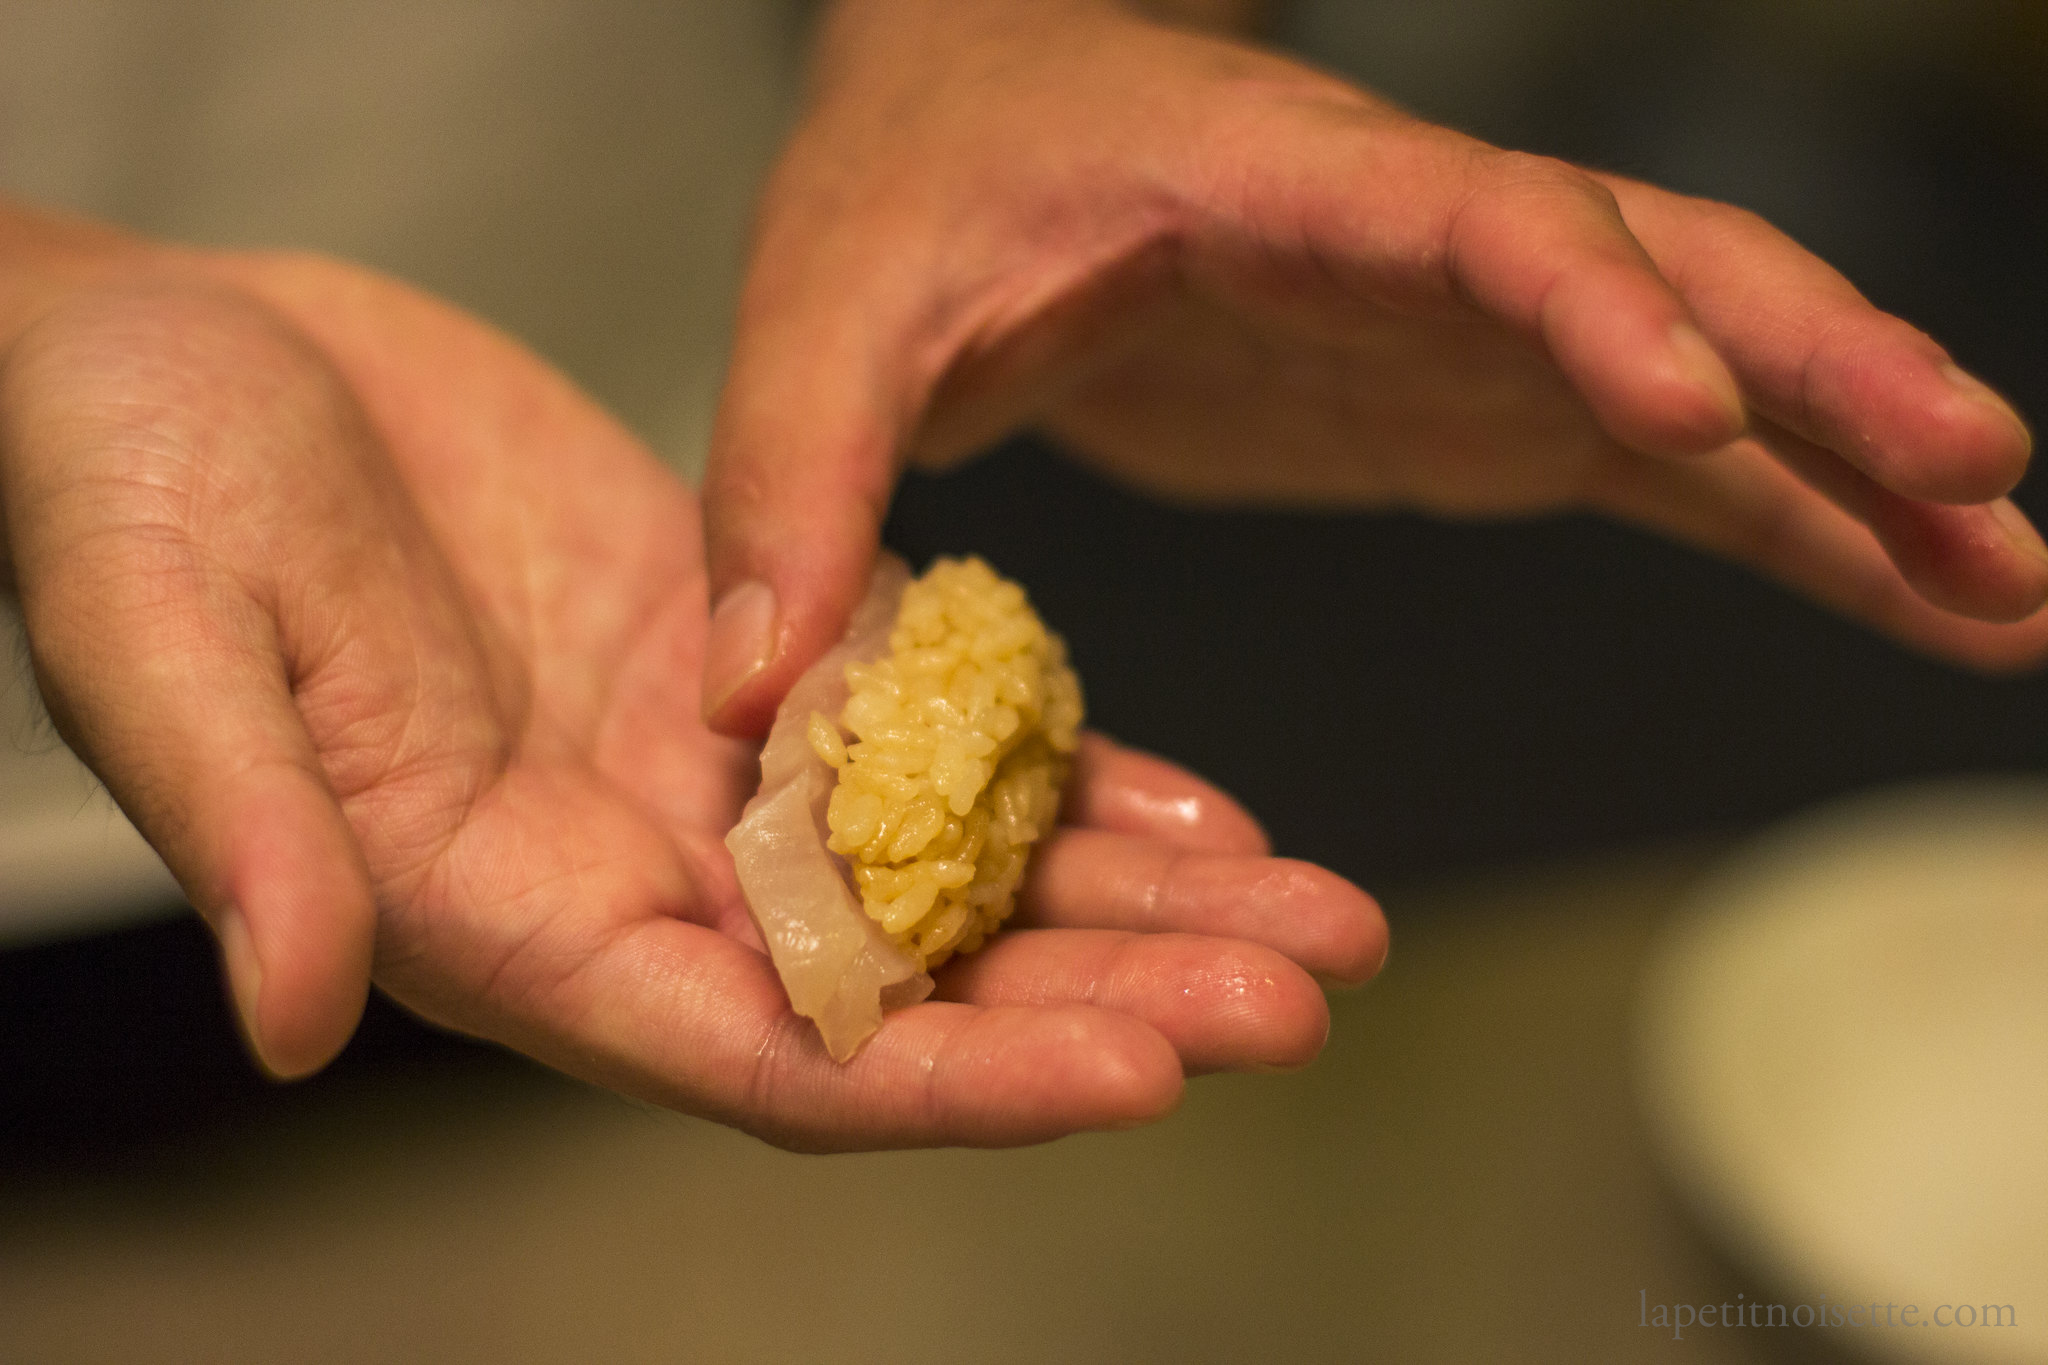
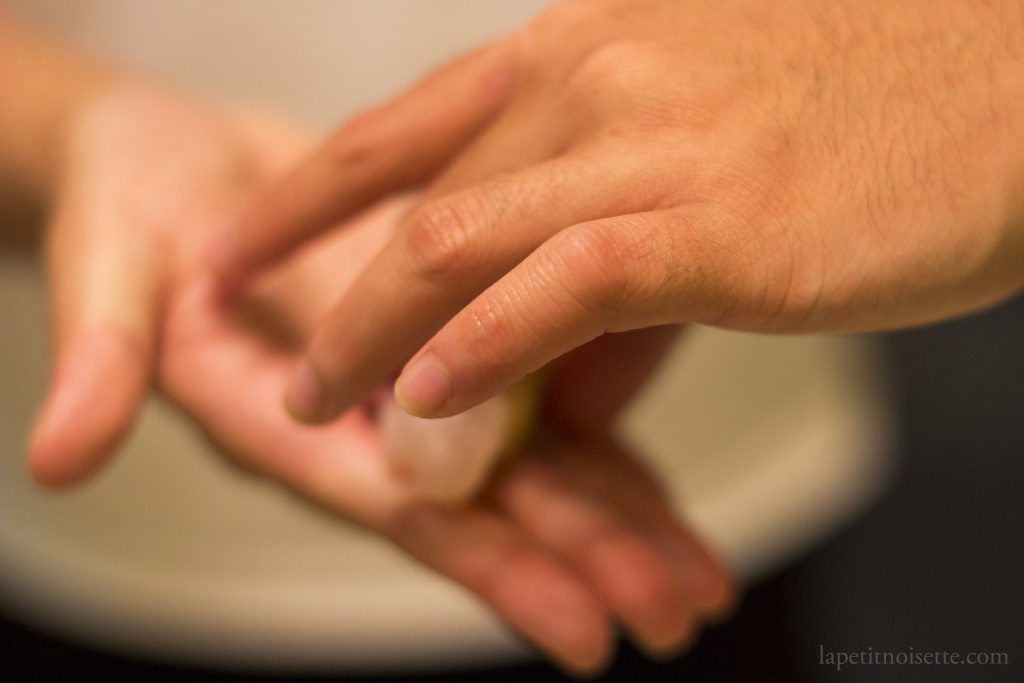
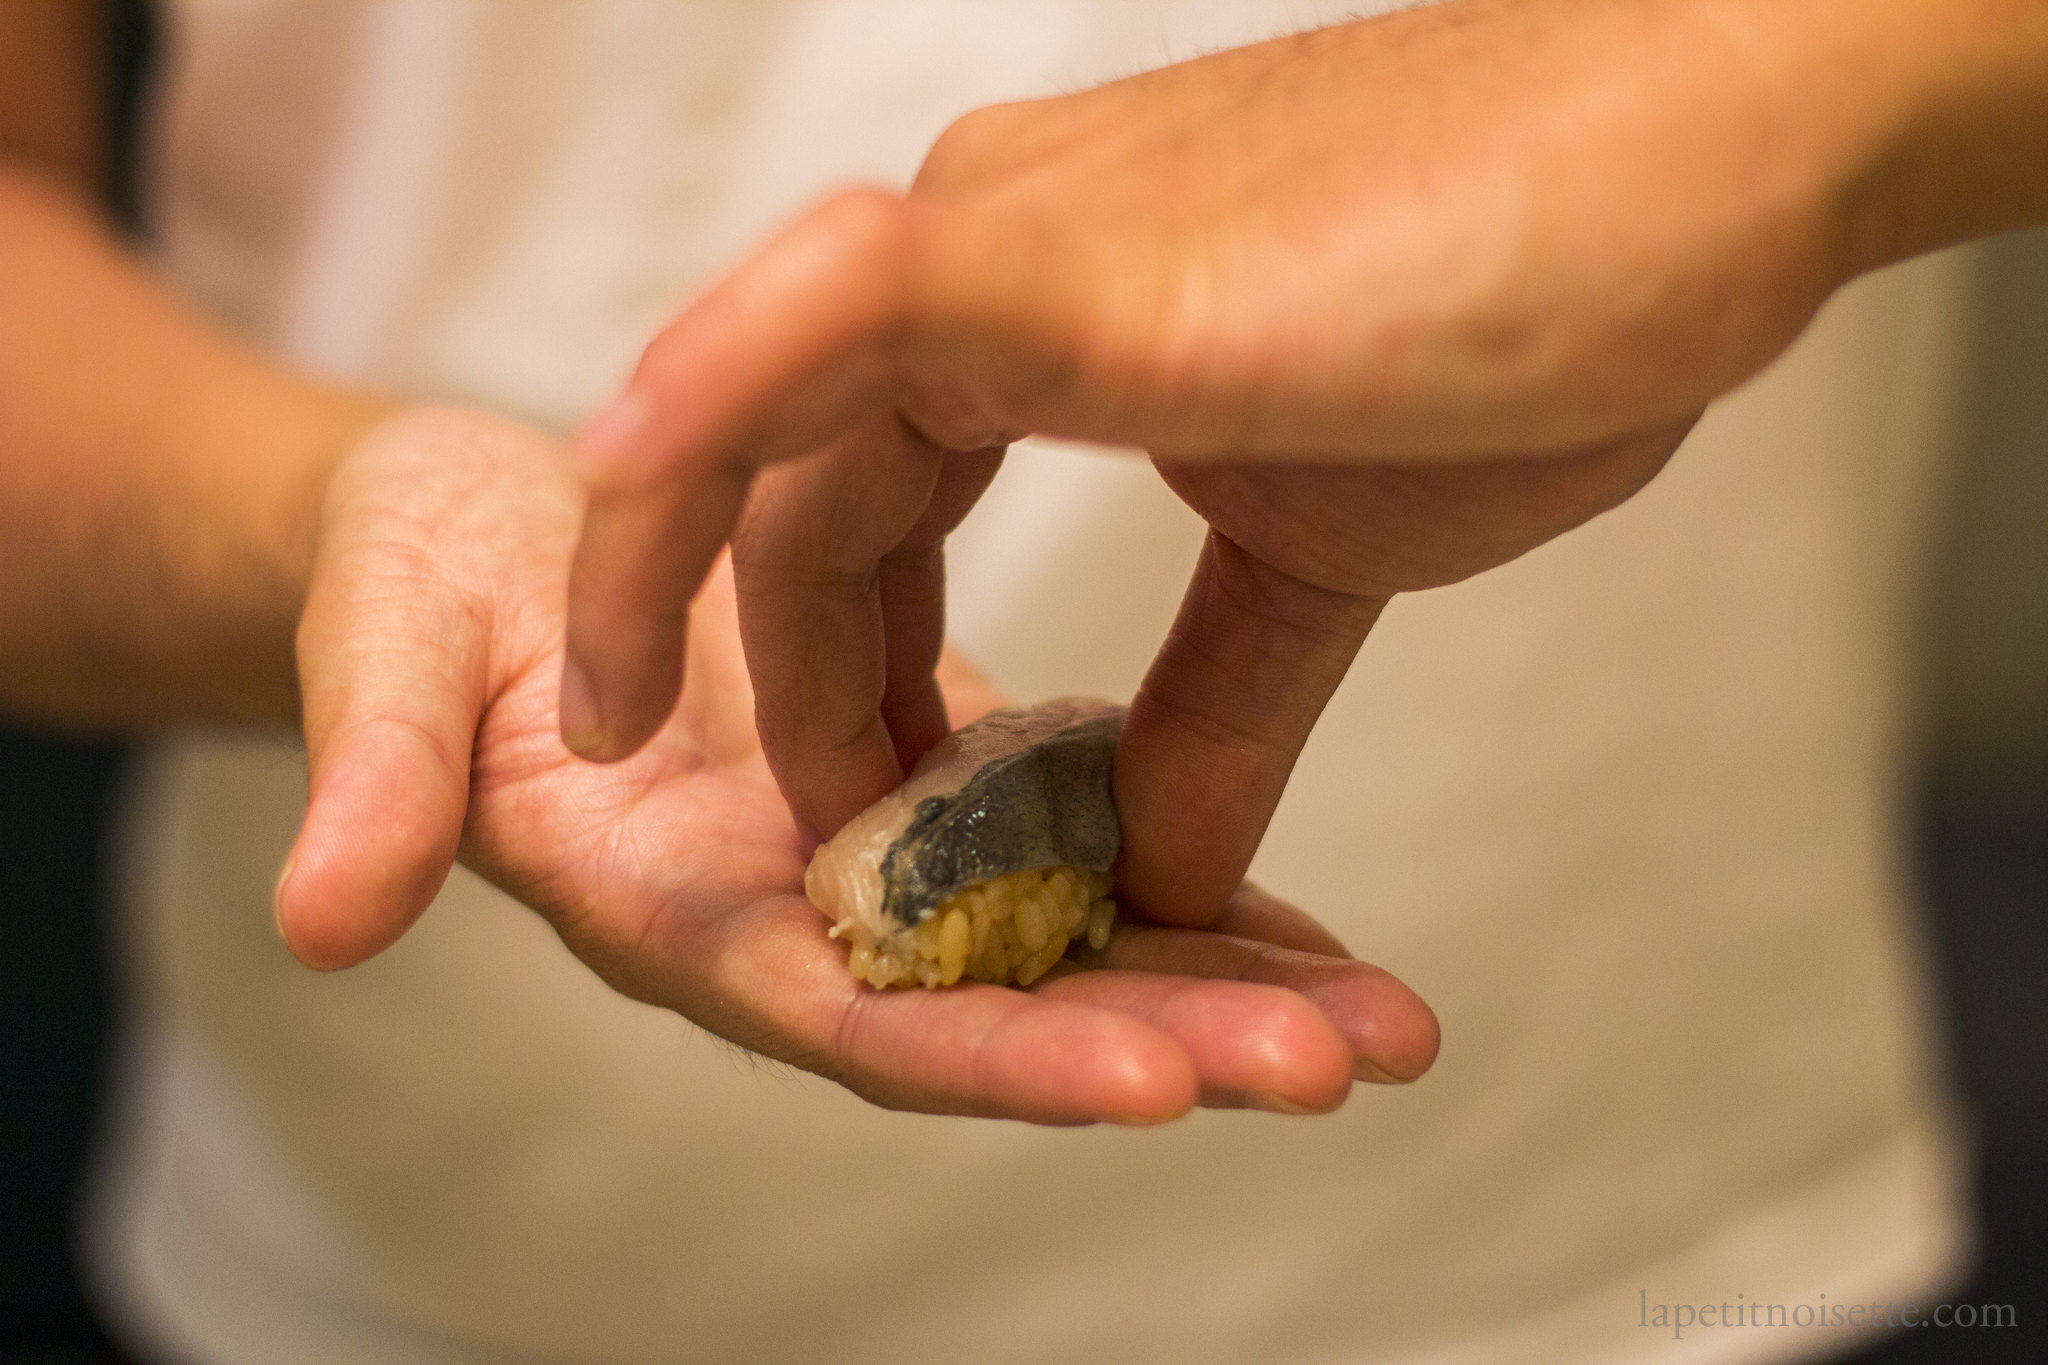
Pinch both sides of the nigiri with your left hand’s thumb and index finger to lightly tighten. Curl the palm of you right hand to gently shape both sides of nigiri.
Cover the nigiri with your left index and gently press. Some sushi instruction books ask you to use two fingers instead of just the index finger. But we always made sure our nigiri could be eaten in one bite and therefore was the width of one finger instead of two.
By curling our palm, it also made the nigiri taller and more three dimensional in shape. The thumb of the right hand would also gently press downwards to shape the top of the nigiri.

Release and rotate the nigiri 180 degrees with your left hand. Up to this point, we have performed 1 nigiri turn, or 1 takaeshi (手返し). To shape the nigiri, a total of 3 turns are done.
After rotating we start the 2nd turn. Again, pinch both sides of the nigiri with your left hand’s thumb and index finger to lightly tighten. This time using the thumb of your right hand the press down on the tane/fish. (This step is not shown).
As again, cover the nigiri with your left index and gently press. Use the thumb of the right hand to gently press downwards to shape the top of the nigiri (previously the bottom of the nigiri).
With the 2nd turn done, we rotate the nigiri 180 degrees again and start the 3rd and final turn.
After rotating, pinch both sides of the nigiri with your left hand’s thumb and index finger to lightly tighten. This time using the thumb of your right hand the press down on the tane/fish. As again, cover the nigiri with your left index and gently press. This time however, gently pull the fish/tane slightly towards you with your left index finger.
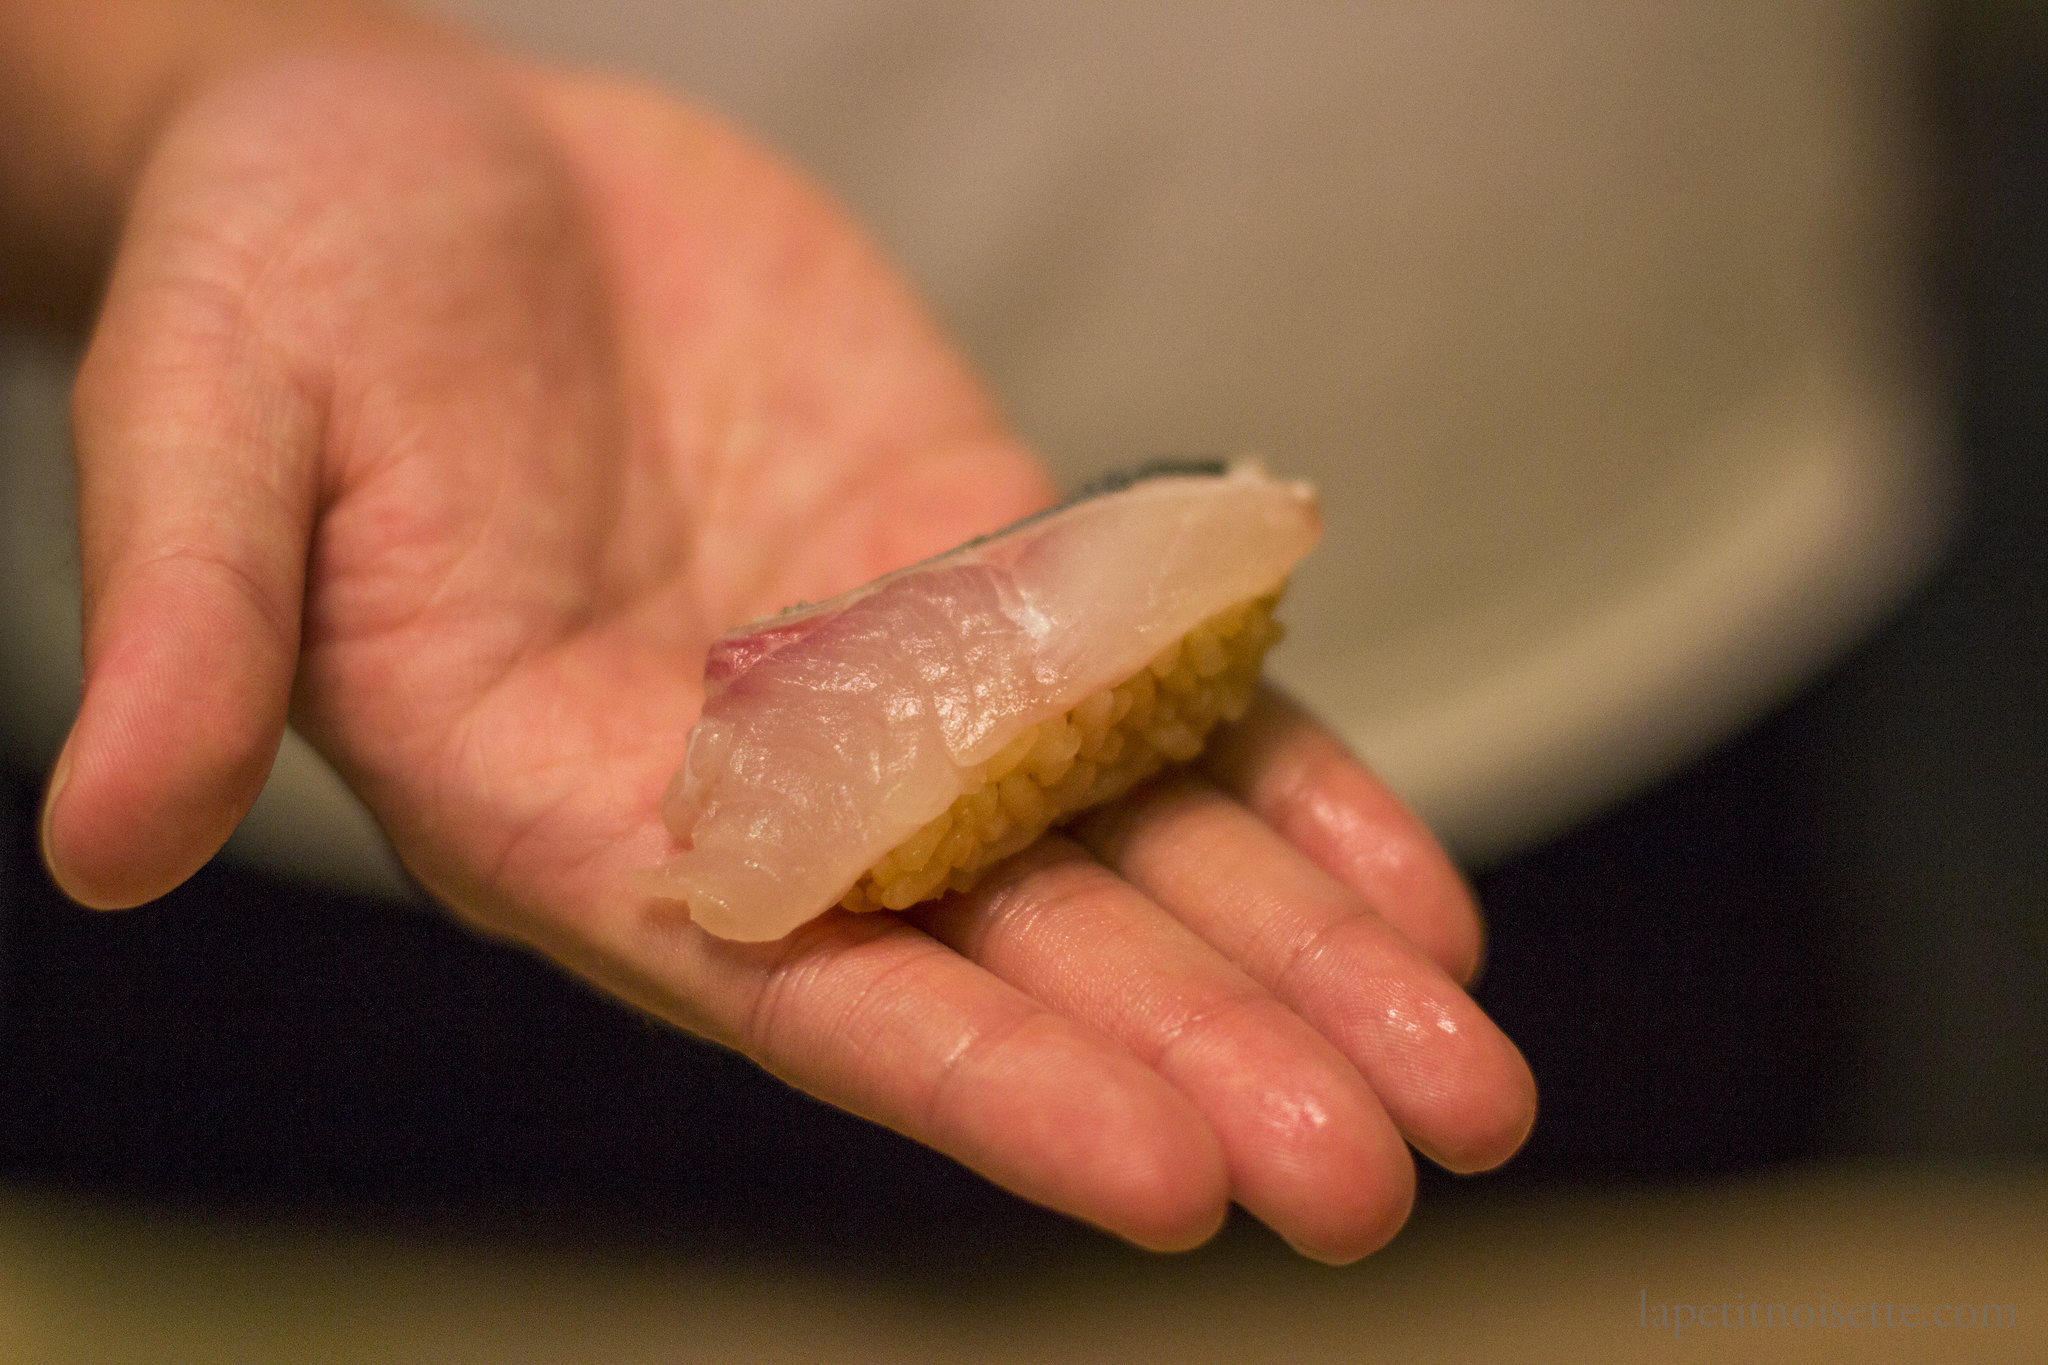
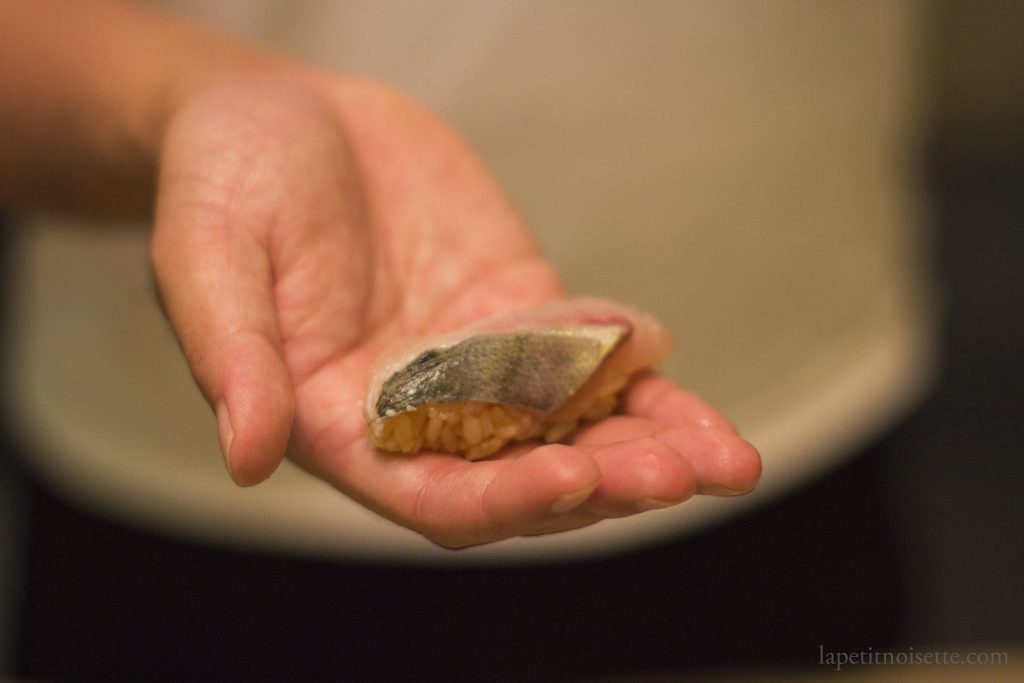
The nigiri is done.
These sequence of steps used to make nigiri is actually known as 小手返し, or small hand turns. There are two other sequences that can be used to make nigiri known as 本手返し, or true turns, and 立て返し or standing turns.

What a pleasure to read your directions and discover they are for left handed people. I am enjoying the whole series you have written. Thank you.
You’re welcome! I’m glad you enjoyed it very much.
You’re very welcome! Glad you enjoyed it 🙂
Amazing blog! Immensely informative. Will you be writing an article on soy sauce?
Phil
I am a rank amateur at making my own sushi. Your blog is most enjoyable and informative. Thank you. As a lefty this article is especially helpful. I would love to read your explanation of how to slice fish for sushi using a left handed yanagi.
Hello!
Thank you, I’ve tried my best to replicate everything I was taught whilst working at the restaurant. I’m rather busy at the moment and have many articles lined up to write, but writing on on soy sauce one day sounds like a good idea!
Phil
Thank you very much!
You’re welcome!
Amazing and. Thanks 🙏
Hey I’m a sushi chef and have always wanted to get deeper into the world of edomae, and there’s not that much in depth information out there. This blog is so valuable to me, I can’t thank you enough. I would love it if you had an article or recipe on nikiri and other edomae sauces typically used for service.
Thanks so much !
Did you brush the Nigirinwoth any Nikiri sauce? Would love your insight on that process and recipes!
Nigiri with*